
If you’ve just unboxed your Starscope monocular and are wondering how to actually use it—especially with your smartphone—you’re not alone. Marketed as a high-powered 80x or even 100x device, the reality is simpler: the Starscope monocular offers 10x to 12x true optical magnification, with higher numbers referring to digital zoom via your phone. Despite the marketing hype, this compact tool delivers surprisingly clear long-distance viewing for birdwatching, hiking, stargazing, and nature photography—if used correctly.
The key to success? Proper setup. Most users struggle not because the device is faulty, but because the included phone adapter wobbles, the mini tripod shakes, or alignment with the smartphone camera is off. This guide cuts through confusion and gives you step-by-step instructions, real-world fixes, and pro tips to get sharp images and stable viewing every time. You’ll learn how to mount it securely, focus accurately, capture moon photos, and avoid common mistakes that ruin the experience.
Let’s get your Starscope working like a pro—no telescope degree required.
Unbox and Inspect Your Kit
Before using your Starscope monocular, verify all components are present and undamaged. A quick inspection prevents frustration later.
Check Included Accessories
Open the case and confirm you have:
– Starscope monocular unit (with lens caps on both ends)
– Universal smartphone adapter
– Mini tripod with 1/4-inch screw
– Carrying case or pouch
– Microfiber lens cloth
– Wrist strap or lanyard
– Basic instruction manual
Pro Tip: Some units arrive with misaligned focus or hazy lenses. Test functionality immediately to ensure eligibility for returns if needed.
Verify Model and Specs
Identify your model by checking the label:
– Starscope 10×42: 10x optical zoom, 42mm lens
– Starscope 12×42: 12x optical zoom, 42mm lens
– Starscope 80×100: 10x optical zoom, 100mm front lens (despite “80x” label)
Remember: “80x” or “100x” is not optical magnification—it refers to digital zoom when combined with your smartphone camera.
Prepare the Monocular for First Use
Proper preparation ensures clear images and protects delicate optics.
Remove and Clean Lenses
- Take off both ocular (eye-end) and objective (front) lens caps.
- Gently breathe on each lens to add moisture.
- Wipe in a circular motion using the microfiber cloth.
- Avoid paper towels, shirts, or liquids—they can scratch coatings.
Warning: Never touch lens surfaces with fingers. Oils degrade coatings over time.
Attach the Wrist Strap
Slide the wrist strap through the monocular’s eyelet and secure it. This prevents drops during outdoor use, especially when adjusting focus or mounting.
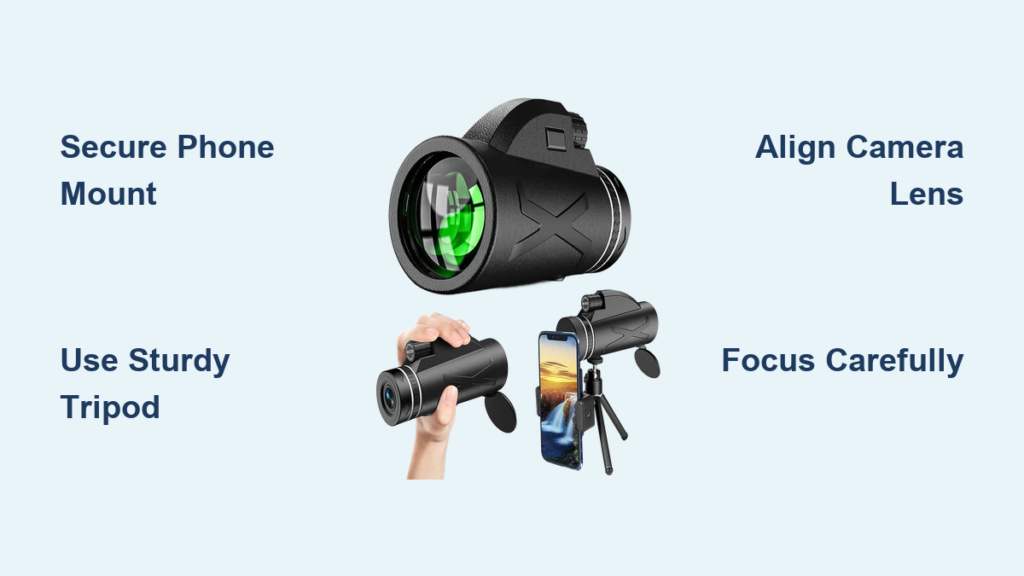
Mount to Smartphone Correctly

This is where most users fail. A shaky or misaligned phone mount ruins image quality.
Install the Universal Phone Adapter
- Extend the arms of the adapter to fit your phone size.
- Clamp it securely around your phone—centered and level.
- Ensure the main (wide-angle) camera lens is fully exposed.
Pro Tip: If your phone has multiple cameras, test each one by covering the others while viewing through the monocular.
Align Monocular with Camera Lens
- Hold the monocular up to your phone so the eyepiece lines up with the main camera.
- Look at your phone’s screen—adjust position until the circular view fills the display.
- Rotate the monocular slightly if the image is off-center.
Critical Fix: The adapter relies on friction and often slips. Wrap a rubber band around the adapter and monocular to lock it in place.
Secure for Stability
- Use non-slip tape or silicone pads between contact points.
- For permanent setups, consider gluing the adapter base or upgrading to a Yulonzi-style reinforced mount.
User Experience: Many report phone shifts during focus adjustment. A secure mount makes the difference between blurry and crisp photos.
Attach to a Stable Tripod
Handholding works for quick views, but a tripod is essential for photography and night use.
Use the 1/4-Inch Mount
- Locate the threaded hole on the monocular’s base.
- Screw in the mini tripod (or better, a full-size one) clockwise until tight.
- Extend legs and place on a flat, stable surface.
Upgrade from the Mini Tripod
The included mini tripod is flimsy and vibrates easily, even in light wind.
Recommended Fixes:
– Replace with a sturdy travel tripod
– Use a counterweighted mount (e.g., Yulonzi)
– Apply a drop of super glue to the tripod screw to prevent loosening
Field Test: At Manassas Battlefield, users captured clear images of the Stonewall Jackson statue’s sword only when using a reinforced tripod setup.
Focus for Sharp Viewing
Proper focusing separates usable images from blurry disappointment.
Adjust the Focus Wheel
- Look through the eyepiece or watch your phone screen.
- Turn the center or side-mounted focus dial slowly.
- Stop when the image is sharpest—avoid overshooting.
Pro Tip: Fine-tune while observing both the monocular view and phone display for best alignment.
Optimize for Smartphone Use
- Tap your phone screen to activate autofocus.
- Set focus on a high-contrast edge (e.g., tree line, building corner).
- Disable digital zoom initially—use only optical clarity first.
Use Minimal Digital Zoom
After optical focus is sharp:
– Increase digital zoom gradually (2x–4x max for decent quality)
– Avoid 8x–10x zoom unless lighting is excellent
Reality Check: Digital zoom reduces image quality. The clearer your optical focus, the better digital enhancement will look.
Use for Daytime Observation
The Starscope excels in daylight for nature and outdoor activities.
Spot Birds and Wildlife
- Scan treetops or fields at 10x–12x magnification
- Identify plumage, beak shape, or animal behavior from hundreds of meters
- Use tripod for steady viewing during long observation
Best Time: Early morning or late afternoon when animals are active
Scout Hiking Trails and Landmarks
- Identify trail markers, distant paths, or potential hazards
- View mountain ridges, river crossings, or campsite locations
- Capture photos of scenic views using phone integration
Support Hunting and Surveillance
- Use for scouting game in forests or open fields
- Observe movement patterns without getting close
- Keep device in carry case for quick access
Capture Night and Low-Light Views
With the right setup, the Starscope reveals stunning night scenes.
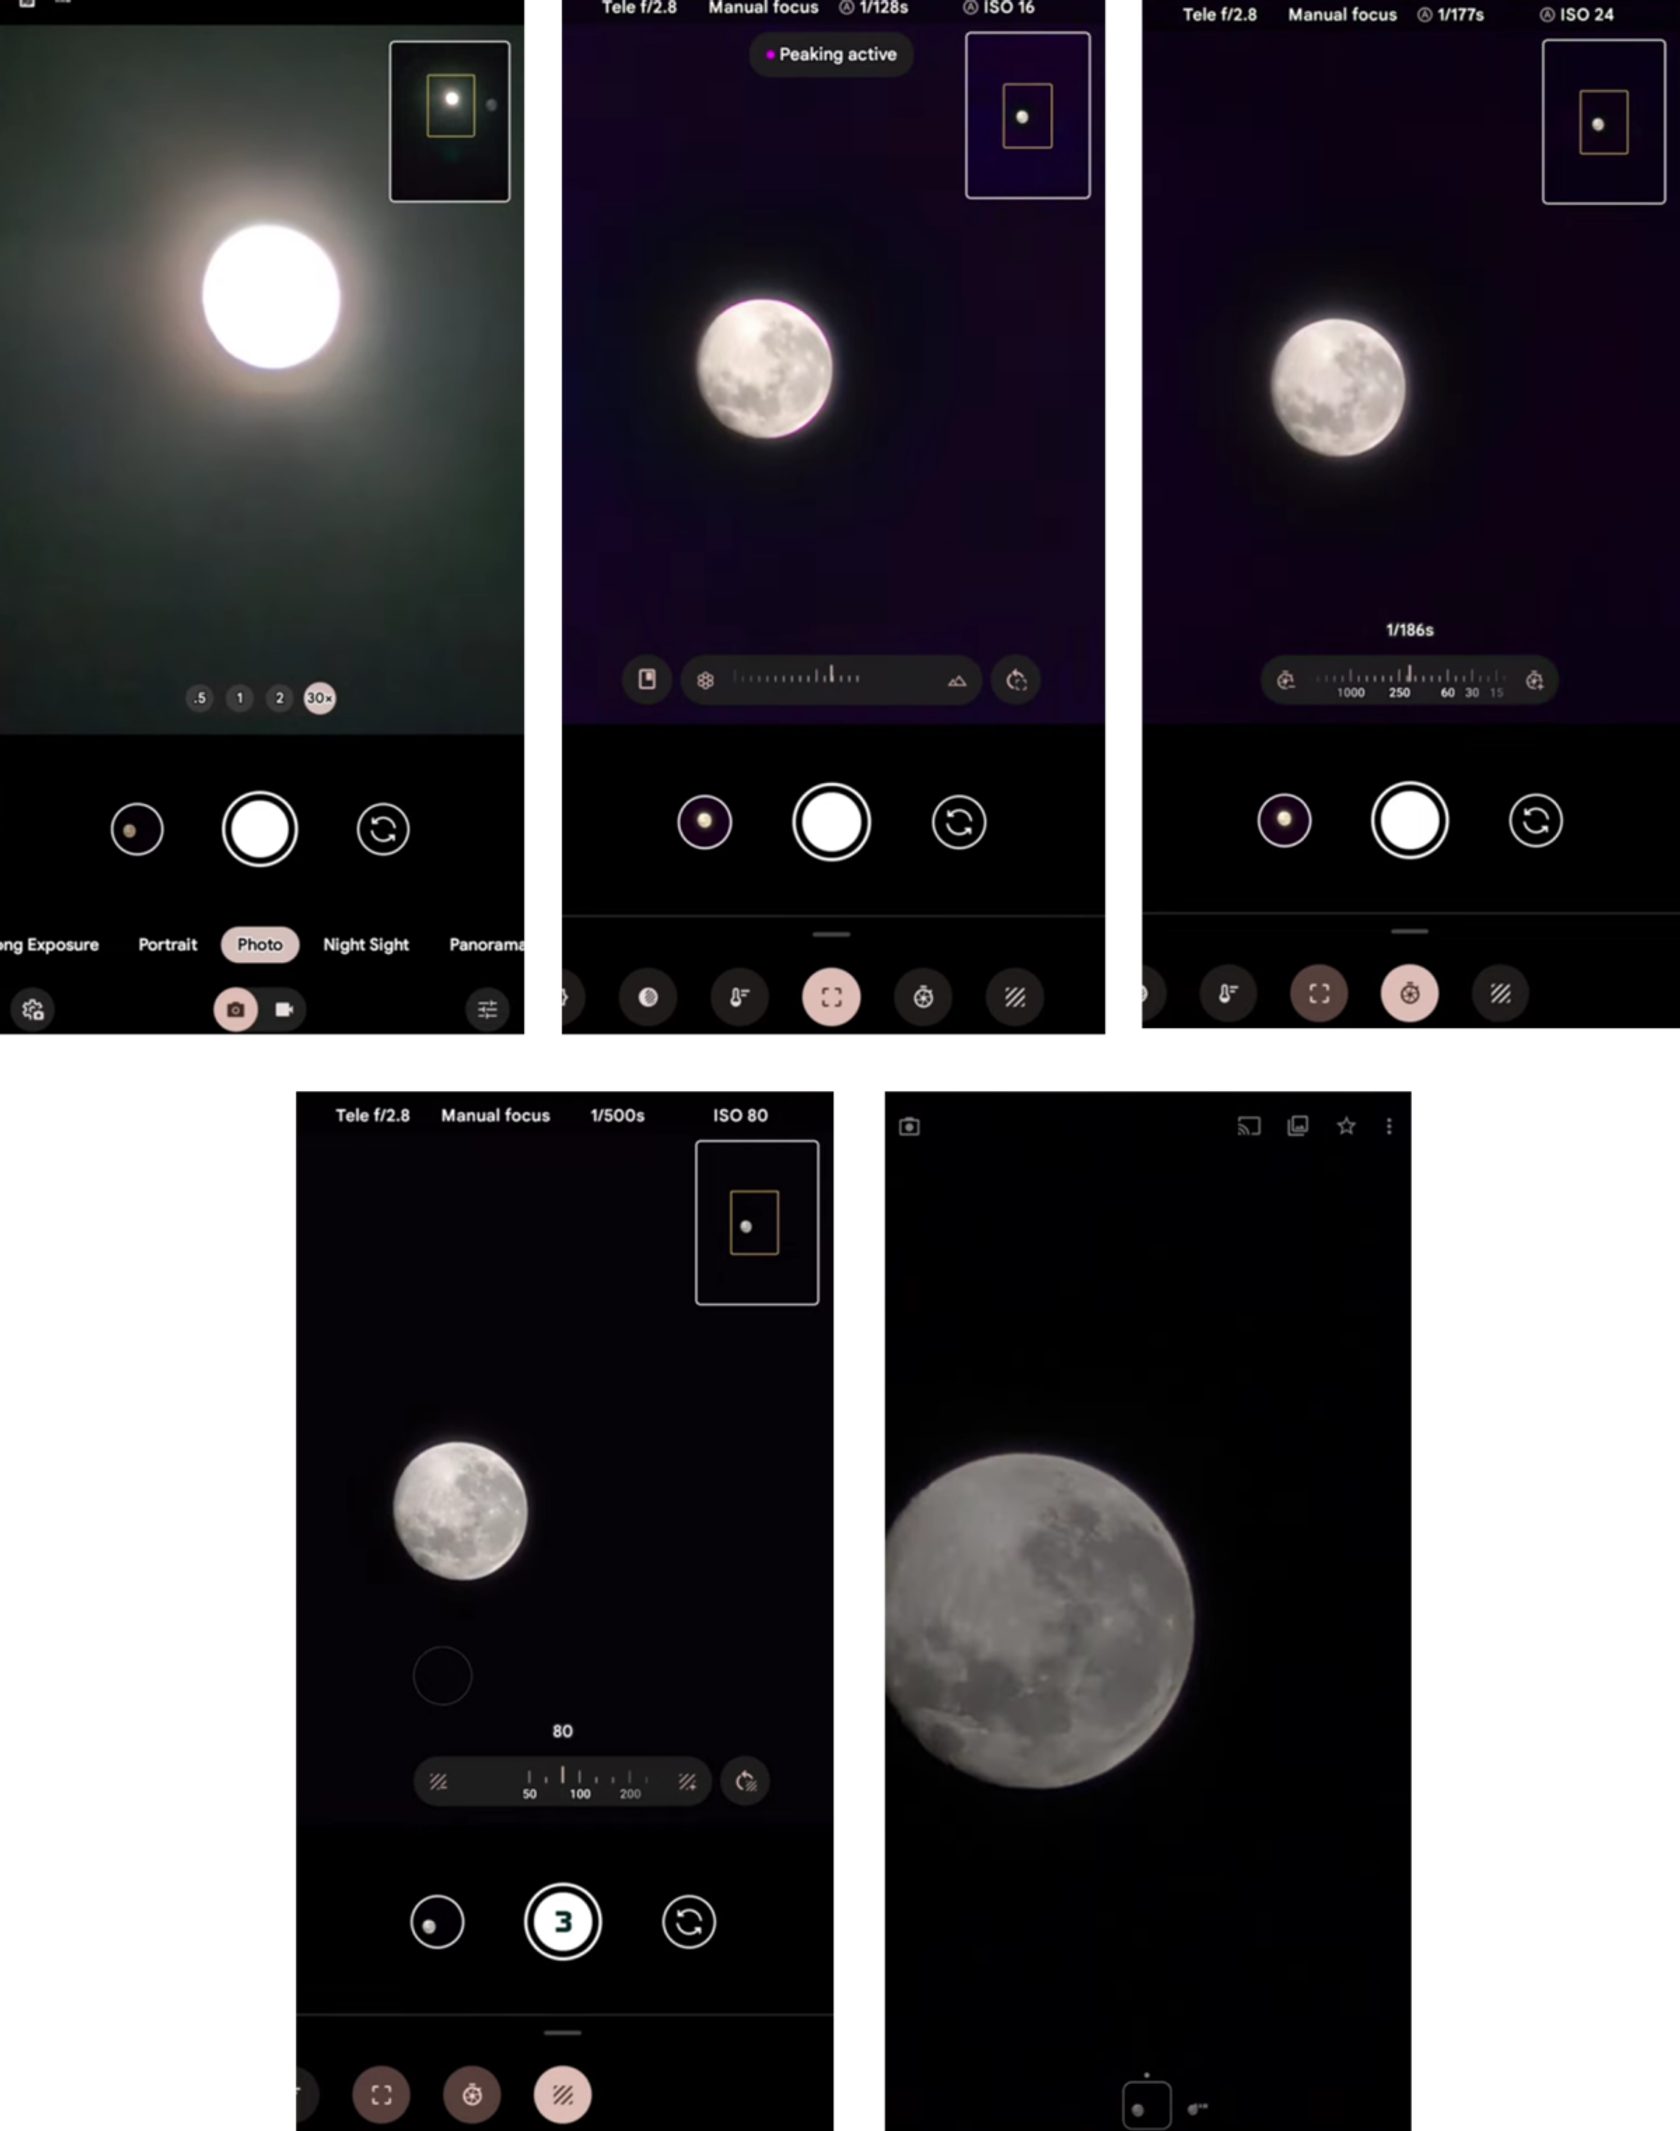
View the Moon Clearly
- Wait for a clear, dark sky (rural areas best)
- Point monocular at the moon using tripod
- Focus slowly—surface details like craters and maria will emerge
Note: A circular “iris” effect may appear—this is normal lens behavior, not a defect.
Photograph the Moon with Your Phone
- Use ProCamera (iOS) or Open Camera (Android) for manual control
- Set focus to infinity and disable autofocus
- Use 2x–3x digital zoom after optical focus is locked
- Hold perfectly still or use remote shutter
Pro Tip: Take multiple shots—some will be sharper due to atmospheric distortion
See Planets and Bright Stars
Visible objects include:
– Moon – Highly detailed
– Jupiter – Visible as a disc with up to four moons
– Venus – Bright, star-like point
– Sirius, Betelgeuse, Polaris – Clear and sharp
Limitation: Not suitable for deep-sky objects (e.g., Orion Nebula, galaxies) due to lack of tracking and small aperture
Avoid Common Mistakes
Even small errors can ruin your experience.
Don’t Trust the “80x” Label
- 80x is digital, not optical
- True magnification is 10x–12x
- Expect realistic performance, not telescope-level detail
Don’t Use the Mini Tripod Outdoors
- It shakes in wind and on uneven ground
- Always upgrade to a solid tripod for night or zoomed viewing
Don’t Skip Phone Alignment
- Misalignment causes vignetting (dark edges) or no image
- Test each camera lens if your phone has multiple
Don’t Touch the Lenses
- Fingerprints reduce clarity and damage coatings
- Use only microfiber cloth or lens pen
Upgrade for Better Performance
Maximize your Starscope’s potential with simple upgrades.
Essential Accessories
| Upgrade | Benefit |
|---|---|
| Sturdy Tripod | Eliminates shake, enables long viewing |
| Reinforced Phone Mount | Prevents slippage and misalignment |
| Lens Pen | Cleans oil and stubborn debris better than cloth |
| External Camera App | Enables manual focus, exposure, and shutter control |
DIY Stability Hacks
- Rubber bands – Secure phone adapter and monocular
- Non-slip pads – Add grip between mount and phone
- Super glue – Fix loose tripod screw (apply sparingly)
Maintain and Store Properly
Good care extends your monocular’s life.
Clean Lenses Safely
- Blow off loose dust with air (not breath)
- Wipe gently with microfiber cloth
- For smudges, use lens cleaning solution on cloth—not directly on lens
Store in Protective Case
- Always use lens caps when not in use
- Keep in dry, cool place
- Avoid car glove boxes or direct sunlight
Handle Weather Wisely
- Water-resistant to light rain
- Not waterproof—do not submerge or use in heavy rain
- Wipe down after damp use to prevent internal moisture
User Warning: Some report fogging inside lenses—this indicates seal failure and may require warranty replacement.
Know the Warranty and Limits
Set realistic expectations for longevity and support.
Warranty Coverage
- Typically 1-year limited warranty
- Covers defects in materials and workmanship
- Requires proof of purchase (keep receipt)
Long-Term Durability
- Durable build for price (metal or high-grade plastic)
- Common issues: loose screws, degrading adapter, fogging
- With care, lasts 3–5 years
Who Should Use It?
✅ Casual users – Birdwatchers, hikers, travelers
✅ Students and educators – Science and outdoor learning
✅ Budget explorers – Under $20 entry into optics
Who Should Avoid It?
❌ Serious astronomers – Not a telescope replacement
❌ Users wanting 80x optical zoom – Misunderstands product
❌ Those in extreme conditions – Not rugged or waterproof
Final Note: The Starscope monocular isn’t magic—but for under $20, it’s a surprisingly capable tool. Success comes from proper setup: a stable tripod, secure phone mount, and realistic expectations. Use it right, and you’ll see distant wildlife, lunar craters, and starry skies like never before. Use it wrong, and you’ll see blurry disappointment. Choose wisely.


