
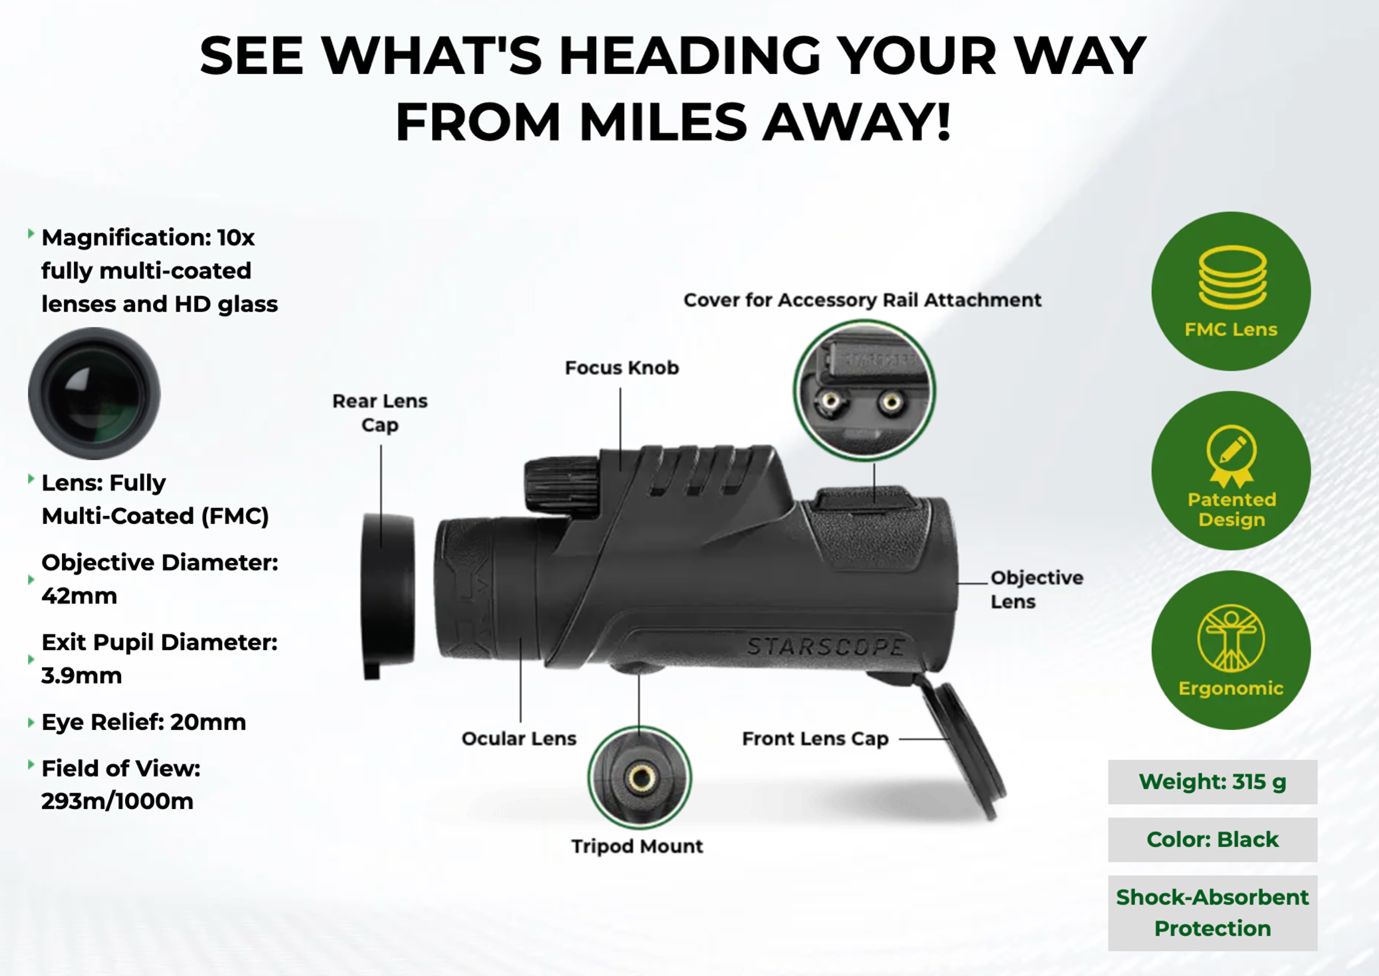
Have you ever tried photographing a distant hawk in flight, a historic monument across a battlefield, or the craters on the moon using just your smartphone—only to end up with a blurry, pixelated mess? You’re not alone. The truth is, no matter how advanced your phone’s camera is, digital zoom alone can’t deliver true long-range clarity. That’s where the StarScope monocular comes in. When properly paired with your smartphone, this compact 12x magnification tool transforms your phone into a powerful telephoto imaging system—capable of capturing stunningly detailed long-distance photos and videos.
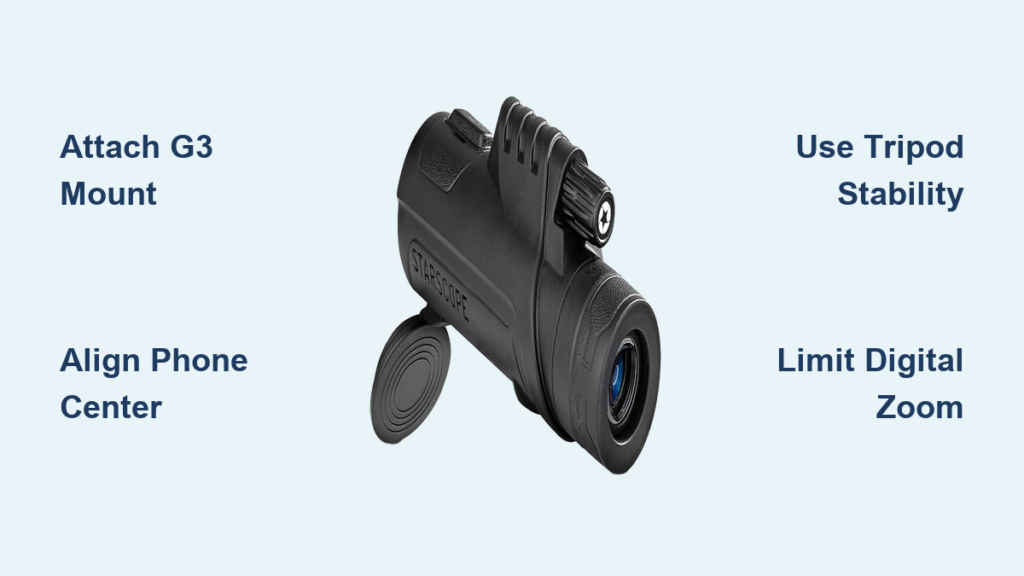
But simply holding your phone up to the eyepiece won’t cut it. Without the right setup, you’ll face misalignment, shaky footage, and vignetting that ruins your shot. The secret to success lies in three things: using the StarScope G3 phone mount, achieving perfect optical alignment, and ensuring absolute stability. This guide walks you through every step—from attaching the mount to capturing crisp, pro-level shots—so you can unlock your phone’s full long-range potential.
Attach the G3 Phone Mount to the Monocular
Slide the Mount Onto the Eyepiece
Start by securing the StarScope G3 phone mount onto the monocular’s eyepiece. The mount is designed to fit snugly over the 44 mm diameter eye cup. Align it carefully and slide it on until it clicks into place. You should feel a firm, secure fit without any wobbling. Once attached, the mount should rotate smoothly, allowing you to switch between vertical and horizontal orientations later.
Pro Tip: Never force the mount. If it doesn’t slide on easily, check for lens caps, dirt, or a misaligned rubber eye cup. A clean, unobstructed surface ensures a proper seal.
Verify the Mount Is Secure
After installation, gently twist the mount to test its stability. There should be no play or looseness. A wobbly connection introduces vibration and misalignment—both of which degrade image quality. If the mount feels loose, inspect the eye cup for damage or debris. For best results, the G3 adapter must sit flush and fixed, creating a rigid platform for your phone.
Mount Your Smartphone with Precision

Open the Phone Clip and Position Your Device
Press the side release levers to open the dual spring-loaded clamp of the G3 mount. This universal design fits phones from 2.2 to 4.3 inches wide—covering everything from the iPhone 15 mini to the Pro Max and large Android devices like the Galaxy S24 Ultra.
Now, position your phone so the rear camera lens aligns perfectly with the center of the monocular’s eyepiece. Even a millimeter of offset can cause vignetting or blurry edges. To check alignment:
- Open your phone’s camera app.
- Look at the live preview.
- Adjust the phone up/down or left/right until the image appears as a full, centered circle with no dark corners.
Critical Tip: A gap thinner than a sheet of paper can cause focus drift during zooming. Press the phone firmly against the eyepiece to eliminate any air space.
Close the Clamp with Even Pressure
Gently close the clamp, ensuring both sides apply even pressure. Don’t overtighten—this could damage your phone case or shift the camera alignment. Once secured, lightly shake the phone to test stability. If it moves, reposition and reclamp. For extra security, wrap a rubber band around the phone and adapter to prevent accidental dislodging.
Stabilize the Setup: Tripod Use Is Essential
Attach to a ¼-Inch Tripod Mount
Handholding the monocular-phone combo may work at low zoom, but at 12x magnification, the slightest hand tremor turns into visible blur. Always use a tripod for sharp results.
- Screw the included ¼-inch tripod mount into the base of the monocular.
- Attach the full assembly (monocular + phone) to your tripod.
- Tighten all knobs to prevent slippage during use.
Expert Note: The included basic tripod is functional but flimsy. Upgrade to a Manfrotto, Vanguard, or Yulonzi model for rock-solid stability, especially outdoors.
Add Weight to Reduce Wind Shake
In breezy conditions (6 mph or more), your setup can sway, especially in horizontal orientation. Combat this by hanging a camera bag, water bottle, or weight from the tripod’s center hook. This added mass dampens vibrations and keeps your shot steady.
Reinforce with a Rubber Band for Security
Even a secure clamp can loosen over time. Wrap a small rubber band around the phone and mount to maintain constant pressure. This simple trick prevents accidental slips and ensures the phone stays flush during zooming or panning.
Choose the Right Orientation: Vertical vs. Horizontal

Use Vertical Mode for Quick, Casual Shots
- Easiest to set up and align with the camera app.
- Matches your phone’s natural portrait interface.
- Ideal for snapshots, social media posts, or quick wildlife checks.
Drawback: Top-heavy balance increases wobble. Avoid for long exposures or video.
Switch to Horizontal Mode for Professional Results
- Superior for telephoto photography—fills the screen better and uses more of your phone’s sensor.
- Reduces wasted space and improves framing.
- Essential for capturing wide, detailed scenes like landscapes or architecture.
Challenge: Lateral stress on the mount. Requires a fully adjustable tripod with pan-tilt or ball head to maintain stability.
Field Insight: At Manassas Battlefield, switching to horizontal mode allowed users to capture sword engravings on distant statues from over 100 feet away—details invisible in vertical mode without aggressive cropping.
Focus for Razor-Sharp Images
Focus the Monocular First
Turn the eyepiece focus ring until the subject appears sharp when viewed through the monocular. This is your primary focus. Don’t rely solely on your phone’s autofocus—your eyes are better at judging optical clarity.
Tap to Fine-Tune on the Phone Screen
Open your phone’s camera app and tap the screen to engage autofocus and exposure lock. For moving subjects, tap and hold to lock focus. This ensures your phone doesn’t refocus mid-shot.
Use Manual Mode for Full Control
On iPhones (Pro models) or Android phones with Pro or Manual mode, take control of:
- ISO: Keep at 100–200 in daylight to reduce noise.
- Shutter Speed: Use 1/500s or faster to freeze motion.
- White Balance: Set manually to avoid color shifts in changing light.
Enable RAW format if available—this preserves maximum detail for post-processing.
Optimize Zoom for Maximum Clarity
Combine 12x Optical Zoom with Up to 5.8x Digital Zoom
- The monocular provides 12x optical zoom—no quality loss.
- Your phone can add up to 5.8x digital zoom.
- Total effective zoom: ~70x (12 × 5.8), letting you capture fine details from extreme distances.
Real-World Test: At 5.8x phone zoom, users clearly read inscriptions on the Stonewall Jackson statue from over 100 feet away.
Avoid Over-Zooming Beyond 6x
Digital zoom beyond 6x relies on pixel interpolation, which degrades image quality. Stick to 5x or less on your phone for crisp, noise-free results.
Pro Tip: Zoom in after focusing. Digital zoom magnifies any misalignment or shake, so get your setup perfect first.
Troubleshoot Common Problems
Fix Blurry Images
Causes:
– Phone not flush with eyepiece
– Loose mount or tripod
– Poor focus technique
Solutions:
– Re-seat the phone and eliminate gaps.
– Use a tripod + rubber band.
– Focus the monocular first, then fine-tune with your phone.
Eliminate Vignetting (Dark Corners)
Cause: Rear camera not centered over the eyepiece.
Fix:
– Adjust phone position in the clamp.
– Use grid lines in your camera app for alignment.
– Ensure no part of your phone case blocks the lens.
Stop Image Shift During Zoom
Cause: Gap between phone and eyepiece expands under pressure.
Fix:
– Tighten clamp evenly.
– Press phone firmly against eyepiece.
– Use a rubber band for constant pressure.
Improve Low-Light Performance
Cause: Monocular has a small aperture; digital zoom amplifies noise.
Fix:
– Limit zoom in low light.
– Shoot in daylight or bright conditions.
– Increase ambient light if possible.
Capture Better Photos and Videos
Use Grid Lines for Perfect Framing
Enable grid lines in your camera settings. They help level the horizon and compose shots—especially important when magnifying distant subjects that lack reference points.
Shoot in Burst Mode for Moving Subjects
For birds, wildlife, or sports, use burst mode to increase your chances of a sharp shot. High magnification makes motion more pronounced, so rapid-fire shots help you catch the perfect moment.
Record Stable Video Like a Pro
- Use a tripod with a fluid head for smooth panning.
- Avoid digital zoom during recording.
- Enable video stabilization in phone settings.
- Use a Bluetooth remote or timer to start recording without touching the phone.
Maintain and Upgrade Your Gear
Clean Lenses the Right Way
- Use only the included microfiber cloth.
- Wipe gently in a circular motion.
- Apply lens cleaner to the cloth—never directly on the lens.
- Avoid paper towels or clothing—they can scratch coatings.
Store Safely and Inspect Regularly
- Replace lens caps after use.
- Store in the protective pouch in a dry, dust-free place.
- Detach the G3 mount to prevent spring fatigue.
- Check tripod threads and clamp monthly for wear.
Upgrade for Better Results
- Replace the stock tripod with a mid-to-high-end model (adjustable legs, pan-tilt head, weight hook).
- Use a Bluetooth remote shutter to eliminate shake.
- Choose a phone with a high-quality telephoto lens (e.g., iPhone 15 Pro, Galaxy S24 Ultra) for sharper base images.
Know Warranty and Value
- Monocular: Limited lifetime warranty (defects only).
- G3 Mount: 1-year warranty.
- Exclusions: Damage from drops, water, or misuse not covered.
- Full Kit Price: $150–$250.
- Replacement G3 Mount: $30–$40.
Tip: The G3 mount is worth every dollar—unlike generic adapters, it ensures perfect alignment and prevents slippage.
Final Tips for Success
- Stability is non-negotiable—use a tripod at all times above 5x zoom.
- Align perfectly every time—center the camera and eliminate gaps.
- Limit digital zoom to under 6x for best quality.
- Shoot in daylight for maximum clarity.
- Ideal for: Birdwatching, travel, history, hiking, and content creation.
Final Note: The StarScope monocular + smartphone combo delivers professional-grade telephoto capability—if you master alignment and stability. Use the G3 mount, a solid tripod, and precise technique, and you’ll capture stunning long-range images with just your phone. Whether you’re exploring battlefields, forests, or cityscapes, this setup puts powerful magnification in your pocket.


