
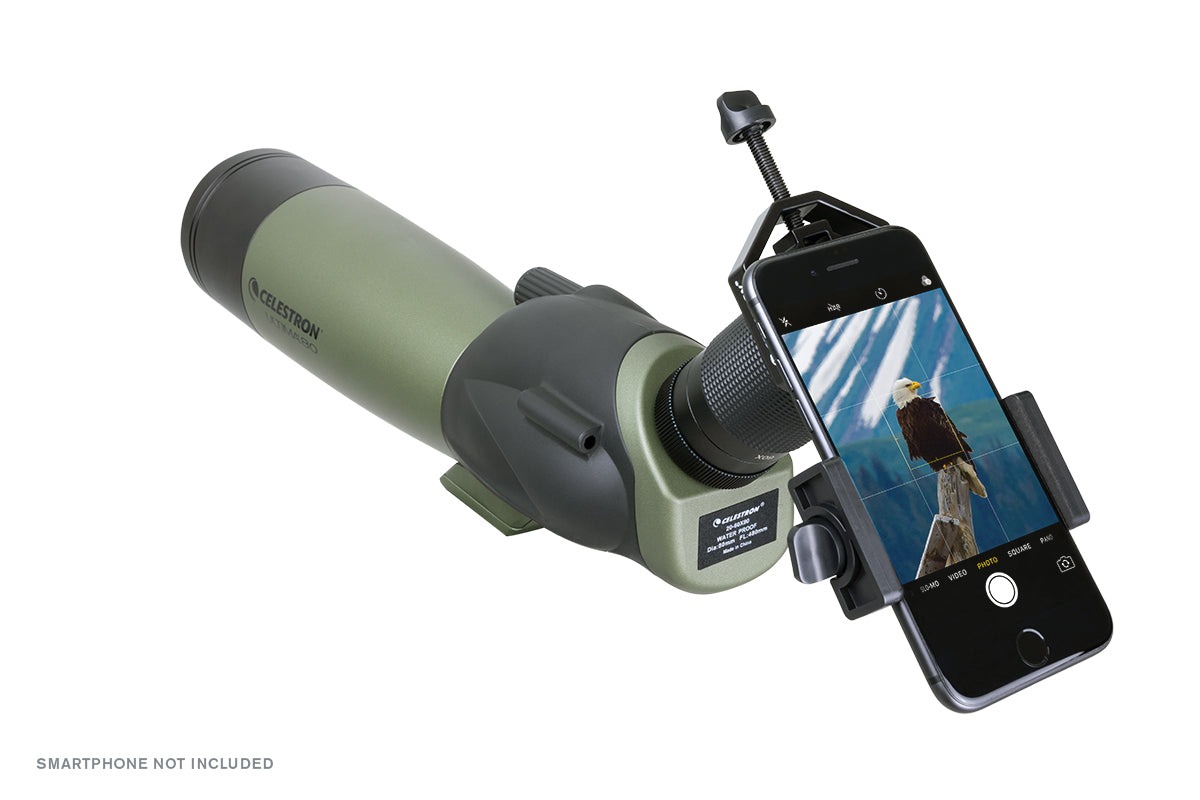
If you’ve ever wanted to turn your smartphone into a powerful long-range observation tool, the Starscope monocular makes it possible—but only if it’s properly attached. The key lies in its G3 dual spring-loaded phone mount, a precision-engineered adapter designed to align your phone’s camera lens directly with the monocular’s 44 mm eyepiece. This connection unlocks up to 80x optical magnification, transforming your phone into a high-powered spotting scope for birdwatching, hunting, astronomy, and long-distance photography.
But simply snapping your phone into place isn’t enough. Even slight misalignment, loose fittings, or poor stabilization can ruin image quality—no matter how advanced the optics. In this guide, you’ll learn exactly how the Starscope monocular attaches to your phone, which phones work best, how to achieve perfect lens alignment, and what upgrades turn shaky footage into crystal-clear, professional-grade results.
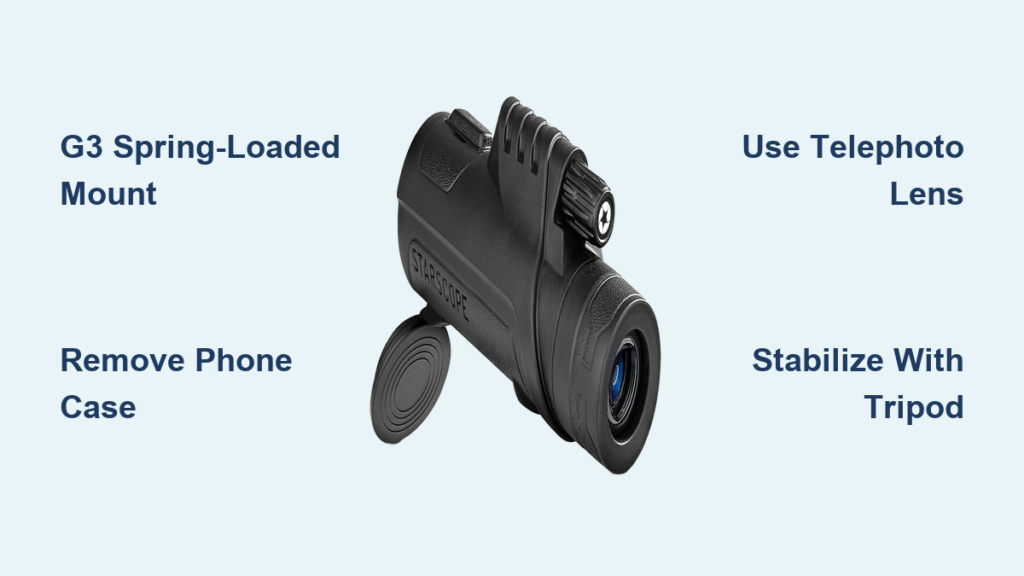
Dual Spring-Loaded G3 Mount: Secure, Tool-Free Attachment
The G3 phone mount is the cornerstone of the Starscope system, specifically designed for fast, stable, and repeatable smartphone attachment.
One-Click Quick-Connect Design
The G3 mount clips directly onto the monocular’s eyepiece with a quick-release mechanism—no screws, tools, or adjustments needed. Once mounted:
– Your phone slides into the adjustable clamp
– Spring-loaded arms apply even pressure on both sides
– The phone is held firmly in place without slipping
This one-click system allows for instant setup and teardown, making it ideal for outdoor use where speed and reliability matter.
Adjustable Clamp for Universal Fit
The clamp expands from 2.2 inches (57 mm) to 4.3 inches (110 mm), accommodating nearly all smartphones:
– iPhone 15 Pro Max to iPhone 13 Mini
– Samsung Galaxy S24 Ultra, Z Fold 5, and Note series
– Google Pixel 8, OnePlus 12, and other Android flagships
✅ Works with cases—but better without: While the clamp fits phones in cases, thick or raised-edge cases (like OtterBox or heavy silicone) can interfere with alignment and stability.
Phone Compatibility: Which Devices Work Best?
While the G3 mount supports most phones, optimal performance depends on camera placement and case thickness.
Phones That Fit and Perform Well
- All iPhones (6 through 15 series)
- Samsung Galaxy S, Z, and Note models
- Google Pixel 4 and newer
- Most OnePlus, Sony, and Xiaomi flagship phones
When to Remove Your Case
Thick cases can:
– Prevent the phone from seating flush against the eyepiece
– Cause vignetting (dark edges in the image)
– Shift the camera lens out of alignment
– Increase the risk of slippage during use
Pro Tip: Start with your phone case-free. Reattach the case only if it still fits snugly and the camera aligns perfectly.
Align the Camera Lens with the Eyepiece
Optical alignment is everything. Even a 2mm offset can cause blurry edges, dark corners, or complete image loss.
Choose the Right Camera Lens
Modern phones have multiple lenses—not all are suitable for monocular use.
| Lens Type | Recommended? | Why |
|---|---|---|
| Telephoto (2x–10x optical zoom) | ✅ Yes | Matches magnification, reduces distortion |
| Wide-angle | ❌ No | Causes vignetting and edge blur |
| Ultra-wide | ❌ No | Too short focal length, unusable |
On iPhones, use the telephoto lens (middle or far-right sensor). On Samsung Galaxy devices, select the 3x or 10x periscope lens for best results.
Step-by-Step Alignment Process
- Open your phone’s camera app
- Look through the monocular while watching the screen
- Slide the phone left/right and up/down until the image fills the frame
- Ensure no dark corners or shadows appear
- Clamp the phone securely and recheck alignment
🔍 Visual Cue: A perfectly aligned setup shows a bright, full circle—no cutoff or vignetting.
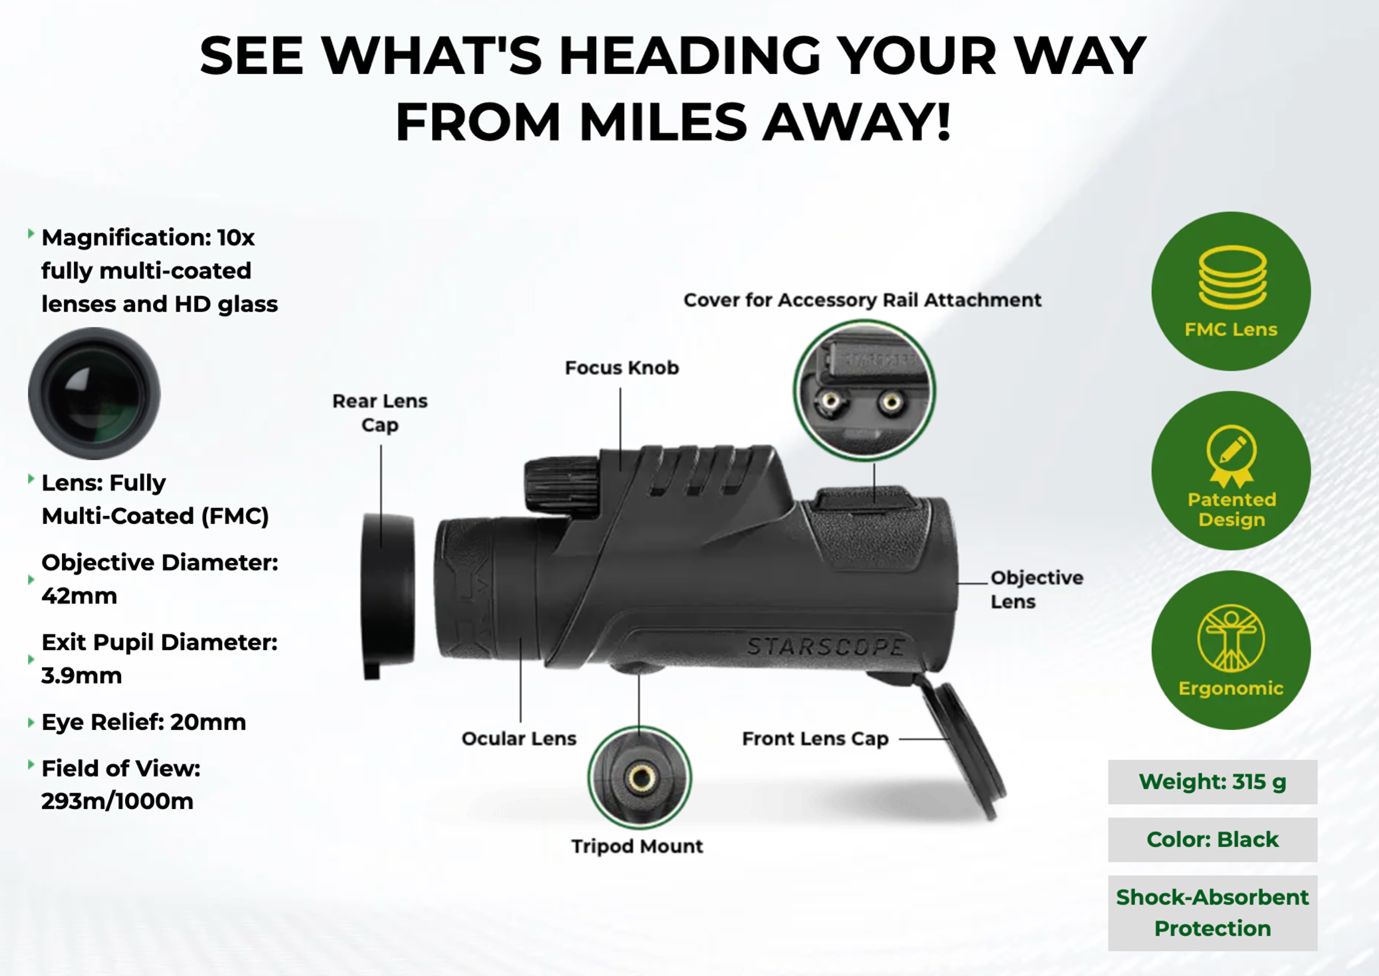
Fit the 44 mm Eyepiece Correctly for Full-Frame Images

The Starscope monocular features a 44 mm diameter eyepiece cup, and the G3 mount is built to match it exactly.
Why the 44 mm Fit Matters
- Ensures coaxial alignment between camera and optics
- Minimizes light leaks around the edges
- Prevents parallax errors that distort focus
- Eliminates black borders in the final image
The mount’s clip allows fine-tuning—slide it forward or backward on the eyepiece to eliminate any remaining vignetting.
⚠️ Warning: Third-party adapters not designed for 44 mm may cause poor fit and degraded image quality.
Horizontal vs. Vertical Mounting: Which Is Better?

You can attach your phone in portrait (vertical) or landscape (horizontal)—but one delivers far better results.
| Orientation | Stability | Field of View | Best Use |
|---|---|---|---|
| Horizontal (Landscape) | ✅ High | ✅ Full match | Photography, video, astronomy |
| Vertical (Portrait) | ❌ Low | ❌ Cropped | Quick checks only |
📌 Recommendation: Always use horizontal orientation for serious use. It provides better balance, reduces strain on the mount, and matches the monocular’s natural field of view.
Fix Common Attachment Problems
Even with the right tools, users face real-world challenges. Here’s how to solve them.
Gap Between Phone and Eyepiece
- Symptoms: Dark corners, blurry edges, light leaks
- Cause: Phone not seated fully or case interference
- Fix: Remove case, press phone gently but firmly into the mount
Loose or Shaky Connection
- Symptoms: Image wobble, especially at 40x+ zoom
- Cause: Weak clamp tension or plastic flex
- Fix: Wrap a rubber band around the adapter to compress components
✅ Verified by users: This simple trick eliminates micro-movements
Camera Misalignment After Clamping
- Symptoms: Cropped or off-center image
- Cause: Phone shifts when tightened
- Fix: Recheck alignment after securing the clamp—adjust slightly if needed
🔧 Expert Tip: Add a silicone O-ring around the eyepiece to improve grip and seal out stray light.
Maximize Magnification and Focus
The Starscope delivers 80x optical magnification, but your phone must work in sync.
Use Optical Zoom, Not Digital
- Avoid digital zoom beyond 1.5x–2x to prevent pixelation
- Rely on the monocular’s optics for magnification
- Use pinch-to-zoom sparingly, only to fine-tune framing
Sync Focus Between Devices
- Focus the monocular using its adjustment wheel
- While watching the screen, use pinch-to-zoom on your phone to sharpen details
- Repeat until image is tack-sharp
🔎 Think of it like a microscope: slow, deliberate adjustments yield the best results.
Stabilize with a Quality Tripod
Handheld use rarely works beyond 20x magnification.
Why Stability Is Non-Negotiable
- At 80x, your heartbeat can blur the image
- Wind as light as 6 mph causes visible shake
- Even slight hand tremors distort focus
Stock vs. Upgraded Tripod
| Feature | Included Tripod | Recommended Upgrade |
|---|---|---|
| Material | Lightweight plastic/metal | Aluminum or carbon fiber |
| Head Type | Fixed or basic pan | Ball head or gimbal |
| Stability | Poor in wind | Excellent with damping |
| Price Range | Free with kit | $25–$60 |
🛠️ Best Upgrade: A Yulonzi ball head tripod or gimbal-style smartphone mount dramatically improves control and image clarity.
Dual-Mount Systems (Advanced)
For maximum precision, use a dual-arm bracket that mounts:
– The monocular on one arm
– The phone on a separate, adjustable arm
This allows independent positioning and better center of gravity—ideal for astrophotography or long sessions.
Ideal Use Cases and Performance Tips
When properly attached and stabilized, the Starscope excels in several outdoor applications.
Birdwatching and Wildlife
- Observe nesting birds without disturbing them
- Record video of deer, foxes, or raptors
- Use tripod + telephoto lens combo for best results
Hunting and Surveillance
- Scan terrain from a distance
- Silent, battery-free operation ensures stealth
- Works in low light with proper stabilization
Mobile Photography and Astrophotography
- Capture detailed Moon surface images
- Photograph distant landscapes or architecture
- Try planetary shots (Jupiter, Saturn) with a gimbal mount
🌙 Pro Tip: Shoot the Moon at 50–80x with minimal digital zoom for sharpest results.
Maintain and Protect Your Setup
The Starscope is built for outdoor use, but care extends its life.
Included Protection Features
- Weather-resistant housing (handles drizzle, humidity)
- Front and rear lens caps
- Lanyard to prevent drops
- Microfiber cloth for cleaning
Maintenance Routine
- Wipe lenses before and after use
- Store in the protective carry case with belt loop
- Avoid direct water spray or submersion
❌ Do not immerse—the monocular is not waterproof.
Pro Tips for Best Results
- Always use a tripod—handheld shots fail at high zoom
- Remove your phone case for flush contact
- Manually select the telephoto lens in your camera app
- Fine-tune alignment after clamping the phone
- Reinforce with a rubber band if the mount feels loose
- Upgrade to a ball head tripod for serious use
- Avoid digital zoom beyond 2x
- Practice in daylight before attempting night or low-light shots
What’s in the Box (Varies by Kit)
| Item | Purpose |
|---|---|
| Starscope Monocular (e.g., 80×42) | Core optical device |
| G3 Phone Mount | Secure smartphone attachment |
| Universal Phone Cradle | Holds phone over eyepiece |
| Compact Tripod | Basic stabilization |
| Carry Case | Protection and portability |
| Lens Covers | Prevent scratches |
| Lanyard | Safety strap |
| Microfiber Cloth | Cleaning tool |
| Manual | Setup instructions |
⚠️ Watch Out: Budget kits may include a plastic cradle instead of G3 mount—less stable, harder to align.
Stock vs. Upgraded Setup: Real-World Impact
| Component | Stock Setup | Upgraded Setup |
|---|---|---|
| Phone Mount | Plastic, wobbly | G3 spring-loaded clamp |
| Tripod | Light, shaky | Heavy-duty ball head |
| Stability | Fails at 40x | Solid at 80x |
| Image Clarity | Hit-or-miss | Consistently sharp |
| Longevity | Prone to breakage | Field-durable |
✅ Bottom Line: The optics are excellent, but the included accessories are the weak link. Upgrade the mount and tripod to unlock the system’s full potential.
Final Recommendations
To get the most from your Starscope monocular:
- Use the G3 dual spring-loaded mount for secure attachment
- Remove your phone case to ensure perfect contact
- Select the telephoto lens manually for best image quality
- Mount everything on a sturdy tripod—no exceptions
- Fine-tune alignment after clamping to avoid vignetting
- Upgrade the tripod and mount for photography or astronomy
- Practice focus syncing between monocular and phone
When done right, the Starscope turns your smartphone into a powerful, portable spotting scope—ideal for nature lovers, hunters, and mobile photographers alike.