
You’ve spent time and money perfecting your rifle setup—your scope delivers crisp clarity, consistent zero, and precision at every range. But when night falls, that high-end optic becomes nearly useless. That’s where a night vision monocular comes in. By learning how to attach a night vision monocular to a scope, you can transform your daylight rifle into a 24/7 capable system—no need to replace your trusted scope or carry a separate night rifle.
This guide walks you through the complete process of mounting a night vision monocular to a rifle scope, covering both front (clip-on) and rear (behind-the-scope) configurations. Whether you’re hunting hogs at midnight, conducting perimeter checks, or enhancing your tactical readiness, you’ll learn the correct setup, avoid critical mistakes, and maintain accuracy. We’ll also break down compatibility, focus protocols, and legal considerations so you can deploy with confidence.
Let’s get you seeing—and shooting—in the dark.
Choose Your Mounting Position: Front vs. Rear

The first decision is where to place the night vision monocular: in front of the scope or behind it. Each method has distinct advantages, limitations, and optical requirements.
Front Mounting: Clip-On Over the Objective Lens
Front mounting places the monocular directly over the scope’s objective lens, turning your entire rifle setup into a night-capable system.
Why Choose Front Mounting?
- Maintains eye relief and reticle familiarity—you still look through your scope.
- Preserves zero on collimated models like the Pulsar Krypton 2 series.
- Quick attachment with bayonet-style adapters (e.g., PSP-B).
- No interference with cheek weld or head position.
What You’ll Need:
- A clip-on compatible monocular (thermal or night vision)
- Bayonet adapter ring matching your scope’s objective size (e.g., 50 mm)
- Inner spacer (if required for snug fit)
Compatible Monoculars:
- Pulsar Krypton 2 FXG50 / FXQ35
- AGM Rattler T25
- ATN X-Sight clip-on series
✅ Best for users who want fast, repeatable deployment and zero retention—ideal for tactical or hunting scenarios.
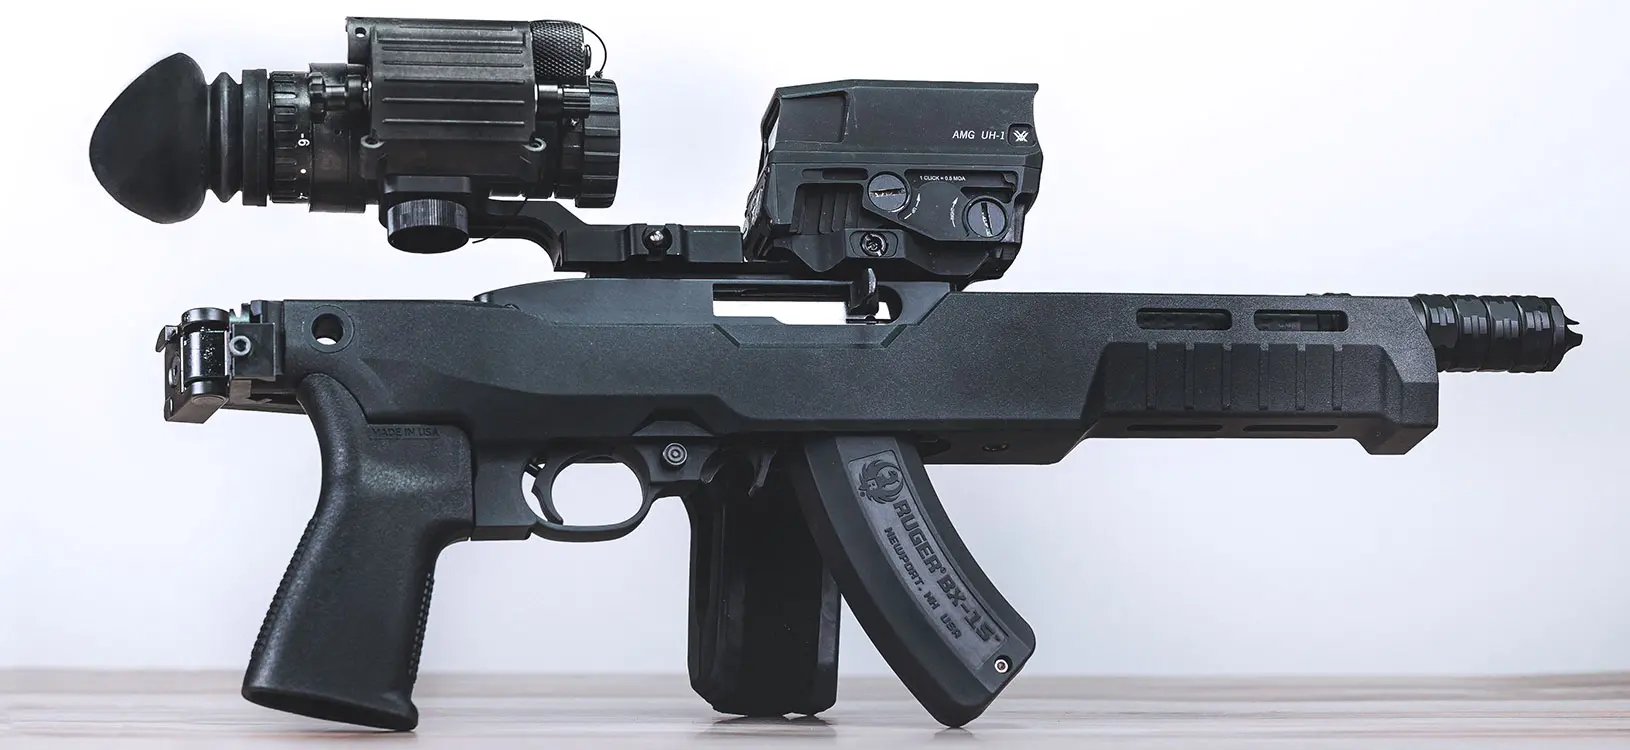
Rear Mounting: Behind the Ocular Lens
Rear mounting positions the monocular behind the scope’s eyepiece, where it views the magnified image projected by the scope.
Why Choose Rear Mounting?
- Leverages your scope’s magnification—no need for a high-power monocular.
- Lower cost—works with standard night vision monoculars.
- Keeps weight centered on the rifle.
Limitations:
- Requires a side-focus or adjustable objective (AO) scope.
- Fixed-parallax scopes will not work.
- Risk of eye injury from recoil on powerful calibers.
- More complex focus setup.
⚠️ Only use rear mounting with AO or side-focus scopes—otherwise, you’ll never achieve a sharp image.
Check Compatibility Before You Mount
Never assume your gear will work together. Verify compatibility between your scope, monocular, and mounting hardware.
Match Objective Lens Size (Front Mount)
Front-mounted clip-ons require an adapter ring that fits your scope’s objective diameter—common sizes include 42 mm, 50 mm, and 56 mm. Use the manufacturer’s chart to select the correct bayonet ring (e.g., PSP-B 50 mm).
🔍 Tip: If the fit feels loose, add a spacer. A wobbly mount ruins zero and damages optics.
Confirm Recoil Tolerance
High-recoil rifles (.308, .30-06, etc.) demand ruggedized monoculars. Look for:
– MIL-STD-810 compliance
– Recoil-rated specifications (e.g., “tested up to .375 H&H”)
– Avoid consumer-grade monoculars on heavy-recoil platforms
Verify Rail and Clearance
Check that:
– There’s enough front clearance for a clip-on (no barrel or rail obstructions)
– The eyepiece has space for rear mounting brackets
– The monocular doesn’t touch the scope when mounted
Match Optical Quality
Pair a $2,000 scope with a $300 monocular, and you’re wasting performance. Aim for balanced optics:
– High-resolution (640×480) sensors for long-range use
– Premium glass on both devices for maximum clarity
Install a Front Clip-On Monocular
Front mounting is ideal for fast, reliable night operations with zero retention.
Attach the Adapter Ring
- Remove lens cap and sunshade from the scope’s objective.
- Insert inner spacer (if needed) to match your scope’s diameter.
- Slide the bayonet ring onto the objective lens—ensure full seating.
- Tighten the locking screw gently—over-torquing can damage the scope.
🔧 Use a torque wrench (3–5 in-lbs) if available for consistent, safe tightening.
Mount the Monocular
- Align the monocular with the bayonet slots.
- Slide and twist a quarter-turn to lock.
- Engage the locking lever (if equipped) to prevent accidental release.
✅ Test: Gently twist the monocular. It should not rotate or wobble.
Align the Image
Some models (e.g., Pulsar Krypton 2) have onboard alignment tools:
– Use the display grid to center the image
– Adjust internal screws or calibration mode as needed
🎯 Goal: The monocular’s image should fully cover the scope’s field of view with no black edges or vignetting.
Set Up a Rear-Mounted Monocular
Rear mounting requires precision and compatible optics.
Use a Side-Focus Scope
Only scopes with adjustable parallax (AO or side focus) can work. The process relies on:
– Monocular focusing on the reticle
– Scope focusing on the target
Fixed-parallax scopes cannot produce a sharp image when viewed through a night vision device.
Mount the Monocular Behind the Scope
- Install a Picatinny rail behind the scope (on receiver or mount).
- Attach a monocular bracket to the rail.
- Position the monocular 1–2 inches behind the ocular lens.
- Center and tighten—ensure no contact with the scope.
🔍 Visual Check: Look through both. The scope’s exit pupil should fill the monocular’s lens.
Master the Focus Sequence (Critical!)
Incorrect focus is the #1 cause of blurry images.
Focus in the Right Order (Rear Mount)
-
🔹 Focus the monocular on the reticle
– In low light, adjust the monocular’s focus until the reticle is razor-sharp
– Lock this focus—never adjust again -
🔹 Use the scope’s side focus to sharpen the target
– Adjust the AO knob to bring the target into focus
– The reticle stays sharp; only the target changes
❌ Never refocus the monocular—it will blur the reticle and ruin accuracy.
Front Mount Focus
- Focus using the monocular’s objective lens
- Adjust while viewing a distant target
- Use IR illuminator in total darkness
Conduct Final System Checks
Before heading to the range, verify everything is secure.
Test for Stability
- Gently shake the rifle—no wobble should occur
- Check all screws, locks, and battery compartments
Power On and Verify
- Turn on the monocular
- Activate IR illuminator if needed
- Look through:
– Front mount: through the scope
– Rear mount: through the monocular - Confirm:
– Full image circle (no black edges)
– Sharp reticle and target
– No flickering or sensor issues
Check Battery Life
- Fully charge before use
- Carry spares or a power bank
- Runtime varies: 6–11 hours depending on model
Confirm Zero at the Range
Even collimated clip-ons can shift POI.
Fire Confirmation Shots
- Zero without the monocular
- Attach the monocular
- Fire 3–5 rounds at 100 yards
- Compare group placement
🎯 Acceptable shift: ≤ 1 MOA. Larger shifts mean realignment or rezeroing.
Rezero If Needed
- Adjust scope turrets to compensate
- Some maintain a separate night zero for quick switching
💡 Pro Tip: Mark turrets with tape or paint to track day vs. night settings.
Optimize Performance in the Field
Maximize clarity, detection, and accuracy.
Set Correct Magnification
- Use 2× to 4× on variable scopes
- Higher zoom increases pixelation and reduces FOV
- Lower zoom improves target acquisition in brush
Match Display Settings
- Set thermal palette to white hot or black hot
- Sync brightness and contrast across devices
- Use low mag on monocular for scanning, scope for aiming
Use IR Illuminator Wisely
- Turn on only when necessary
- Adjust beam width and intensity
- Test beam pattern at home to avoid hotspots
Maintain Your Setup
Proper care ensures long-term reliability.
Clean Lenses Safely
- Use microfiber cloth and lens-safe cleaner
- Blow off dust first
- Never wipe dry lenses
Store Properly
- Remove batteries during storage
- Keep in hard case with desiccant
- Avoid extreme temperatures
Inspect After Use
- Check for loose screws or dents
- Look for battery corrosion
- Test functionality before next outing
Know the Legal Rules
Night vision and thermal use is restricted in many areas.
United States
- ✅ Legal for hogs, coyotes, predators in most states
- ❌ Banned for deer and big game in many (e.g., Texas, Georgia)
- 📝 Permit required on some public lands
Europe
- 🇬🇧 Scotland: Full ban on night hunting
- 🇩🇪 Germany: Allowed with license
- 🇫🇷 France: Restricted to pest control
✅ Always check local hunting regulations before use.
Troubleshooting Common Issues
Blurry Image?
- Rear mount: Did you focus monocular on reticle first?
- Front mount: Is objective lens clean and focused?
- Check for lens caps or smudges
Black Edges or Vignetting?
- Misalignment: Re-center the monocular
- Wrong adapter size: Verify fit
- Zoom too high: Reduce magnification
Monocular Shuts Off?
- Low battery: Recharge or replace
- Overheating: Let cool down
- Faulty connection: Inspect power port
POI Shifted?
- Recheck mount tightness
- Re-zero at the range
- Consider switching to a collimated clip-on
Attaching a night vision monocular to a scope unlocks 24/7 operational capability without replacing your high-end daylight optic. Whether you choose front clip-on for zero retention or rear mounting for flexibility, success depends on compatibility, correct focus order, and range verification.
Thermal clip-ons like the Pulsar Krypton 2 series offer the best performance, but even budget setups can work with proper technique. Just remember:
🔹 Focus the monocular on the reticle first (rear mount)
🔹 Use side focus to sharpen the target
🔹 Always confirm zero after installation
With the right setup, your rifle becomes a true day-and-night system—ready for predators, precision, and the unseen.


