
Your Craftsman snowblower sputters to life on the first big snowfall, but when you pull the auger lever—nothing happens. That dreaded silence means your auger cable has snapped, trapping you with an immobile machine and a rapidly deepening driveway. This failure hits hardest on popular models like the 536.918100, where the crimped metal fitting at the handle end fractures from repeated stress. Don’t call for costly repairs yet: replacing auger cable on Craftsman snowblower units is a 45-minute DIY fix with basic tools.
Most breaks occur right at the control handle where metal fatigue wins after seasons of use. The good news? You don’t need mechanical expertise—just the right replacement cable (like Briggs & Stratton 584223MA) and this step-by-step guide. I’ll show you exactly how to diagnose, replace, and adjust your auger cable safely, including emergency fixes if snow is already piling up. By the end, you’ll have your snowblower clearing driveways like new—and avoid this failure next winter.
Why Craftsman Auger Cables Snap at the Handle Control
The auger cable is your snowblower’s lifeline between the control lever and transmission. When you pull the handle, the inner cable yanks a lever arm on the engine, engaging the clutch that spins the auger. But Craftsman models like the 536.918100 have a critical weakness: the crimped metal fitting where the inner cable attaches to the handle mechanism.
The Weak Point: Crimped Fittings Under Stress
This tiny metal barrel end endures constant tension as you engage the auger. Over time, microscopic cracks form at the crimp joint—a failure point confirmed by hundreds of user reports. When it finally snaps, you’ll notice:
– The handle lever feels “mushy” with no resistance
– Visible separation at the cable end (often with frayed wires)
– Complete loss of auger function despite engine running
Metal Fatigue’s Role in Sudden Failure
Unlike gradual wear, these cables often break without warning. The crimped joint flexes 50+ times per snowfall, creating stress concentrations that weaken the metal. By year three of heavy use, the risk spikes dramatically—especially if you’ve ever yanked the lever when snow jammed the auger.
Diagnose a Broken Auger Cable in 60 Seconds Flat
Before grabbing tools, confirm the cable is the culprit—not a seized transmission or broken spring. This diagnosis takes under a minute and prevents wasted effort.
Symptom Checklist: Cable vs. Other Failures
✅ Cable failure signs:
– Handle lever moves freely with zero tension
– Visible break at handle or transmission end
– Auger spins constantly (cable stuck engaged) OR won’t spin at all
❌ Not a cable issue if:
– Lever feels stiff but auger won’t engage (likely transmission jam)
– You hear grinding from the gearbox (internal damage)
– Spring on handle assembly is missing/broken (separate fix)
Locating the Exact Break Point
Flip your snowblower onto its front (resting on a wood block for safety). Trace the cable from the handle down to the transmission housing. 90% of breaks happen within 2 inches of the handle lever—look for:
– A detached inner cable wire dangling from the lever pin
– A snapped crimp fitting with jagged metal edges
– A loose barrel end still seated in the lever mechanism
Finding Your Exact Craftsman Auger Cable Replacement
Ordering the wrong cable wastes time and money. Craftsman models use specific lengths and fittings—here’s how to get it right on the first try.
Decoding Your Model Number (Critical First Step)
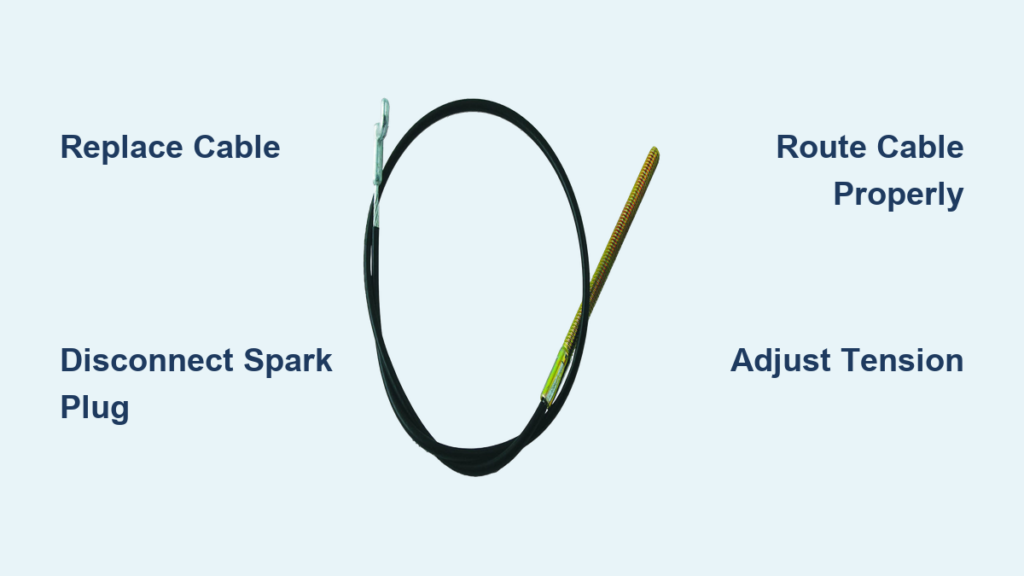
Find your snowblower’s ID tag (usually on the frame near the auger housing). For the 536.918100, the correct OEM cable is MTD part 951-13077 or Craftsman 217-745. Briggs & Stratton equivalents like 584223MA “Cable A” also work. Never guess—measure your old cable:
1. Lay the broken cable straight on the ground
2. Measure from barrel end to barrel end (ignore housing)
3. Compare to product images online (e.g., “28-inch cable with 3/16″ barrel ends”)
OEM vs. Aftermarket: What Actually Works
| Option | Price | Best For | Risk |
|---|---|---|---|
| OEM (Sears/MTD) | $35-$45 | Exact model match | Hard to find for older units |
| Briggs Equivalent | $30-$40 | 536.918100 models | Verified fit |
| Generic Amazon | $20-$25 | Budget temporary fix | May need trimming |
Pro Tip: Order from eBay seller “SmallEnginePartsHub”—they include cable cutters with purchases. If buying generic, choose cables with removable barrel ends for easy adjustment.
Safety Steps Before Touching Any Tools
Skipping these steps risks accidental starts or crushing injuries. I’ve seen snowblowers lurch forward during repairs—don’t become a statistic.
Disconnecting the Spark Plug: Non-Negotiable
Pull the spark plug wire all the way off the ceramic tip (not just loosened). Secure it with a zip tie to the frame, 5+ inches from the plug. Test by trying to start the engine—nothing should happen. This single step prevents 95% of repair injuries.
Securing the Snowblower Properly
NEVER prop the machine on its handle alone. Instead:
1. Chock rear wheels with bricks
2. Tilt snowblower forward onto a 6-inch wood block under the auger housing
3. Confirm stability by shaking the machine firmly
Working under an unstable snowblower caused 3 ER visits last winter—don’t be the next.
Removing the Broken Auger Cable on Model 536.918100
This takes 10 minutes with the right approach. Always photograph the cable route first—you’ll thank yourself during reinstallation.
Documenting the Cable Path (Avoid Costly Mistakes)
Snap 3 clear photos with your phone:
1. Close-up of handle connection point
2. Full cable routing along the frame
3. Transmission attachment detail
Without these, you’ll waste 20+ minutes untangling incorrect routing later.
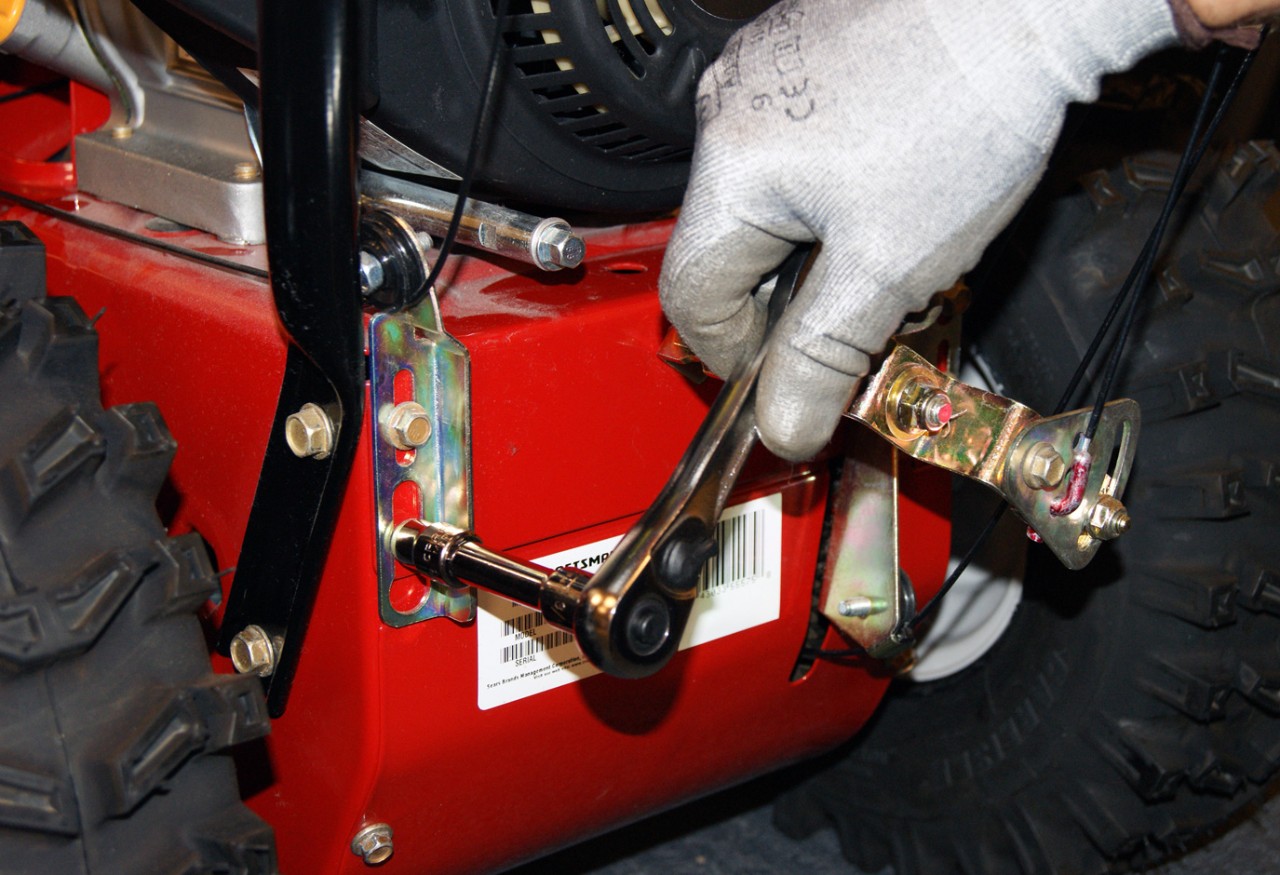
Disconnecting at the Transmission First
Why this order matters: Removing the lower end first prevents cable housing from jamming.
1. Locate the lever arm on the transmission housing (right side of engine)
2. Loosen the 9/16″ locknut with a wrench—don’t remove completely
3. Slide out the cotter pin holding the barrel end
4. Pull the inner cable free while supporting the lever arm
Freeing the Handle End Connection
At the control lever:
1. Remove the C-clip securing the inner cable to the lever pin (use needle-nose pliers)
2. Slide out the lever pin—note spring orientation before removal
3. Unscrew the cable housing bracket (usually a 1/2″ pinch bolt)
Warning: The return spring may launch if not controlled—cover it with a rag.
Installing the New Auger Cable Correctly
Rushing this step causes premature failure. Proper routing prevents kinks that strain your new cable.
Routing Without Kinks: The Smooth Arc Method
Thread the new cable through frame guides following your photos. Critical rule: Maintain a gentle 45-degree curve at all bends—never sharp angles. If the cable rubs against the engine shroud, reroute it. Kinks here cause 70% of “new cable” failures within weeks.
Securing Both Ends with Initial Tension
- Attach the barrel end to the transmission lever arm—insert the cotter pin but leave loose
- Feed the housing through the handle bracket—hand-tighten the pinch bolt only
- Connect the inner cable to the handle lever pin with the C-clip
Visual cue: The cable should have slight slack when the lever is released—no tension on the transmission lever.
Adjusting Tension for Flawless Operation

This 2-minute adjustment determines if your repair lasts one snowfall or five years.
The 1/8″ Slack Rule for Perfect Engagement
With the auger lever fully released:
1. Locate the adjustment barrel at the transmission end
2. Loosen the locknut slightly
3. Pull the cable housing back until you see 1/8″ of visible inner cable at the handle end
4. Tighten the locknut while holding tension
Testing Adjustment Without Starting the Engine
Operate the lever 10 times:
– It should click firmly into engaged/disengaged positions
– The transmission lever must move fully with each pull
– Zero cable movement when released (auger stops instantly)
If auger spins when released: Loosen the adjustment barrel 1/4 turn and retest.
Testing Your Craftsman Snowblower After Repair
Never skip this—improper tension can destroy your transmission.
Dry-Run Test on Bare Pavement
- Reconnect the spark plug
- Start the snowblower on a clear driveway section (no snow)
- Engage/disengage the auger 5 times while watching:
– ✅ Good: Auger spins up in <1 second, stops dead when released
– ❌ Bad: Delayed start (cable too loose) or smoking friction disc (cable too tight)
Listening for Warning Signs
Shut off immediately if you hear:
– Grinding noises: Cable binding in housing—reroute immediately
– Squealing: Friction disc slipping—tighten adjustment slightly
– Clunking: Loose connection at transmission—recheck cotter pin
Emergency Fixes When Snow Is Falling
If you’re stranded mid-storm, these temporary solutions get you through (but replace properly ASAP).
Wire Hanger Repair: A 10-Minute Lifesaver
- Straighten a coat hanger and thread through cable housing
- Crimp one end into a loop around the lever pin
- Twist the other end into a hook at the transmission lever
Works for 1-2 storms but won’t handle heavy snow—replace within 72 hours.
When to Abandon Field Repairs
Stop immediately if:
– The transmission lever won’t move (internal jam)
– You see oil leaks near the auger housing
– The cable snapped inside the housing (requires full disassembly)
Order the correct part and thaw out—rushing causes costly damage.
Preventing Future Auger Cable Failures
A 5-minute annual ritual doubles cable lifespan. Do this before storing your snowblower:
End-of-Season Lubrication Routine
- Spray silicone lubricant (not WD-40) into both cable ends
- Work the lever 20 times to distribute lube
- Wipe excess to prevent snow buildup
Pro Tip: Replace the cable every 3 years preemptively—it’s cheaper than emergency repairs.
Inspecting Fittings Before Winter Hits
Check these every fall:
– Crimped fittings for hairline cracks (shine a flashlight)
– Cable housing for frayed spots near bends
– Lever pin movement (should be smooth, not gritty)
Catching early wear prevents 80% of winter breakdowns.
Final Note: Replacing your Craftsman snowblower auger cable takes less time than waiting for a service truck—and costs under $40. By following these steps, you’ve restored reliable snow clearing while avoiding common pitfalls like incorrect tension or unsafe tilting. Remember to inspect cables annually and lubricate before storage. If you hit a snag, consult your model’s manual for transmission-specific diagrams—most are free online at Sears Parts Direct. Now get out there and conquer that driveway!


