Peering at bacteria under the microscope reveals a hidden universe of life operating on a scale invisible to the naked eye. These tiny organisms, typically ranging from 0.2 to 10 micrometers, are among Earth’s oldest inhabitants—dating back nearly 4 billion years. Found in soil, water, extreme environments, and within our own bodies, bacteria are fundamental to ecosystems, human health, and disease. Observing them under magnification isn’t just a scientific curiosity—it’s a critical skill in diagnosing infections, understanding microbial behavior, and combating antibiotic resistance.
To see bacteria clearly, you need more than a microscope—you need the right technique. Most bacteria are transparent and nearly invisible under standard brightfield lighting without staining. At 1000X total magnification using oil immersion, their shapes, arrangements, and even specialized structures like spores or capsules become distinguishable. Whether identifying Staphylococcus aureus in a wound sample or tracking the rapid movement of Vibrio cholerae in a wet mount, microscopic observation delivers actionable insights. This guide walks you through what you’ll actually see, how to prepare and view samples correctly, and why these observations matter in medicine and research.
How Bacteria Appear Under the Microscope
Under magnification, bacteria reveal key visual traits—shape, arrangement, color after staining, and motility—that help identify species and guide treatment. What you observe depends heavily on preparation: unstained bacteria appear faint and translucent in brightfield microscopy, making contrast-enhancing techniques essential. Stained specimens, particularly those treated with differential stains like Gram stain, provide clear visual differences between bacterial types.
Resolution—not just magnification—determines how much detail you can see. While light microscopes reach up to 1000X, their resolving power is limited to about 200 nanometers. This means you can distinguish individual bacterial cells but not smaller structures like ribosomes (20 nm) or viruses (typically 20–300 nm). Despite this, critical features such as cell shape, clustering patterns, capsule formation, endospores, and motility are routinely visible and diagnostically valuable.
Recognize Common Bacterial Shapes
Bacterial morphology is one of the first clues in identification. Three primary shapes dominate:
- Cocci (round): Spherical cells often seen in clusters, pairs, or chains.
- Staphylococcus aureus forms grape-like clusters.
- Streptococcus pneumoniae appears as diplococci (pairs) or short chains.
- Bacilli (rod-shaped): Cylindrical cells that may stand alone or in chains.
- Escherichia coli and Bacillus subtilis are classic examples.
- Spiral and comma forms: Less common but highly diagnostic.
- Spirillum minus has a rigid spiral shape.
- Vibrio cholerae shows a distinct comma-like curve.
These shapes are consistent across environments and can be assessed at 400X magnification. While shape alone doesn’t confirm species, it narrows possibilities and directs further testing.
Identify Arrangement Patterns
How bacteria group together provides additional diagnostic value, based on how they divide and remain attached:
- Diplococci: Pairs (e.g., Neisseria gonorrhoeae)
- Streptococci: Chains (e.g., Streptococcus pyogenes)
- Staphylococci: Irregular clusters (e.g., Staphylococcus epidermidis)
- Tetrads: Four cocci in a square
- Sarcinae: Cubical packets of eight or more
- Palisades: Bacilli lined up side-by-side like fence posts (e.g., Corynebacterium diphtheriae)
For example, distinguishing Streptococcus (chains) from Staphylococcus (clusters) is a foundational step in clinical microbiology.
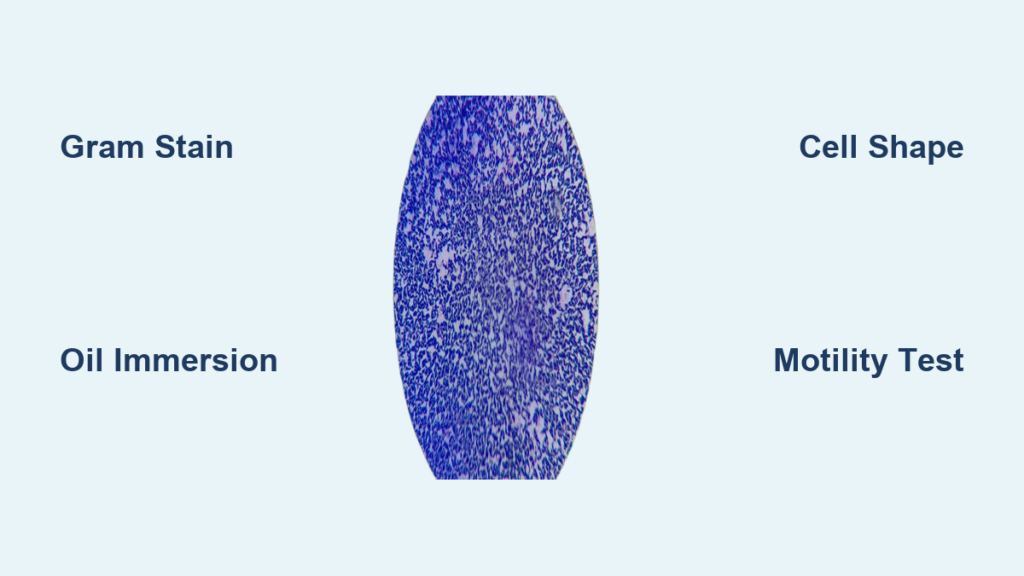
Master the Gram Stain Technique

Gram staining is the cornerstone of bacterial classification. This differential technique divides bacteria into Gram-positive and Gram-negative based on cell wall structure, guiding antibiotic selection and diagnosis.
Understand Gram-Positive vs. Gram-Negative Results
- Gram-positive bacteria have a thick peptidoglycan layer that traps crystal violet dye, appearing purple or blue-violet.
- Examples: Staphylococcus aureus, Streptococcus pneumoniae, Bacillus subtilis
- Gram-negative bacteria have a thin peptidoglycan layer and an outer membrane with lipopolysaccharides (LPS). They lose the primary stain during decolorization and take up safranin, appearing pink or red.
- Examples: Escherichia coli, Salmonella enterica, Vibrio cholerae
This distinction is medically crucial—Gram-negative bacteria are often more resistant due to their protective outer membrane.
Follow the Gram Stain Steps
- Crystal violet (1 min) → all bacteria stain purple.
- Iodine mordant (1 min) → locks dye into thick walls.
- Decolorize with alcohol/acetone (5–15 sec) → removes stain from Gram-negative cells.
- Safranin counterstain (1 min) → stains Gram-negative cells pink.
Rinse gently between steps. Timing is critical: over-decolorizing can make Gram-positives appear false-negative; under-decolorizing makes Gram-negatives look false-positive.
Use the Right Microscopy Technique

The choice of microscopy technique affects contrast, resolution, and whether you can observe live or fixed samples.
Choose Between Brightfield, Phase Contrast, and Darkfield
- Brightfield microscopy: Standard method; best for stained, fixed samples. Bacteria appear dark against a bright background. Ideal for Gram-stained smears.
- Phase contrast microscopy: Enhances contrast in live, unstained specimens by detecting refractive index differences. Reveals internal density and motility. Perfect for watching E. coli swim in real time.
- Darkfield microscopy: Uses oblique light to make bacteria glow against a dark background. Excellent for detecting spirochetes like Treponema pallidum, which are hard to stain.
Each method serves a unique purpose depending on whether you need to study structure, movement, or viability.
Apply Oil Immersion Correctly
To see fine bacterial details, use the 100X objective with immersion oil. Without oil, light bends at the air-glass interface, reducing resolution.
Steps:
1. Focus at 400X using the 40X objective.
2. Rotate nosepiece halfway.
3. Add a drop of immersion oil on the coverslip.
4. Swing the 100X lens into place—it should dip into the oil.
5. Use only the fine focus knob.
Never use oil with lower objectives. Always clean the 100X lens with lens paper and 70% ethanol after use.
Prepare Slides Like a Pro
Proper slide preparation ensures accurate, clear observations.
Make a Quality Smear
- Clean slide with alcohol.
- Place a small drop of culture.
- Spread into a thin, translucent film.
- Air-dry completely.
- Heat-fix by passing through flame 2–3 times.
Heat fixation adheres cells, kills pathogens, and prepares for staining. Avoid overheating, which distorts cells.
Try Wet Mounts for Live Observation
To observe motility:
1. Place a drop of liquid culture on a slide.
2. Gently lower a coverslip to avoid bubbles.
3. Observe immediately under phase contrast or darkfield at 400X or 1000X.
Motile species like Salmonella enterica show peritrichous flagella movement, while Vibrio cholerae spins rapidly with a single polar flagellum. Limit observation—bacteria dry out quickly.
Spot Key Structures and Features
While light microscopy can’t show ribosomes or plasmids, several specialized structures are visible with proper staining.
Detect Capsules with Negative Staining
Some bacteria, like Streptococcus pneumoniae, have a polysaccharide capsule that resists immune attack. Use negative staining:
– Apply India ink or nigrosin.
– Background stains dark; capsule appears as a clear halo around the cell.
Confirms virulence and aids identification.
Identify Endospores Using Special Stains
Bacillus and Clostridium form endospores under stress. Use Schaeffer-Fulton method:
1. Steam with malachite green to penetrate spores.
2. Decolorize with water.
3. Counterstain with safranin.
Result: Green spores inside pink vegetative cells—oval or spherical, often central or terminal.
Visualize Mycobacteria with Acid-Fast Staining
Mycobacterium tuberculosis has waxy mycolic acids in its wall. Use Ziehl-Neelsen method:
– Carbol fuchsin (heated to penetrate).
– Acid-alcohol decolorizer—only mycobacteria retain red dye.
– Methylene blue counterstain.
Result: Bright red rods on a blue background—diagnostic for tuberculosis.
Know the Limits of Light Microscopy
Even with optimal technique, light microscopes have physical constraints.
Accept Resolution Boundaries
Maximum resolution is 200 nm:
– Can distinguish two cells 0.2 µm apart.
– Cannot see ribosomes (20 nm), plasmids, or viruses.
– Viruses require electron microscopy (TEM/SEM).
Magnifying beyond 1000X without better resolution leads to empty magnification—larger but blurry images.
Turn to Electron Microscopy When Needed
- TEM: Reveals internal structures—nucleoid, ribosomes, flagellar base.
- SEM: Shows 3D surface details—pili, fimbriae, biofilms.
Used in research and public health, not routine diagnostics.
Follow Safety and Maintenance Protocols
Working with bacteria requires strict hygiene and equipment care.
Handle Slides Safely
- Use sterile loops and gloves.
- Work near a Bunsen burner or in a biological safety cabinet.
- Autoclave or disinfect slides before disposal.
- Label with organism and biosafety level.
Never leave wet mounts unattended—evaporation damages the stage.
Maintain Your Microscope
- Clean lenses with lens paper only.
- Remove oil immediately with 70% ethanol.
- Store with lowest objective in place and dust cover on.
- Check condenser and alignment regularly.
A well-maintained microscope ensures reliable results.
Document and Interpret Your Findings
Accurate observation requires systematic documentation.
Record Observations Systematically
Note:
– Total magnification (e.g., 1000X)
– Staining method
– Shape and arrangement
– Color reaction
– Special features: capsules, spores, motility
– Density: scant, moderate, heavy
Example: “Gram-negative rods in pairs and singles, moderate density, no spores or capsules observed at 1000X oil immersion.”
Capture Photomicrographs
Use a microscope camera:
– Label with specimen, stain, magnification.
– Adjust lighting and focus before capture.
– Store files clearly (e.g., E_coli_Gram_1000X.jpg).
Images support teaching, diagnosis, and publication.
Recognize Public Health Implications
Microscopy has real-world impact in fighting antibiotic resistance and outbreaks.
Link Microscopy to Antibiotic Use
Rapid identification guides therapy:
– Gram-positive cocci in clusters → likely Staphylococcus—possible MRSA.
– Gram-negative rods in urine → likely E. coli or Klebsiella—common UTI cause.
Early ID reduces broad-spectrum antibiotic use, slowing resistance.
Understand Resistance Risks
CDC reports:
– 2 million Americans infected annually with resistant bacteria.
– 23,000 die yearly.
– MRSA is a leading hospital-acquired infection.
Microscopy helps detect resistant strains early, enabling targeted treatment and containment.
Observing bacteria under the microscope combines technical skill with scientific insight. From recognizing Vibrio cholerae’s comma shape to confirming Mycobacterium tuberculosis with acid-fast staining, each detail contributes to our understanding of microbial life. By mastering staining, using oil immersion correctly, and respecting resolution limits, you gain insights that impact health, research, and policy. Always document precisely, work safely, and remember: bacteria aren’t just pathogens—they’re essential partners in life. How we observe them shapes how we treat them.