
Have you ever peered through a microscope and wondered just how much larger the tiny world before you truly appears? Knowing how to calculate total magnification of a microscope is more than a classroom exercise—it’s a critical skill for accurate scientific observation, precise measurement, and reliable data reporting. Whether you’re a student examining onion cells or a researcher analyzing microbial structures, understanding the true scale of what you’re seeing ensures your interpretations are grounded in reality.
Total magnification isn’t simply “how zoomed in” the image looks—it’s a calculated value based on the combined power of all optical components in the system. This number tells you exactly how many times larger the specimen appears compared to its actual size, typically expressed as a multiple like 40x, 400x, or even 1000x. Without correctly determining this value, any size estimates or comparisons you make could be significantly off.
In this guide, you’ll learn the exact formulas for calculating total magnification across different microscope types, how to account for often-overlooked components like intermediate lenses and digital adapters, and how to avoid common errors that compromise accuracy. You’ll also discover how magnification impacts image quality and why maximizing zoom doesn’t always mean better results. By the end, you’ll be able to confidently calculate total magnification—whether you’re using a basic compound scope or a high-resolution digital imaging system.
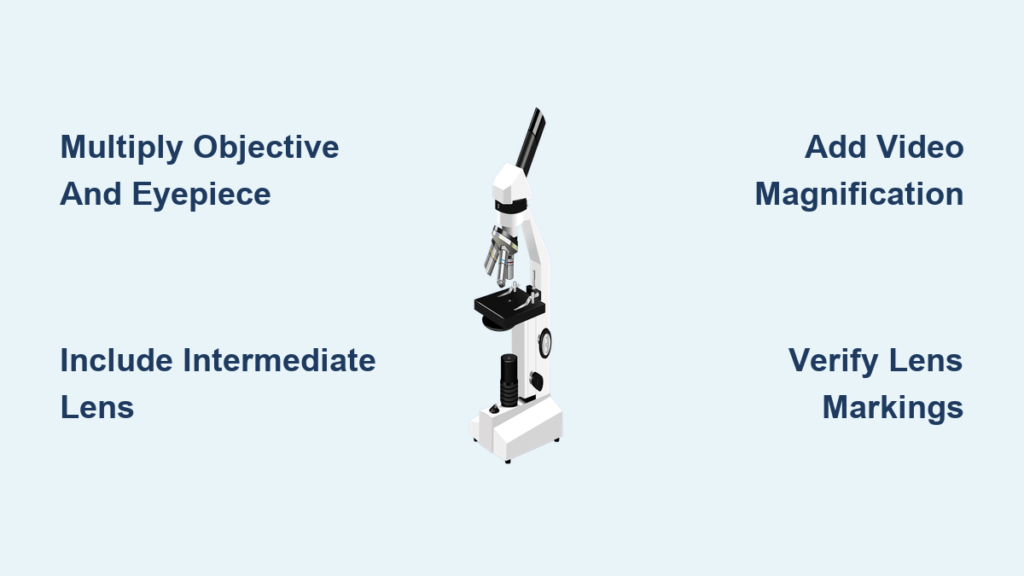
Multiply Objective and Eyepiece Magnifications
The foundation of all microscope magnification calculations is this simple formula:
Total Magnification = Objective Lens Magnification × Eyepiece (Ocular) Lens Magnification
This equation applies to standard compound light microscopes found in schools, labs, and clinics. The result is a unitless number followed by an “x” (e.g., 400x), indicating how many times the specimen is enlarged.
For example:
– Objective: 40x
– Eyepiece: 10x
→ 40 × 10 = 400x total magnification
This means the specimen appears 400 times larger than its actual size. Always verify the magnification values engraved on the lenses—never assume. Some microscopes use non-standard eyepieces (like 15x or 20x), and using the wrong value can throw off your entire calculation.
Magnification Is a Ratio, Not a Measurement
It’s essential to understand that magnification is not a physical dimension like millimeters or microns. Instead, it’s a scaling factor—a ratio that describes how much larger the image appears. This distinction becomes crucial when estimating actual specimen size or comparing results across different setups.
When the Basic Formula Falls Short
While the standard formula works for most educational microscopes, advanced or digital systems often include additional optical components that alter the final image size. In these cases, the formula must be expanded to include every element that affects magnification.
Identify Objective Lens Power
The objective lens, located just above the specimen, provides the primary magnification. It creates a real, magnified image inside the microscope body, which the eyepiece then further enlarges.
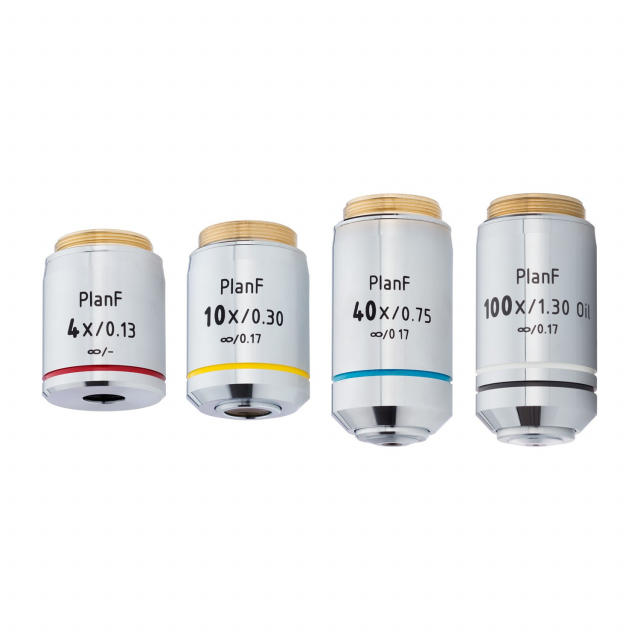
Objective lenses are typically labeled with their magnification and numerical aperture. The most common types include:
- Scanning (4x): Best for locating specimens due to its wide field of view.
- Low Power (10x): Ideal for initial focusing and general observation.
- High Power (40x): Used for detailed study of cellular structures.
- Oil Immersion (100x): Required for viewing bacteria and ultra-fine details, using immersion oil to improve resolution.
Key Considerations
- Resolution vs. Magnification: Higher magnification objectives generally have higher numerical apertures, which improve resolution—the ability to distinguish closely spaced objects. Without sufficient resolution, increased magnification leads to “empty magnification,” where the image is larger but no additional detail is visible.
- Working Distance Shrinks: As magnification increases, the space between the lens and slide decreases. Always use caution when switching to high-power objectives to avoid damaging the slide or lens.
- Start with 4x: Begin focusing with the scanning objective to locate the specimen safely and efficiently.
Determine Eyepiece Magnification

The eyepiece (or ocular lens) magnifies the real image produced by the objective and projects it to your eye. Most standard eyepieces are 10x, but 15x and 20x models are also common.
Fixed vs. Zoom Eyepieces
- Fixed Magnification: Labeled clearly (e.g., 10x). Use this exact value in calculations.
- Zoom Eyepieces: Allow variable magnification (e.g., 10x–20x). In calculations, use the current setting, not the range.
For example:
– A 40x objective with a 15x eyepiece gives 600x total magnification, not 400x.
– Assuming a 10x eyepiece when it’s actually 15x leads to a 50% error.
Always check the eyepiece marking before use. Damaged or unmarked eyepieces should be replaced or verified with calibration tools.
Include Intermediate Lens Magnification

Some microscopes include intermediate lenses (also called magnification changers) in the body tube. These can add extra magnification (e.g., 1.5x or 2x) and must be included in the total calculation.
Updated Formula
Total Magnification = Objective × Eyepiece × Intermediate Lens
For example:
– Objective: 40x
– Eyepiece: 10x
– Intermediate: 2x
→ 40 × 10 × 2 = 800x
Ignoring the intermediate lens would give 400x, half the actual magnification.
How to Spot Intermediate Lenses
- Look for a magnification knob or lever on the microscope body.
- Check the manufacturer’s manual.
- Some digital systems automatically apply intermediate magnification during imaging mode changes.
Calculate Digital Microscope Magnification
In digital microscopy, the image is captured by a camera and displayed on a screen, so total magnification includes the monitor size.
Digital Magnification Formula
Total Magnification = Objective × Adapter × Video Magnification
Where:
– Video Magnification = Monitor Diagonal (mm) ÷ Sensor Diagonal (mm)
Example Calculation
- Objective: 10x
- Adapter: 0.45x
- Sensor (1/2″): ~8 mm
- Monitor (19″): ~482.6 mm
→ Video Magnification = 482.6 ÷ 8 = 60.3x
→ Total = 10 × 0.45 × 60.3 = 271.35x
The specimen appears about 271 times larger on screen.
Use the Video Magnification Reference Table
To simplify digital calculations, refer to this table:
| CCD Size | 19″ Monitor | 27″ Monitor |
|---|---|---|
| 1/2″ (~8 mm) | 60.3x | 85.7x |
| 1/3″ (~6 mm) | 80.4x | 114.3x |
Multiply the video magnification by objective and adapter values for total on-screen magnification.
Pro Tip: Larger monitors increase apparent magnification, but resolution depends on the camera sensor, not screen size.
Estimate Specimen Size Accurately
Once you know total magnification, you can estimate real size:
Real Size = Measured Size on Image ÷ Total Magnification
Example:
- Measured length: 100 mm
- Total magnification: 271.35x
→ Real Size = 100 ÷ 271.35 ≈ 0.37 mm
For optical microscopes, use a stage micrometer and ocular reticle for direct measurement.
Avoid Common Magnification Mistakes
Frequent errors include:
– Assuming all eyepieces are 10x
– Ignoring intermediate lenses
– Using zoom eyepieces at incorrect settings
– Failing to calibrate with a stage micrometer
These mistakes can lead to 50–100% errors in reported magnification.
Best Practices for Reliable Results
- Verify all lens markings before use.
- Include every optical element in your calculation.
- Calibrate regularly with a stage micrometer.
- Document lens combinations for reproducibility.
- Start with low magnification to avoid damage.
- Respect resolution limits—don’t chase empty magnification.
Summary: Master Microscope Magnification
To calculate total magnification:
– Optical: Objective × Eyepiece
– With intermediate lens: Include magnification changer
– Digital: Add video magnification based on sensor and monitor
Always verify components, avoid assumptions, and calibrate. Accurate magnification ensures your observations reflect reality—essential for education, research, and diagnostics. With this knowledge, you can confidently measure, compare, and report with precision.


