
Examining urine under a microscope is a cornerstone of clinical diagnostics, offering a window into kidney function and urinary tract health. While dipstick tests provide rapid screening for protein, blood, glucose, and infection, they can’t reveal cellular details or structural abnormalities. That’s where microscopic examination of urine sediment becomes indispensable. By identifying red and white blood cells, epithelial cells, casts, and crystals, this technique helps differentiate between glomerular and non-glomerular sources of hematuria, confirms infections, and flags early signs of kidney disease. Whether you’re evaluating unexplained proteinuria, suspected pyelonephritis, or acute kidney injury, mastering how to examine urine under microscope transforms a routine test into a powerful diagnostic tool. In this guide, you’ll learn the correct preparation, identification, and interpretation methods to ensure accurate, clinically relevant results.
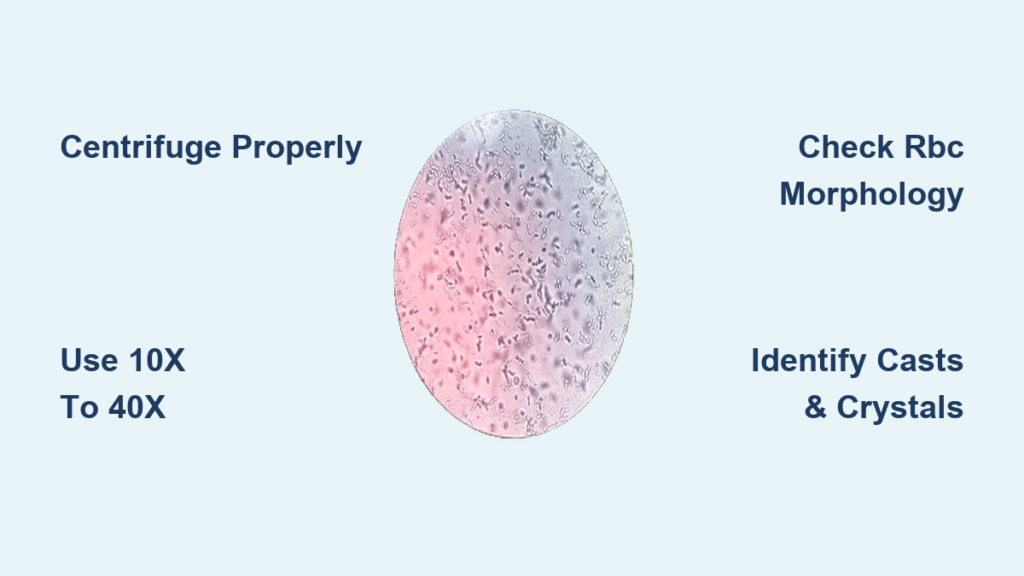
Prepare the Urine Sample Properly
Accurate microscopic analysis begins long before the slide reaches the microscope—proper sample handling is critical.
Centrifuge the Urine Specimen Correctly
Start with 10–15 mL of well-mixed, fresh urine in a conical centrifuge tube. Urine should ideally be examined within one hour of collection; delays lead to cell lysis, bacterial overgrowth, or crystal precipitation, all of which distort results. Centrifuge at 1500–2000 rpm for 5 minutes to pellet the sediment. After spinning, carefully pour off the supernatant, leaving 0.5–1 mL above the sediment to avoid disturbing the pellet. Then, gently tap or flick the tube to resuspend the sediment evenly.
Pro Tip: Always label tubes clearly and use consistent centrifugation settings across your lab to ensure reproducibility.
Transfer Sediment to Slide Without Artifacts
Using a micropipette or Pasteur pipette, transfer a small drop of the resuspended sediment to a clean glass slide. Immediately cover it with a 22 mm × 22 mm coverslip. Apply gentle pressure to spread the drop evenly without trapping air bubbles, which can mimic cells or crystals.
⚠️ Common Mistake: Too much fluid causes overflow and makes focusing difficult. Use just enough to fill the space under the coverslip—about 20–30 µL.
Set Up the Microscope for Optimal Viewing
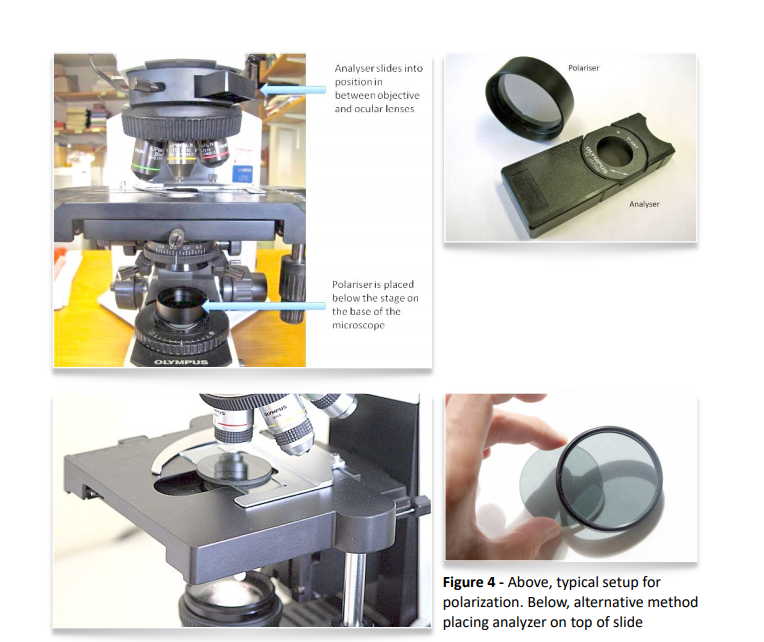
Even perfect sample prep fails without proper microscope settings. Adjusting magnification and lighting dramatically improves detection of subtle findings.
Use the Right Magnification Sequence
Begin your examination under low power (10x objective) to assess overall particle distribution and locate larger structures like casts. Scan at least 10 fields systematically—like mowing a lawn—to avoid missing rare but significant elements. Then switch to high power (40x objective) to examine cell morphology, bacteria, and crystals in detail. Reserve oil immersion (100x objective) for cases where bacterial identification or confirmation of dysmorphic red blood cells is needed.
Visual Cue: Hyaline casts are nearly invisible under bright light but appear as faint, transparent rods under reduced illumination.
Control Light and Focus for Better Contrast
Open the iris diaphragm too wide, and transparent elements like hyaline casts disappear. Instead, partially close the diaphragm to reduce light intensity and enhance contrast. This technique, known as sub-stage illumination adjustment, makes translucent particles stand out against the background. Begin focusing with the coarse knob, then fine-tune using the fine adjustment to bring delicate structures into sharp view.
Why It Matters: Transparent casts and dysmorphic RBCs are easily missed with excessive lighting—proper contrast is key.
Identify Red Blood Cells and Determine Their Origin
Finding red blood cells (RBCs) in urine—microscopic hematuria—is defined as two or more RBCs per high-powered field (HPF) across multiple fields. But more important than the count is the morphology.
Count RBCs Across Multiple Fields
Systematically scan at least 10 HPFs at 40x magnification and calculate an average. Report findings as “X–Y RBCs/HPF.” Be cautious interpreting isolated findings—transient hematuria can occur after vigorous exercise, catheterization, or during menstruation.
Threshold Alert: Persistent hematuria warrants further evaluation, including imaging and nephrology referral if glomerular disease is suspected.
Differentiate Isomorphic vs Dysmorphic RBCs
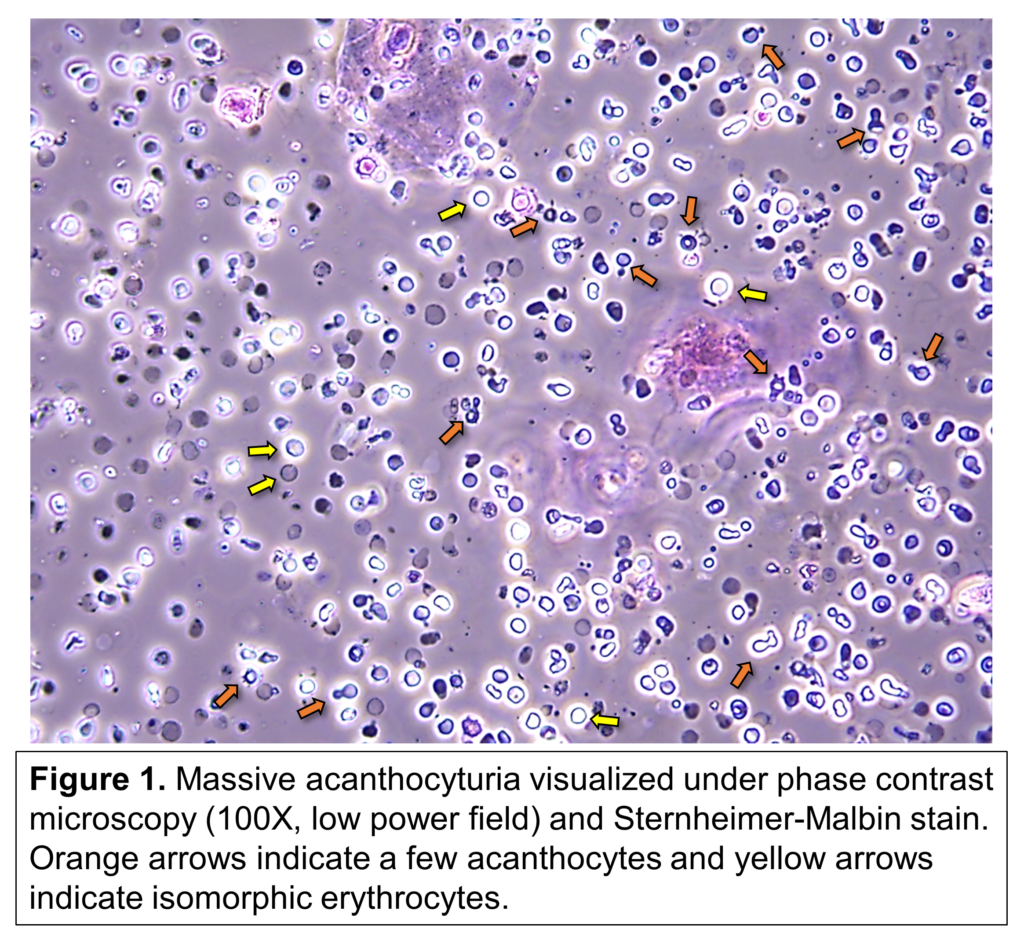
The shape of RBCs reveals the source of bleeding.
Isomorphic Red Blood Cells
These appear uniform, round, and identical to those in peripheral blood. They indicate non-glomerular bleeding, such as:
– Urinary tract infection
– Kidney stones
– Bladder tumors
– Trauma or instrumentation
Since these cells pass through an intact glomerular filtration barrier, their shape remains unchanged.
Dysmorphic Red Blood Cells
These show irregular shapes—budding, blebbing, or crenated forms—due to damage as they traverse inflamed or abnormal glomerular membranes. Their presence strongly suggests glomerular disease, including:
– IgA nephropathy
– Lupus nephritis
– Post-streptococcal glomerulonephritis
Expert Note: If over 80% of RBCs are dysmorphic, a glomerular cause is highly likely. This finding should prompt evaluation for proteinuria, elevated creatinine, or systemic illness.
Detect White Blood Cells and Signs of Infection
White blood cells (WBCs) in urine signal inflammation or infection, most commonly neutrophils.
Recognize Neutrophils in Urine Sediment
Neutrophils are larger than RBCs and have granular cytoplasm. Though their multilobed nuclei may not be visible at 40x, their clumping behavior and association with bacteria are telling clues. A positive leukocyte esterase on dipstick usually correlates with WBC presence.
Clinical Link: Bacteriuria with WBCs strongly supports a diagnosis of urinary tract infection.
Understand Sterile Pyuria
Sterile pyuria—WBCs in urine with negative culture—should never be dismissed. It may indicate:
– Drug-induced acute interstitial nephritis (e.g., from NSAIDs, proton-pump inhibitors)
– Renal tuberculosis
– Urolithiasis causing mucosal irritation
– Sexually transmitted infections like chlamydia
Clinical Tip: In patients with unexplained fever, rash, or rising creatinine, consider discontinuing suspect medications and ordering a urine PCR for Mycobacterium tuberculosis.
Identify Eosinophiluria When Present
Eosinophils are rare but significant. Best seen with Hansel’s stain or phase contrast microscopy, they contain bright orange-red cytoplasmic granules. Their presence is a classic marker of acute interstitial nephritis, especially when drug-induced.
Limitation: Many labs don’t routinely stain urine for eosinophils. Suspect it clinically when WBCs appear without infection and kidney function declines.
Analyze Epithelial Cells by Type and Significance
Epithelial cells in urine originate from different parts of the urinary tract and vary in meaning.
Classify the Three Main Types
Squamous Epithelial Cells
Large, flat cells with irregular edges and small central nuclei. They usually come from the urethra or vaginal flora and often indicate contamination, especially in female patients.
Action Step: If numerous squamous cells appear, consider repeating the test with a clean-catch midstream technique.
Transitional Epithelial Cells
Round or polygonal cells shed from the bladder, ureters, or renal pelvis. A few are normal; increased numbers suggest irritation, infection, or malignancy.
Red Flag: Clusters of atypical transitional cells may indicate urothelial carcinoma—refer for cystoscopy if suspected.
Renal Tubular Epithelial Cells
Slightly larger than WBCs, cuboidal in shape, these cells come from the renal tubules. Their presence indicates intrinsic kidney damage, such as:
– Acute tubular necrosis (ATN)
– Nephrotoxic injury (e.g., from aminoglycosides)
– Viral infections (e.g., adenovirus, BK virus)
Key Clue: When seen with granular casts, renal tubular cells strongly support a diagnosis of ATN.
Interpret Casts and Crystals Quickly and Accurately
Though casts and crystals require deeper study, recognizing basic types is essential for timely diagnosis.
Know What Common Casts Mean Clinically

Casts form in the distal tubules and reflect underlying pathology.
| Cast Type | Appearance | Clinical Significance |
|---|---|---|
| Hyaline | Clear, refractile cylinders | Normal in dehydration; increased with exercise |
| RBC Casts | Red-brown, cellular rods | Glomerulonephritis, vasculitis |
| WBC Casts | Pale, granular with white cells | Pyelonephritis, interstitial nephritis |
| Granular | Coarse or fine granules | Acute kidney injury, ATN |
| Waxy | Broad, glassy, cracked look | Chronic kidney disease |
Red Flag: RBC casts are pathognomonic for glomerular disease—always investigate further with serologic tests (e.g., ANA, anti-GBM, ANCA).
Recognize Key Crystals by Shape and pH
Crystals vary by urine pH and solute levels.
- Calcium oxalate: Envelope-shaped; seen in ethylene glycol poisoning or hyperoxaluria.
- Uric acid: Yellow-brown, diamond-shaped; associated with gout or tumor lysis.
- Triple phosphate (struvite): Coffin-lid shaped; linked to UTIs with Proteus or other urea-splitting bacteria.
- Cystine: Hexagonal; diagnostic of cystinuria, a genetic disorder.
Caution: Some crystals form after collection due to refrigeration. Correlate findings with clinical symptoms and pH.
Troubleshoot Common Microscopy Errors
Even experienced clinicians make mistakes—avoid these pitfalls.
Prevent Contamination
Vaginal secretions can mimic WBCs; menstrual blood causes false hematuria. Always obtain clean-catch midstream samples when possible. For catheterized specimens, ensure non-oil-based lubricants are used—oil droplets resemble WBCs under the microscope.
Avoid Misidentification
- Yeast vs RBCs: Yeast (e.g., Candida) are larger, may bud, and don’t lyse in water. Add acetic acid—RBCs will burst; yeast won’t.
- Oil droplets vs cells: Use clinical context—was the patient recently catheterized?
Pro Tip: When in doubt, repeat the test or consult a pathologist.
Document and Report Findings Clearly
Clear, standardized reporting ensures proper follow-up.
Use Consistent Terminology
Report semi-quantitatively:
– Few, moderate, many – for cells and casts
– 1+ to 4+ or actual counts per HPF
Example:
“10–15 RBCs/HPF, predominantly dysmorphic; 20–25 WBCs/HPF; rare granular casts; no crystals.”
Include interpretive comments:
– “Findings suggestive of glomerulonephritis”
– “Squamous cells indicate possible contamination”
Correlate With Clinical Context
Never interpret in isolation. Combine microscopy with:
– Patient symptoms (dysuria, flank pain)
– Dipstick results (proteinuria, nitrites)
– Serum creatinine, eGFR, and imaging
Next Step: If RBC casts or heavy proteinuria are present, refer to nephrology promptly.
Final Note: Learning how to examine urine under microscope equips you to detect early kidney disease, infection, and metabolic disorders with precision. With standardized technique, attention to morphology, and clinical correlation, this simple test becomes a diagnostic powerhouse. Practice regularly, document meticulously, and always link lab findings to the patient’s full story.


