Peering at yeast under a microscope transforms an invisible biological process into a vivid, dynamic spectacle. At just 3–10 micrometers in size, yeast cells like Saccharomyces cerevisiae are too small to see with the naked eye—but under magnification, their world comes alive. You’ll witness ovoid cells floating in fluid, some sprouting smaller buds as they reproduce, others surrounded by shimmering carbon dioxide bubbles from active fermentation. This window into microbial life isn’t just fascinating—it’s practical. Whether you’re a home brewer checking yeast health, a baker confirming dough readiness, or a student exploring cell biology, observing yeast under the microscope provides real-time insight into one of nature’s most essential microorganisms.
Understanding what you’re seeing—and how to see it clearly—starts with knowing the tools, techniques, and biological clues revealed at different levels of magnification. From basic wet mounts to advanced fluorescence imaging, microscopy unlocks critical information about cell viability, contamination, and metabolic activity. Below, we break down exactly how to prepare, view, and interpret yeast under the lens, and why these observations matter across science and industry.
How to Clearly See Yeast Cells: Equipment and Setup
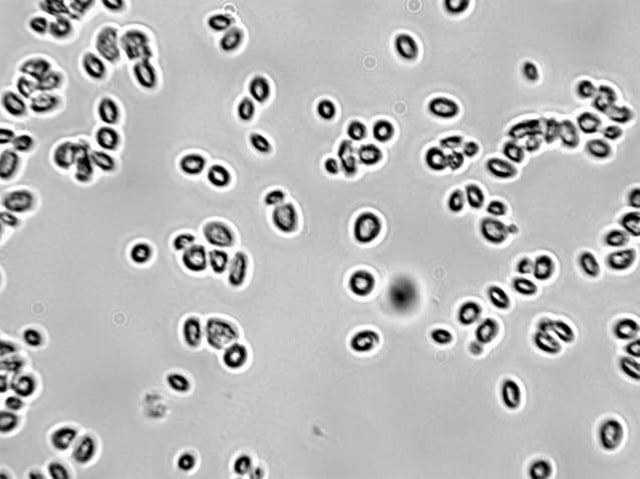
To observe yeast effectively, your microscope must meet specific requirements. 400x magnification (achieved with a 40× objective and 10× eyepiece) is the minimum for identifying individual yeast cells. At this level, they appear as bright, refractile ovals or spheres, clearly distinguishable from the much smaller bacteria. For finer details—like budding necks, vacuoles, or nuclei—1000x magnification using a 100× oil immersion objective is essential.
The type of microscopy also affects image quality:
– Brightfield microscopy works for stained samples but offers poor contrast for live, unstained yeast.
– Phase contrast enhances transparency differences, making organelles visible without killing the cells—ideal for observing active fermentation.
– Differential Interference Contrast (DIC) adds a 3D-like effect, excellent for research-grade imaging.
– Fluorescence microscopy, when paired with dyes like DAPI or fluorescein, reveals DNA, mitochondria, and viability status.
Essential accessories include a mechanical stage for precise slide movement, a condenser with iris diaphragm to control light and contrast, and a trinocular head if you plan to attach a camera. Entry-level models like the Motic BA210E are sufficient for hobbyists, while professionals may prefer the BA310E or BA410E with full phase contrast and fluorescence capabilities.
Preparing a Yeast Sample: Simple and Advanced Methods
You don’t need a lab to see yeast under the microscope. A basic wet mount can be made using supermarket yeast:
1. Mix 1 tsp active dry yeast with ¼ cup warm water (~90°F / 32°C) and 1 tsp sugar.
2. Wait 5–10 minutes until foaming begins—this confirms CO₂ production and metabolic activity.
3. Let the mixture settle, then draw a drop from the cloudy bottom layer.
4. Place it on a clean slide and gently lower a coverslip to avoid bubbles.
View this at 400x to see individual cells, some with visible buds and surrounding gas bubbles. Remember: any apparent “movement” is due to fluid currents or Brownian motion, not active swimming—yeast lack flagella and cannot move on their own.
For more accurate analysis, advanced methods include heat-fixing (which kills and adheres cells for staining), smear preparation, and oil immersion for high-resolution imaging. Always use immersion oil only with the 100× objective and clean it off immediately with lens paper to prevent damage.
Identifying Yeast vs. Bacteria and Mold

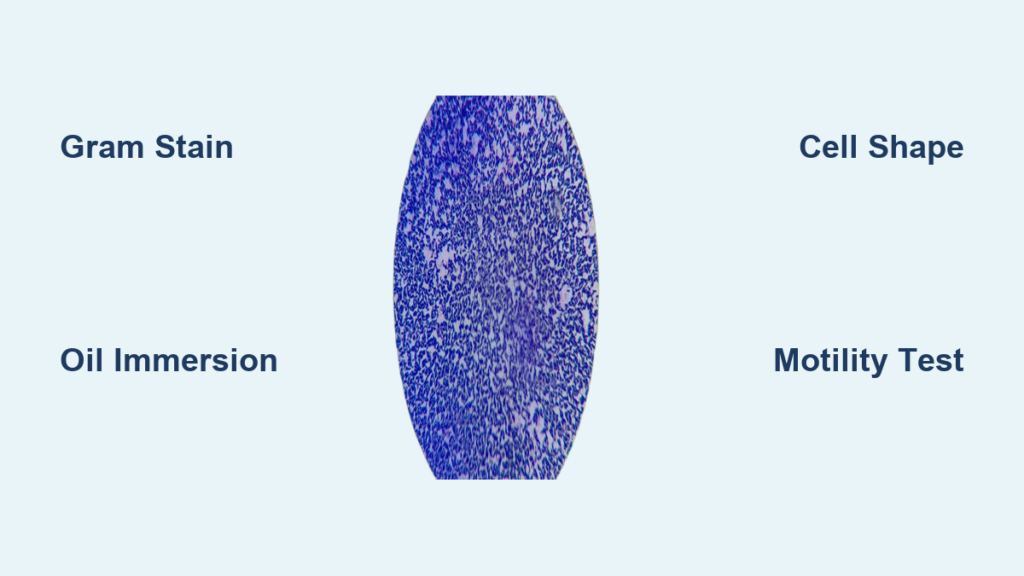
One of the most valuable uses of microscopy is distinguishing yeast from contaminants. Yeast cells (3–10 µm) are significantly larger than most bacteria, which are typically 0.5–1 µm wide. Under 400x, yeast appear as large, round or ovoid structures, while bacteria look like tiny rods, dots, or filaments.
Key visual clues:
– Round, budding cells with CO₂ bubbles = likely healthy yeast.
– Slender rods among round cells = possible bacterial contamination (e.g., Lactobacillus or Acetobacter).
– Long, branching filaments = mold, not yeast.
While microscopy can’t confirm species definitively, it provides rapid, real-time quality control. In brewing or baking, spotting rod-shaped bacteria early can prevent spoiled batches. For absolute identification, combine microscopy with agar plating, gram staining, or PCR.
Watching Fermentation in Action: Bubbles, Budding, and Metabolism
One of the most captivating sights under the microscope is CO₂ bubble formation during fermentation. As yeast metabolize sugar, CO₂ dissolves in the liquid until saturation, then nucleates into visible bubbles—often starting on the cell surface. These grow and detach due to buoyancy, creating a fizzy halo around active cells.
This visual confirms metabolic activity and healthy fermentation. Since ethanol is produced in equal molar amounts to CO₂ (via the reaction: $ C_6H_{12}O_6 \rightarrow 2CO_2 + 2C_2H_5OH $), observing consistent bubbling indirectly verifies alcohol production—useful for brewers before taking hydrometer readings.
You can also observe budding, the asexual reproduction method of yeast. At 1000x, budding appears as small protrusions from mother cells, constricted at the neck. A high budding rate indicates vigorous, healthy cultures; few or no buds may signal stress, aging, or nutrient depletion.
With a trinocular microscope and camera, you can record time-lapse videos of budding cycles (every 90–120 minutes under ideal conditions), bubble release, or colony development—powerful tools for education or research.
Counting and Assessing Viability with a Hemocytometer

For precise control in brewing or baking, knowing how many yeast cells you have—and how many are alive—is critical. A hemocytometer is a specialized slide with a laser-etched grid that allows cell counting in a known volume (0.1 mm depth).
To use it:
1. Mix your yeast 1:1 with 0.1% methylene blue—a viability stain.
2. Load the chamber via capillary action.
3. Count cells in the four corner squares (each holds 0.0025 µL).
4. Calculate concentration:
$$
\text{Cells/mL} = \text{Average count} \times 10^4 \div \text{Dilution factor}
$$
Live cells exclude the dye and remain colorless; dead cells have compromised membranes and stain blue. Viability is calculated as:
$$
\text{Viability (\%)} = \left( \frac{\text{Unstained cells}}{\text{Total cells}} \right) \times 100
$$
Aim for >80% viability in starters. To avoid clumping, vortex the sample and use sterile saline instead of water. Dilute dense cultures (e.g., 1:10 or 1:100) to ensure accurate counts.
Fluorescence Microscopy: Seeing Inside Living Yeast
For deeper analysis, fluorescence microscopy reveals internal structures and physiological states:
– FDA (fluorescein diacetate): Glows green in live cells—confirms viability.
– Rhodamine 123: Labels mitochondria, indicating respiratory health.
– DAPI or Hoechst 33342: Bind DNA, showing nuclei and cell cycle stages.
– Acridine orange: Stains both DNA (green) and RNA (red), useful for studying gene expression.
These require a fluorescence-capable microscope with appropriate filter cubes (e.g., FITC for green, TRITC for red). Use low light exposure to avoid killing live cells during imaging.
Real-World Applications: Brewing, Baking, and Beyond
In brewing, microscopy ensures proper pitching rates (6–20 million cells/mL, depending on wort gravity), checks viability before fermentation, and detects contamination. Under-pitching stresses yeast, causing off-flavors; over-pitching leads to rapid, flavorless fermentation.
In baking, seeing budding and CO₂ bubbles confirms yeast is active before dough mixing. For sourdough starters, regular microscopic checks prevent mold or bacterial overgrowth.
In research, S. cerevisiae is a model eukaryote—its genome is fully sequenced, and it shares conserved pathways with human cells. Nobel Prize-winning discoveries in cell cycle regulation and autophagy were made using yeast. Today, it’s used in drug screening, cancer research, and synthetic biology.
Final Thoughts: A Window into the Microbial World
Viewing yeast under the microscope turns abstract biology into something tangible and actionable. From confirming fermentation to ensuring culture purity, the ability to see, count, and assess yeast empowers bakers, brewers, educators, and scientists alike. With affordable microscopes and simple techniques, this powerful tool is no longer limited to labs—it’s accessible to anyone curious about the invisible life driving some of humanity’s oldest crafts.