
Your drill bit slips during a critical hole, ruining the material and wasting time. That frustrating wobble isn’t always the bit’s fault—it’s often your drill chuck failing to grip properly. With multiple drill chuck types on the market, selecting the wrong one causes inaccurate holes, damaged shanks, and dangerous kickbacks. This guide cuts through the confusion by revealing exactly which chuck types solve common problems like slippage and vibration. You’ll learn to decode Jacobs Tapers, avoid capacity mismatches, and leverage professional-grade specs like 0.005″ TIR for flawless results every time.
Choosing between keyed and keyless chucks isn’t just about convenience—it’s about matching torque demands to your project. A DIYer changing bits constantly needs different drill chuck types than a metalworker drilling 3/4″ holes in steel. The wrong choice means compromised precision or catastrophic bit ejection. We’ll dissect real specifications from top-tier models like the 0222-0701 and 0222-0706, showing you exactly how capacity, taper size, and runout impact performance. Stop guessing and start drilling with confidence.
Why Your Drill Chuck Slips and How to Fix It Immediately
Bit slippage happens when your chuck can’t maintain grip under torque, causing ruined workpieces and safety hazards. This isn’t random—it’s directly tied to your drill chuck types’ specifications and usage. Three critical factors cause most slippage: incorrect minimum capacity, worn jaws, or mismatched taper sizes. For example, using a 1/16″ bit in a chuck with 3/16″ min capacity (like model 0222-0706) guarantees slippage since the jaws can’t close tightly.
Diagnosing Chuck Slippage in 60 Seconds
Grab a dial indicator and follow these steps:
1. Insert a bit fully into the chuck and tighten firmly
2. Rotate the chuck slowly while watching the bit tip
3. Wobble exceeding 0.005″ means excessive TIR (Total Indicator Runout)
4. Visible gaps between jaws indicate minimum capacity mismatch
5. Grinding noise when tightening signals damaged teeth or wrong key size
Replace chucks showing more than 0.010″ runout—professional models like the 0222-0702 maintain 0.005″ TIR for precision work.
Quick Fixes for Loose Drill Chucks
For keyless chucks: Apply firm counter-pressure with your non-dominant hand while ratcheting the chuck body clockwise. Listen for 3-5 distinct clicks indicating full jaw engagement. For keyed chucks: Insert the correct key (K4 for model 0222-0702, K5 for 0222-0703), then alternate tightening positions 120 degrees apart until resistance increases sharply. Never use pliers—this damages the gear teeth. If slippage persists after proper tightening, inspect for worn internal threads or mismatched taper sizes.
Keyed vs. Keyless Chucks: Which Stops Bit Slippage?
The core distinction in drill chuck types comes down to tightening mechanism—each with critical performance tradeoffs. Keyless chucks dominate consumer drills for speed, but keyed models deliver the grip strength needed for demanding applications. Your project’s torque requirements should dictate your choice, not convenience alone.
When Keyless Chucks Fail Under Pressure
Keyless chucks rely on hand-tightening via ratcheting mechanisms. While ideal for frequent bit changes in woodworking or light DIY, they struggle under high torque:
– Max torque limit: Typically 25-35 ft-lbs before slippage
– Critical weakness: Can’t achieve the jaw pressure needed for metal drilling or large bits
– Visual cue: Gradual bit rotation within the chuck during operation
– Best for: Frequent bit changes in soft materials (drywall, wood)
If you’re drilling steel or masonry, a keyless chuck’s convenience becomes a liability—opt for keyed models like the 0222-0705 (5/8″ capacity) instead.
Why Heavy-Duty Jobs Demand Keyed Chucks
Keyed chucks use mechanical leverage from the chuck key (K5 for model 0222-0703, K6 for 0222-0706) to achieve jaw pressures impossible by hand. This is non-negotiable for:
– Metalworking: Prevents bit walk during hole starting
– Masonry drilling: Handles hammer-action shock loads
– Large bits (1/2″+): Maintains grip at high torque
– Visual confirmation: Solid “clunk” when key seats fully
Pro tip: Always store your chuck key in the drill’s battery compartment. Using a K4 key on a K5 chuck (common mistake with models 0222-0703/0704) shears gear teeth instantly.
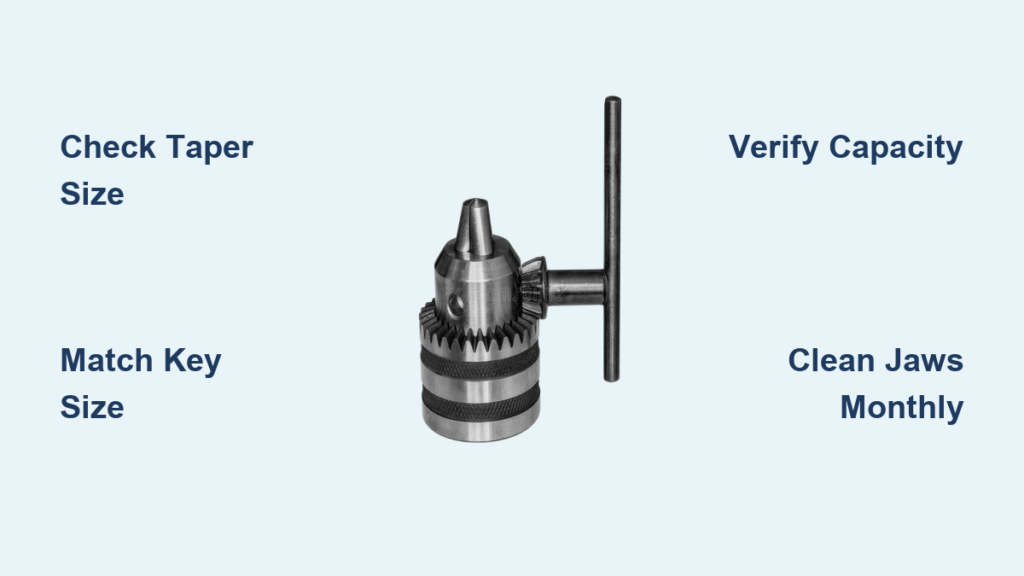
Jacobs Taper Sizes Decoded: JT1 to JT33 Compatibility Guide
Jacobs Taper (JT) is the critical interface between your drill and chuck—mismatched sizes cause dangerous wobble or chuck ejection. Unlike thread mounts, JT uses a self-holding conical fit where precision matters more than force. Your drill’s spindle recess must exactly match the chuck’s taper designation (JT1, JT2, JT3, JT6, or JT33).
How to Identify Your Drill’s Taper Size in 60 Seconds
Grab calipers and measure the spindle recess:
1. JT1: 0.375″ base diameter (fits model 0222-0701)
2. JT2: 0.438″ base diameter (fits model 0222-0702)
3. JT3: 0.625″ base diameter (fits models 0222-0705/0706)
4. JT6: 0.500″ base diameter (fits model 0222-0703)
5. JT33: 0.625″ base diameter with longer taper (fits models 0222-0704/0708)
Critical warning: Never force a JT33 chuck into a JT3 spindle—it appears to fit but causes catastrophic failure under load. Verify with manufacturer specs before installation.
Why Taper Size Dictates Your Maximum Capacity
Taper size directly correlates with torque capacity:
– JT1/JT2: For light-duty (1/4″-3/8″ max capacity)
– JT3/JT33: For heavy-duty (1/2″-3/4″ capacity)
– JT6: Specialized industrial (1/2″ capacity)
A JT1 spindle (model 0222-0701) physically can’t handle the torque of a 3/4″ hole—upgrade to JT3 models like 0222-0706 for construction work.
Why Your Chuck Key Size Must Match Exactly
Chuck key sizes (K2, K4, K5, K6) aren’t interchangeable—using the wrong size destroys your chuck in seconds. Each designation corresponds to the square drive size in the chuck’s gear teeth. The K2 key for model 0222-0701 has a 1/4″ drive, while K6 for 0222-0706 uses 3/8″.
How Wrong Keys Ruin Your Chuck
Forcing a K4 key into a K5 chuck (common with 0222-0703 models) causes:
– Stripped gear teeth: Visible as shiny, rounded edges on the chuck’s outer ring
– Incomplete tightening: Jaw pressure drops 40% even with “full” tightening
– Vibration damage: Accelerates wear on spindle bearings
Always verify: Match the key size stamped on your chuck (e.g., “K5” on model 0222-0704) before tightening. Replacement keys cost $3-5—never improvise with pliers.
Max Capacity Mistakes: Why 1/32″ Min Size Matters
Drill chuck types advertise maximum capacity (1/4″, 1/2″, etc.), but the minimum capacity is equally critical. Using bits smaller than the min size—like a 1/32″ bit in a chuck with 3/16″ min capacity (model 0222-0706)—causes dangerous slippage. All precision chucks in this guide maintain 1/32″ minimum capacity except heavy-duty models.
Avoiding the “Too Small” Trap
Check your smallest bit against the chuck’s min capacity:
– Precision work (0222-0701): 1/32″ min handles micro-drills for electronics
– General DIY (0222-0702): 1/32″ min accommodates most twist bits
– Heavy-duty (0222-0706): 3/16″ min means NO bits under 5mm
Visual check: Insert your smallest bit. If you see light between the jaws when fully closed, the bit is too small—switch to a chuck with lower min capacity.
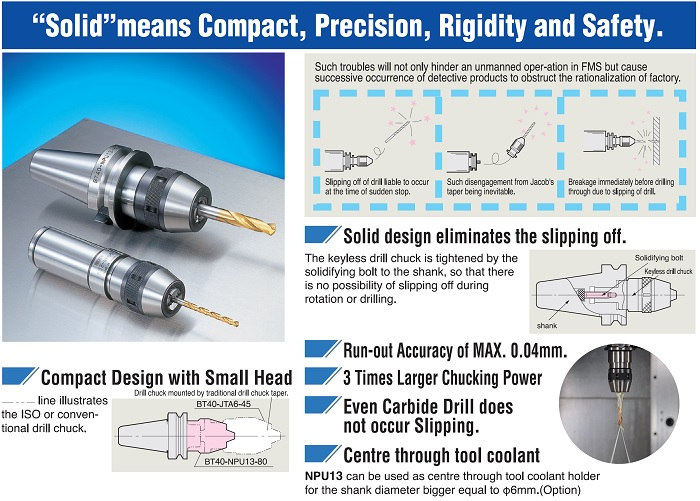
TIR Explained: How 0.005″ Runout Saves Your Project Accuracy

Total Indicator Runout (TIR) measures chuck wobble—lower numbers mean straighter holes. Professional drill chuck types maintain 0.005″ TIR (0.127mm), while cheap chucks often exceed 0.020″. This difference determines whether you drill clean holes or tear out material.
Why 0.005″ TIR is Non-Negotiable for Professionals
At 3,000 RPM, a 0.020″ TIR chuck wobbles 0.040″ at the bit tip—enough to:
– Widen holes by 15% in metal or hardwood
– Snap thin bits during plunge drilling
– Create oval holes in precision work
All models in this guide (0222-0701 through 0222-0708) maintain 0.005″ TIR through heat-treated alloy steel construction. Test yours with a dial indicator—if runout exceeds 0.010″, replace the chuck.
Choosing the Right Drill Chuck: Precision, DIY, or Heavy-Duty?

Match your chuck to the job—not your drill’s default configuration. The wrong drill chuck types waste time and compromise results, even on high-end tools.
Precision Work: Why Model 0222-0701 is Essential
For electronics, jewelry, or fine woodworking:
– Choose: 0222-0701 (1/4″ max, JT1, K2 key)
– Why: 30mm diameter won’t obstruct tight spaces; 0.005″ TIR ensures clean 1mm holes
– Pro tip: Pair with carbide-tipped bits—any wobble cracks fragile shanks
General DIY: The 3/8″ Capacity Sweet Spot
For home projects (framing, furniture, plumbing):
– Choose: 0222-0702 (3/8″ max, JT2, K4 key)
– Why: Handles 90% of household bits; compact 43mm diameter fits confined areas
– Avoid: Oversized chucks that add unnecessary weight
Heavy-Duty Construction: When You Need 3/4″ Capacity
For structural work (steel beams, concrete anchors):
– Choose: 0222-0706 (3/4″ max, JT3, K6 key)
– Why: 65mm diameter withstands 100+ ft-lbs torque; JT3 taper resists hammer-drill shock
– Warning: Never use on drills under 1/2″ chuck capacity
Installing Your Drill Chuck Without Damaging the Taper
Forcing mismatched tapers destroys both chuck and drill spindle. Proper installation takes 90 seconds but prevents $200 in damage.
Step-by-Step: Mounting a JT Taper Chuck Correctly
- Clean both surfaces: Remove grease/debris from spindle and chuck taper with isopropyl alcohol
- Align perfectly: Hold chuck straight—no side pressure
- Tap gently: Use a soft mallet to seat the chuck (3-4 light strikes)
- Verify: Rotate by hand—should turn smoothly with no binding
- Test: Run drill at low speed for 10 seconds before applying load
Never hammer directly on the chuck body—this damages internal gears. If resistance exceeds light tapping, check taper compatibility.
California Prop 65 Warning: What Drill Users Must Know
WARNING: This product contains materials known to cause cancer and reproductive harm (California Prop 65). All drill chuck types in this guide carry this warning due to trace metals in heat-treated alloy steel. This is a legal requirement—not an indication of immediate risk during normal use. Always wear gloves and eye protection when handling metal components, and wash hands after use. For details, visit www.P65Warnings.ca.gov.
Extend Chuck Life: 3 Maintenance Habits You’re Skipping
Professional drill chuck types last years with simple care. Neglect these, and even 0.005″ TIR precision degrades rapidly.
Clean Jaws Monthly to Prevent Slippage
Debris in jaw threads causes incomplete tightening. Every 30 hours of use:
1. Fully open the chuck
2. Spray with electronic contact cleaner
3. Rotate while brushing with a stiff nylon brush
4. Wipe dry before use
Visual cue: Black gunk on the chuck body means immediate cleaning.
Replace Worn Keys Before They Damage Chucks
Chuck keys wear faster than chucks. Replace when:
– Key feels loose in the chuck’s drive slots
– Edges are rounded instead of square
– Tightening requires excessive force
Keep a spare K5 key if using models 0222-0703/0704/0708—these are the most common industrial sizes.
Choosing the right drill chuck types transforms frustrating projects into precision work. Match Jacobs Taper to your drill (JT1 for precision, JT3 for construction), verify capacity ranges (never ignore min size!), and demand 0.005″ TIR for clean holes. For most DIYers, the 0222-0702 (3/8″ capacity) is the ideal balance of versatility and control. Professionals tackling steel or concrete need the 0222-0706’s 3/4″ capacity and JT3 taper. Always use the exact key size—K4 for 0222-0702, K5 for 0222-0703—and clean jaws monthly. When in doubt, measure TIR with a dial indicator; replace chucks exceeding 0.010″ runout. Your next project deserves straighter holes and safer operation—start with the chuck that fits your job, not just your drill.


