
If you’ve ever watched a single-celled amoeba glide across a slide or marveled at the intricate structure of a plant cell, you’ve witnessed the power of the light microscope. This essential scientific instrument uses visible light and precision lenses to magnify tiny specimens up to 1,200 times their actual size, revealing a hidden world invisible to the naked eye. But how does a light microscope work? At its heart, it combines controlled illumination and multi-stage magnification to transform faint, microscopic details into clear, observable images.
The process begins when light passes through—or reflects off—a specimen. As the light interacts with cellular structures, it’s absorbed, scattered, or phase-shifted in ways that create contrast. These subtle changes are captured by a series of lenses that first magnify the image at the objective level, then further enlarge it through the eyepiece. Unlike electron microscopes, which require complex vacuum systems and destroy living samples, light microscopes allow real-time observation of living cells, making them indispensable in biology, medicine, and education.
Understanding how a light microscope works isn’t just about knowing its parts—it’s about mastering how light, optics, and specimen interaction come together to produce meaningful images. This guide breaks down every step of the process, from basic components to advanced imaging techniques, so you can confidently use, interpret, and appreciate what you see under the lens.
How Light and Lenses Combine to Magnify Tiny Structures

The Two-Stage Magnification Process Explained
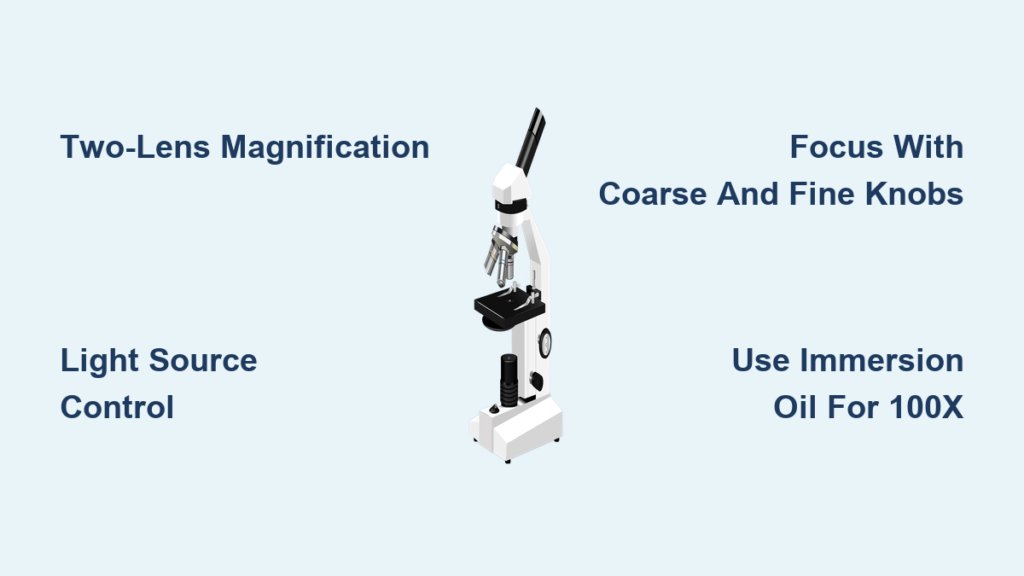
A light microscope works by using a two-lens system to achieve high magnification. The first stage occurs at the objective lens, which sits closest to the specimen. When light passes through the sample, the objective captures the altered light waves and forms a real, inverted image inside the microscope body. This image is already magnified—typically 4×, 10×, 40×, or 100×, depending on the lens used.
That real image then travels up the body tube to the eyepiece (ocular lens), usually offering 10× magnification. The eyepiece acts like a magnifying glass, enlarging the intermediate image into a virtual image visible to your eye. The total magnification you see is simply the product of both lenses:
Total Magnification = Objective Magnification × Eyepiece Magnification
For example:
– 40× objective × 10× eyepiece = 400× total magnification
– 100× objective × 10× eyepiece = 1,000× total magnification
While some microscopes reach 1,200×, going beyond this results in empty magnification—an image that’s larger but no more detailed, due to the physical limits of visible light.
Why the Image Appears Upside Down and Backward
One of the first surprises for new users is that the image appears inverted and reversed. Move the slide to the right, and the image shifts left. Push it forward, and the view moves down. This happens because both the objective and eyepiece lenses bend light in a way that flips the image path. It’s not a flaw—it’s how convex lenses work. With practice, you’ll learn to move the slide in the opposite direction of where you want the image to go, making navigation intuitive.
Key Components That Make Image Formation Possible
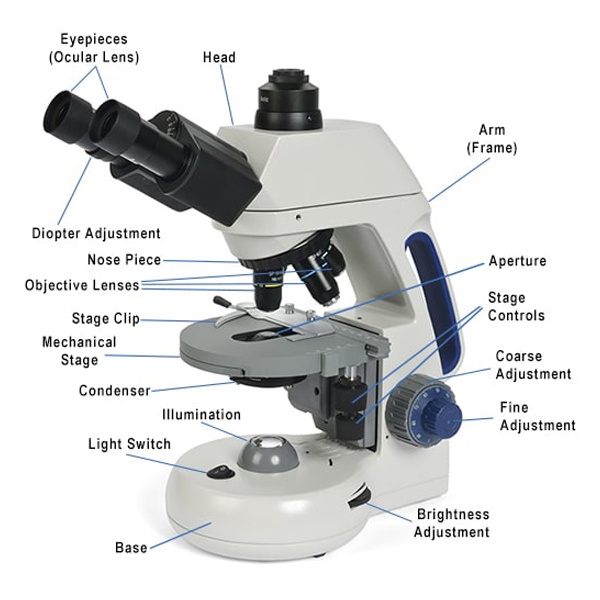
Light Source and Condenser: The Foundation of Clarity
Every image starts with light. Modern light microscopes use LEDs as their primary source because they’re bright, stable, energy-efficient, and produce little heat—critical for observing live specimens without damaging them. Older models may use halogen or tungsten bulbs, while basic units sometimes rely on mirrors to reflect ambient light.
Beneath the stage, the condenser lens focuses this light into a concentrated cone that illuminates the specimen evenly. Without proper condensation, even high-quality lenses can’t resolve fine details. Most condensers include an iris diaphragm, which controls the width of the light cone. Closing it increases contrast but reduces resolution; opening it improves sharpness but may wash out faint structures. Balancing this setting is key—especially when switching between magnifications.
Stage and Objective Lenses: Holding and Zooming In
The stage is the platform where you place your slide. Many microscopes have a mechanical stage with precision knobs that let you move the slide smoothly in X and Y directions without touching it—essential for scanning large samples or tracking moving organisms.
Above the stage, the objective lenses on the rotating nosepiece provide the first level of magnification. Common objectives include:
– 4× (scanning) – for locating areas of interest
– 10× (low power) – for general viewing
– 40× (high dry) – for detailed inspection
– 100× (oil immersion) – for maximum resolution
Each lens has a numerical aperture (NA) rating, which determines how much light it can gather and how finely it can resolve details. Higher NA = better resolution.
Critical tip: Never use the coarse focus knob with 40× or 100× objectives—doing so can crash the lens into the slide and cause costly damage.
Eyepiece and Focus Controls: Finalizing the View
The eyepiece (or ocular) is what you look through. Most are 10×, though 15× versions exist for extra magnification. Binocular models have two eyepieces for comfort, while trinocular heads include a camera port for digital imaging. Some eyepieces contain a pointer or reticle for marking locations or measuring distances under the microscope.
To bring the image into focus, two knobs control the stage or objective movement:
– Coarse focus: Makes large adjustments—use only at low magnification.
– Fine focus: Allows tiny, precise changes—essential for high-power viewing.
Always start focusing with the 4× objective and coarse knob, then switch to fine focus as you increase magnification.
What Limits What You Can Actually See?
Resolution vs. Magnification: Knowing the Difference
Magnification makes things look bigger—but resolution determines whether you can see them clearly. Two points too close together will blur into one if they’re below the microscope’s resolution limit. This limit depends on the wavelength of light (~400–700 nm) and the numerical aperture (NA) of the objective.
The Rayleigh criterion calculates this limit:
r = 0.61 × (λ / NA)
Where:
– r = smallest resolvable distance
– λ = light wavelength (e.g., 550 nm for green light)
– NA = numerical aperture
Using green light and an NA of 1.25:
r ≈ 0.61 × (550 / 1.25) ≈ 268 nm
This means features closer than ~200–300 nm cannot be distinguished. So:
– Cells (10 µm) appear in full detail.
– Bacteria (0.5–5 µm) show shape and motion.
– Viruses (<300 nm) remain invisible—requiring electron microscopy.
Advanced Techniques That Reveal More Than Bright Light Alone
Fluorescence, Phase Contrast, and Beyond
Standard bright field microscopy works well for stained samples like blood smears, but live, transparent cells often lack contrast. That’s where advanced techniques come in.
- Phase contrast converts tiny phase shifts in light—caused by differences in cell thickness or density—into visible brightness changes. It lets you watch live cells divide without staining.
- Differential Interference Contrast (DIC) uses polarized light to create 3D-like images with sharp edges, ideal for observing organelles.
- Fluorescence microscopy uses dyes that glow under specific light, allowing you to tag and track specific proteins or DNA.
- Confocal microscopy uses a laser and pinhole to eliminate out-of-focus light, enabling 3D reconstructions of thick samples.
- TIRF microscopy excites only molecules within 100 nm of the coverslip, perfect for studying cell membrane dynamics.
These methods go beyond basic optics, revealing function and structure in living systems with incredible specificity.
Proper Usage and Maintenance for Long-Lasting Performance
Step-by-Step Guide to Using a Light Microscope Safely
- Turn on the light and set intensity low.
- Place your slide on the stage and secure it with clips.
- Rotate the nosepiece to the 4× objective.
- Use the coarse focus to bring the specimen into view.
- Center the area of interest using stage controls.
- Switch to 10× and 40×, using fine focus only.
- For 100×, apply a drop of immersion oil and rotate the oil objective into place.
- Adjust the condenser diaphragm for optimal contrast.
- After use: remove the slide, turn off the light, rotate back to 4×, lower the stage, and clean the oil lens with lens paper only.
Avoid using tissues or cloth on lenses—only lens paper is safe.
Why Light Microscopy Remains Essential Across Science
From diagnosing diseases in hospitals to teaching cell biology in classrooms, light microscopes are versatile, affordable, and non-destructive. They allow real-time observation of living processes, something electron microscopes cannot do. While limited by the wavelength of light, innovations like super-resolution, expansion microscopy, and computational deconvolution continue to push their capabilities.
Whether you’re a student, researcher, or clinician, understanding how a light microscope works empowers you to explore the microscopic world with confidence—revealing life in action, one magnified image at a time.


