
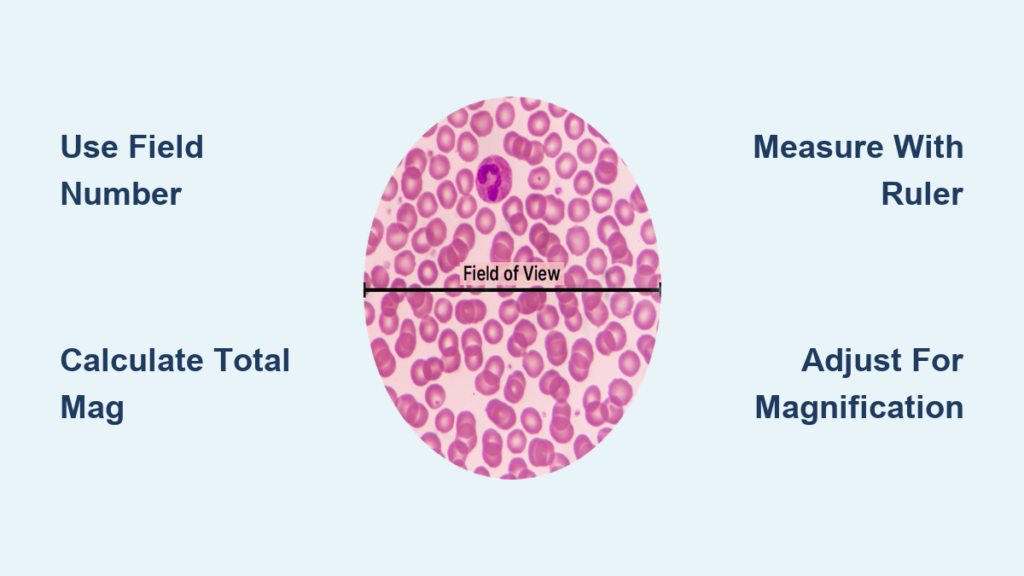
When you peer through a microscope, you’re not seeing the entire slide—only a small circular area in the center. This visible region is known as the field of view (FOV), and knowing how to calculate it is crucial for estimating cell sizes, analyzing specimen density, and producing accurate scientific documentation. Whether you’re a biology student measuring onion cells or a lab technician examining tissue samples, mastering FOV calculation turns your microscope into a precise measurement tool.
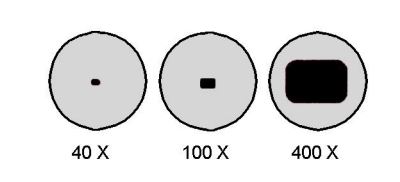
The field of view changes dramatically with magnification. At low power—say 40×—you might see 4.5 mm across the lens, but at high power (400×), that shrinks to just 0.45 mm. This inverse relationship is predictable and can be calculated using either the eyepiece field number or a direct ruler-based measurement. In this guide, you’ll learn how to determine the microscope field of view step by step, apply it to real-world measurements, and avoid common pitfalls.
Use the Field Number Formula for Accurate FOV
The most reliable way to calculate field of view is by using the field number (FN)—a value engraved on most microscope eyepieces. This number, measured in millimeters, represents the diameter of the fixed field diaphragm visible when viewed without any objective lens magnification.
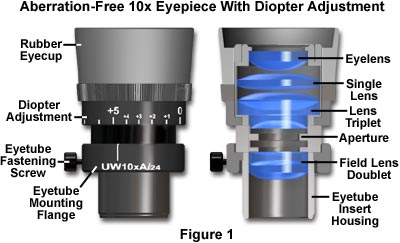
Find the Field Number on Your Eyepiece
Check the side of your ocular lens. You’ll often see markings like “10×/20” or “WF 10×/18.” The number after the slash is the field number (FN). For example:
– “10×/20” means a 10× magnifying eyepiece with an FN of 20 mm.
– Common FN values are 16, 18, 20, and 22 mm.
🔍 Visual cue: A higher FN means a wider field of view. If two microscopes use the same objective but different eyepieces (e.g., 18 vs. 22), the one with FN 22 shows more of the specimen.
If no FN is legible or your eyepiece lacks this marking, skip to the ruler method below.
Apply the FOV Formula Using Total Magnification
Once you know the FN, calculate the actual field of view using this formula:
$$
\text{FOV (mm)} = \frac{\text{Field Number (FN)}}{\text{Total Magnification}}
$$
Where:
– Total Magnification = Ocular Magnification × Objective Magnification
Real-World Example:
- Eyepiece: 10×/20 → FN = 20 mm
- Objective lens: 40×
- Total Magnification = $10 \times 40 = 400\times$
- $$
\text{FOV} = \frac{20}{400} = 0.05 \text{ mm}
$$
Convert to micrometers: $0.05 \times 1,000 = 50 \, \mu m$
So at 400×, you’re viewing a 50 µm diameter area—about the width of a human hair.
💡 Pro tip: Always convert results to micrometers (µm) since most biological specimens are measured at that scale.
Adjust FOV When Changing Objectives
Switching objectives alters total magnification and thus FOV. Here’s how FOV changes with a standard 10×/20 eyepiece:
| Objective | Total Mag | FOV (mm) | FOV (µm) |
|---|---|---|---|
| 4× | 40× | 0.5 mm | 500 µm |
| 10× | 100× | 0.2 mm | 200 µm |
| 40× | 400× | 0.05 mm | 50 µm |
| 100× | 1,000× | 0.02 mm | 20 µm |
⚠️ Critical mistake: Never ignore the ocular magnification. A 15× eyepiece reduces FOV by 50% compared to a 10×. For example, with FN 20 at 40× objective:
$ \text{FOV} = \frac{20}{15 \times 40} = 0.033 \text{ mm} = 33 \, \mu m $
Measure FOV Directly Using a Ruler
If your eyepiece doesn’t list a field number, you can measure FOV empirically using a simple millimeter ruler—a practical method ideal for classrooms and field labs.
Place a Ruler on the Microscope Stage
- Start with the lowest magnification objective (usually 4×).
- Place a transparent ruler on the stage with the millimeter scale facing up.
- Focus carefully until the markings are sharp and clear.
🔍 What to look for: You should see a straight line of ruler divisions spanning the full circular field. Estimate how many millimeters fit from edge to edge.
Estimate the Visible Diameter in Millimeters
Suppose the field spans from the 3 mm to 7.5 mm mark:
– Difference = $7.5 – 3 = 4.5$ mm
– So, FOV at 40× total mag = 4.5 mm = 4,500 µm
✅ Best practice: Use a stage micrometer instead of a ruler for lab-grade accuracy. These calibrated slides have divisions as fine as 0.01 mm.
Calculate FOV at Higher Magnifications Using Proportion
Since FOV decreases inversely with magnification, use this formula:
$$
\text{New FOV} = \text{Known FOV} \times \left( \frac{\text{Known Mag}}{\text{New Mag}} \right)
$$
Example:
- Known FOV at 40× = 4,500 µm
- Find FOV at 400×:
$$
\text{FOV}_{400x} = 4,500 \times \left( \frac{40}{400} \right) = 4,500 \times 0.1 = 450 \, \mu m
$$
| Total Magnification | FOV (µm) |
|---|---|
| 40× | 4,500 |
| 100× | 1,800 |
| 400× | 450 |
| 1,000× | 180 |
🔄 Assumption: The optical path remains unchanged. Swapping eyepieces or adding adapters invalidates this linear scaling.
Estimate Specimen Size Using Calculated FOV
Once you know the FOV, you can estimate the size of cells or microstructures without special tools.
Count How Many Fit Across the Field Diameter
- Switch to the desired magnification.
- Observe how many specimens line up side-by-side across the full FOV.
- Divide FOV by that number.
$$
\text{Specimen Size} = \frac{\text{FOV Diameter}}{\text{Number Across FOV}}
$$
Practical Example:
- FOV at 400× = 500 µm
- 10 red blood cells fit across the diameter
- Average cell size = $ \frac{500}{10} = 50 \, \mu m $
💡 Expert note: Works best for uniform, linear arrangements like bacteria chains or pollen grains.
Estimate Size of Large or Partially Visible Specimens
For single cells that don’t span the full FOV:
– Estimate what fraction of the diameter the specimen occupies.
– Multiply FOV by that fraction.
Example:
– FOV = 200 µm
– One cell spans roughly 70% of the view
– Estimated size = $ 200 \times 0.7 = 140 \, \mu m $
⚠️ Limitation: Avoid edge distortion. Always center the specimen and use fine focus for accurate perception.
Adjust for Stereo and Zoom Microscopes
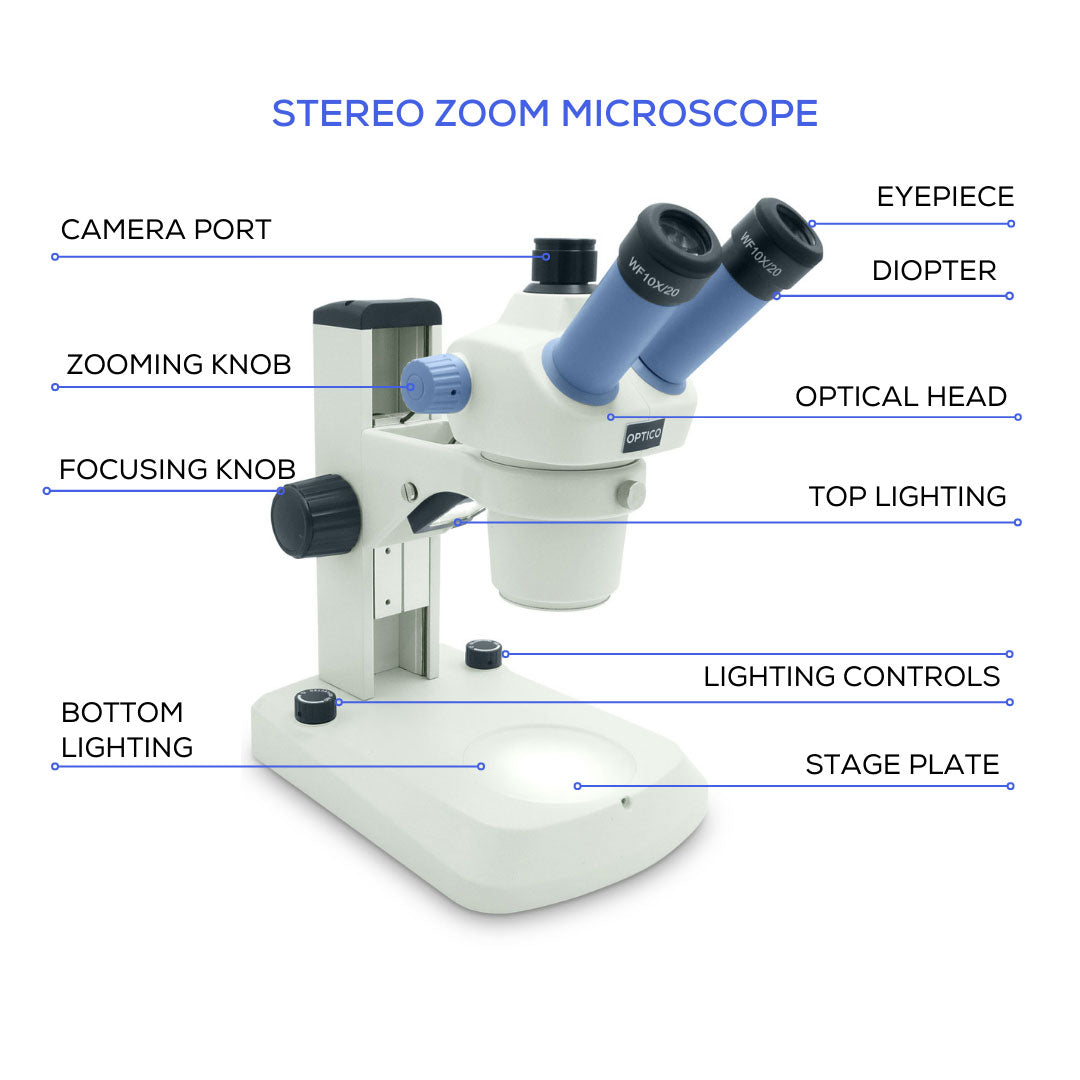
Stereo (dissecting) microscopes lack fixed objectives and instead use zoom knobs for variable magnification, making FOV calculation more complex.
FOV Still Shrinks With Increased Zoom
Even in zoom systems:
– Low zoom = wide FOV (e.g., 28 mm)
– High zoom = narrow FOV (e.g., 3.5 mm)
But the reduction may not be perfectly linear due to internal optics.
Calibrate Each Zoom Setting Individually
Because there’s no standard “objective,” measure FOV at each zoom level:
| Zoom Setting | Measured FOV (mm) |
|---|---|
| 0.75× | 28 mm |
| 1.5× | 14 mm |
| 3.0× | 7 mm |
🔧 Tip: Record these values and label digital images with both zoom and FOV for reproducible results.
Account for Auxiliary Lenses That Alter FOV
Adding 2× or 3× booster lenses increases magnification but cuts FOV proportionally.
Auxiliary Lens Halves FOV at Double Magnification
Example:
– Base system: FOV = 8 mm at 10× total mag
– Add 2× auxiliary lens:
– New magnification = $10 \times 2 = 20\times$
– New FOV = $ \frac{8}{2} = 4 \, \text{mm} $
⚠️ Warning: Not all eyepieces support auxiliary lenses. Mismatched optics can cause vignetting or blurred edges.
Understand FOV in Digital Microscopes
In digital systems, the camera sensor replaces the eye, so FOV depends on sensor size and adapter magnification.
Use Sensor-Based FOV Formula
$$
\text{FOV (mm)} = \frac{\text{Sensor Width (mm)}}{\text{Total Optical Magnification}}
$$
Where:
– Sensor width: Physical width of the imaging chip (e.g., 6.4 mm for 1/2″ sensor)
– Total Optical Magnification: Objective × Adapter Lens × C-mount magnification
Example:
- Sensor width = 5.6 mm (1/3″ sensor)
- Objective = 10×
- Adapter = 0.5× reducer
- Total mag = $10 \times 0.5 = 5\times$
- $$
\text{FOV} = \frac{5.6}{5} = 1.12 \, \text{mm}
$$
📸 Note: Software may crop the image. Always verify with a stage micrometer.
Avoid Common FOV Calculation Mistakes
Even experienced users make errors. Here’s how to stay accurate.
Using Incorrect Total Magnification
Many forget auxiliary components like:
– C-mount adapters (e.g., 0.5×, 1×, 2×)
– Relay lenses
– Zoom body magnification
✅ Fix: Include all elements in total magnification.
Mixing Incompatible Eyepieces
Eyepieces from different brands may not align with the field diaphragm, causing vignetting (darkened edges) or inaccurate FN use.
✅ Fix: Use matched optical sets from the same manufacturer.
Assuming Linear Scaling in All Microscopes
Some stereo scopes have non-linear zoom optics. Assuming FOV halves when magnification doubles leads to errors.
✅ Fix: Measure FOV directly at each setting instead of calculating.
Final Note: Accurately calculating microscope field of view transforms casual observation into precise measurement. By using the field number formula or ruler-based calibration, you can determine exactly how much specimen is visible at any magnification. Apply this knowledge to estimate cell sizes, improve documentation, and enhance experimental accuracy. Always begin at low magnification, verify calculations with physical measurements, and account for all optical components. With practice, FOV calculation becomes a fast, reliable skill in any microscopy workflow.


