
Have you ever held a monocular and stared at the numbers etched on its body—8×25, 4×12 12.5°—and wondered what they actually mean? These aren’t random codes or marketing tricks—they’re a precise optical shorthand that tells you exactly how powerful, bright, and practical your monocular will be in real-world use. Understanding how to read monocular magnification is the key to choosing the right tool for birdwatching, hiking, reading distant signs, or observing in low light.
Magnification is just the beginning. When paired with objective lens size, field of view, lens coatings, and eye relief, these numbers reveal a complete picture of performance. A high magnification might sound impressive, but if it comes with a shaky image or a tunnel-like view, it could be harder to use than a lower-powered model. The goal isn’t maximum zoom—it’s the right balance for your needs.
In this guide, you’ll learn how to decode every number on a monocular, understand the trade-offs between specs, and choose the best model based on your activities. Whether you’re a hiker, hunter, or casual observer, you’ll walk away knowing exactly how to read monocular magnification—and why it matters.
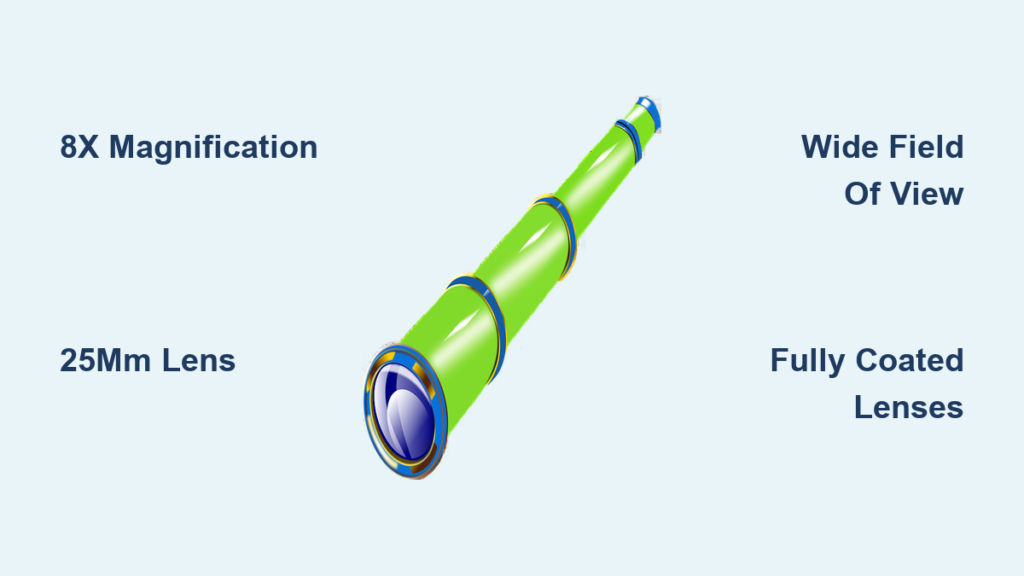
Decode the 8×25 Format

Monoculars use a standardized labeling system: Magnification × Objective Lens Diameter, often followed by Field of View. For example, 8×25 means 8x magnification with a 25mm objective lens. A label like 4×12 12.5° adds field of view (12.5 degrees), giving you even more performance insight.
These numbers directly impact usability:
– 8×25: Brings objects 8 times closer with a 25mm front lens—ideal for daylight hiking
– 6×21: Less zoom, but more stable and pocket-friendly
– 10×42: High detail and brightness, but heavier and prone to shake
Always evaluate all three core specs:
– Magnification
– Objective lens size
– Field of view (if listed)
Together, they determine clarity, brightness, stability, and suitability for your activity.
What Does 8x Magnification Mean?
An 8x monocular makes distant objects appear 8 times closer than with the naked eye. A bird 800 feet away will look like it’s just 100 feet away. This is the sweet spot for most general-purpose models, offering strong detail without overwhelming hand shake.
Typical handheld magnifications:
– 4x–6x: Stable, wide view—great for scanning or close-range use
– 8x: Most popular—sharp detail, manageable shake
– 10x+: High detail, but requires steady hands or tripod support
Higher magnification helps with:
– Reading distant signs or license plates
– Identifying bird species at range
– Scouting terrain during hikes or hunts
But beware: higher magnification amplifies every hand movement. Even breathing can blur the image at 10x. That’s why 8x is the practical limit for handheld use. If you regularly use 10x or more, pair it with a mini tripod or rest.
Pro tip: If you wear glasses or have unsteady hands, stick to 6x or 8x for smoother viewing.
Choose the Right Objective Lens Size
The second number—like 25 in 8×25—is the objective lens diameter in millimeters. This front lens gathers light, so larger lenses produce brighter images, especially in low light.
Common sizes:
– 12–21mm: Ultra-compact (e.g., keychain monoculars)
– Best for daylight
– Fits in a pocket
– Poor in dawn, dusk, or shade
– 25–30mm: Balanced for most users
– Bright enough for most conditions
– Still portable
– 30–42mm: High-performance
– Excellent low-light capability
– Heavier, often needs a case or tripod
For example:
– 8×25: Compact and bright—perfect for hiking
– 10×42: Powerful and bright, but bulky for handheld use
If you’re often out at dawn (like birders), choose 30mm or larger. For travel or casual use, 25mm is usually sufficient.
Remember: Bigger isn’t always better. Balance lens size with portability.
Understand Field of View (FOV)
Field of View (FOV) tells you how wide an area you can see at a given distance. It’s listed in degrees (°) or feet at 1,000 yards (e.g., 367 ft @ 1000 yds).
Examples:
– 12.5° FOV = very wide—great for scanning
– 7.2° FOV = narrow—focused on detail
FOV decreases as magnification increases. An 8x model shows less of the scene than a 4x, even with the same lens.
Why FOV matters:
– Wider FOV helps you:
– Spot moving birds or animals quickly
– Scan landscapes efficiently
– Maintain orientation in forests
– Narrow FOV makes tracking harder but offers more detail on still objects
Typical FOV by magnification:
– 4x: ~12.5° (excellent for scanning)
– 6x: ~9.5° (balanced)
– 8x: ~7.2° (tight, detail-focused)
If you track wildlife or scan open areas, prioritize wide FOV. For long-range ID in open terrain, narrower FOV is acceptable.
Look for models that list FOV—it shows transparency and helps comparison.
Balance Magnification and Stability
High magnification sounds powerful, but it amplifies hand shake. At 10x or above, even slight tremors blur the image. That’s why 8x is the sweet spot for handheld use.
Why 8x Is the Sweet Spot
- Strong enough to read signs, identify birds, scout terrain
- Stable enough for most users
- Widely available in compact designs
If you have shaky hands, wear a backpack, or use it while moving, 6x or 7x offers smoother viewing with minimal loss of detail.
When to Consider 10x or Higher
- You’re using a tripod or rest
- You need maximum detail for long-range observation
- Lighting is bright daylight
- You have steady hands (e.g., hunter, spotter)
Even then, test first. Some 10x models have better stabilization due to coatings or design, but physics limits handheld clarity.
Pro tip: Pair high-magnification monoculars with a smartphone adapter or tripod mount for shake-free viewing.
Avoid Over-Magnification Traps
Some budget models claim 12x, 16x, or 20x—but these are often digital zoom, not optical. The image may be blurry, dark, or distorted.
Stick to reputable brands and check reviews. True optical magnification above 10x in a handheld monocular is rare and usually comes with trade-offs in size, weight, or clarity.
Compare Lens Coatings for Clarity

Lens coatings are invisible but critical. They reduce glare, boost brightness, and improve contrast—especially in low light or bright sun.
Coating types (best to worst):
| Coating Type | Performance |
|————–|———–|
| Fully Multi-Coated | Best—maximum light, sharpest image |
| Multi-Coated | Good—improved clarity |
| Fully Coated | Basic—better than uncoated |
| Coated | Minimal—basic glare reduction |
Two 8×25 monoculars may look identical, but the one with fully multi-coated lenses will deliver a noticeably brighter, clearer image in dawn, dusk, or shade.
Why it matters:
– Reduces ghosting and internal reflections
– Enhances color accuracy
– Improves contrast in fog or haze
When shopping, prioritize fully multi-coated lenses, especially for variable lighting. It’s one of the most impactful upgrades—even more than a slightly larger lens.
Check Close Focus and Eye Relief
Two overlooked specs can make or break your experience.
What Is Close Focus?
Close focus is the minimum distance the monocular can focus sharply—typically 1 to 6 feet.
- 1–3 feet: Great for reading menus, inspecting insects, or indoor use
- 4–6 feet: Limited for close-up work
If you plan to read signs or study nature up close, choose a model with ≤3 feet close focus.
Why Eye Relief Matters
Eye relief is the distance from the eyepiece to your eye where you see the full image. Measured in mm, it’s crucial for eyeglass wearers.
- <12mm: Too short—causes “blackout” at edges
- 12–14mm: Acceptable for some glasses
- ≥14mm: Recommended for glasses wearers
Look for adjustable eyecups or “long eye relief” models. These let you retract the cup and position your eye correctly.
Pro tip: If you wear glasses, test the monocular with your glasses on. Comfort varies by design.
Know the Prism Types
Prisms flip the image upright and affect brightness and size.
Roof Prism: Compact and Modern
- Straight barrel—slim, pocket-friendly
- Common in 8×25, 10×25 models
- Slightly less brightness than Porro
- Often waterproof and durable
Most modern monoculars use roof prisms for portability.
Porro Prism: Brighter and Bulkier
- Offset lenses—wider, traditional look
- Better depth perception and brightness
- Less common in monoculars
Porro prisms offer superior image quality at lower cost but are bulkier.
Choose:
– Roof Prism for travel and everyday carry
– Porro Prism for brightness, if size isn’t an issue
Pick Features for Your Use Case
Your ideal monocular depends on how you use it.
| Use Case | Magnification | Lens | Key Features |
|---|---|---|---|
| Hiking | 6x–8x | 20–25mm | Lightweight, wide FOV |
| Birdwatching | 8x | 25–30mm | Waterproof, wide FOV, close focus |
| Reading Signs | 6x–8x | 20–25mm | Close focus ≤3 ft, high eye relief |
| Hunting | 8x–10x | 30–42mm | Tripod-ready, waterproof |
| Low-Light | 6x–8x | ≥30mm | Large lens, fully multi-coated |
| Night Vision | 3x–5x | Varies | Infrared illuminator |
| Glasses Wearers | 4x–8x | Any | Eye relief ≥14mm |
Test Before You Buy
Specs help, but hands-on testing is best.
- Check weight and grip: Hold it for 1–2 minutes. Is it balanced?
- Test eye relief: With glasses on, do you see the full image?
- Scan a scene: Is the image sharp, bright, and natural?
- Compare prices: Use online research and in-store return policies.
Many retailers offer 30-day returns—use them to test in real conditions.
Final Note: The best monocular isn’t the most powerful—it’s the one that fits your needs. By understanding how to read magnification and related specs, you can avoid marketing hype and choose a tool that enhances your experience. Focus on balance: magnification, lens size, portability, and optical quality. With this guide, you’re now equipped to make a smart, informed choice.


