
That sinking feeling when your workpiece jerks violently during drilling? It’s not just ruined material—it’s a dangerous near-miss caused by improper clamping. Drill press clamps (often called T-slot clamps) are your frontline defense against slippage, inaccurate holes, and potential injury. When used correctly, they lock materials firmly to the table, ensuring precision in woodworking, metalworking, and machining projects. Yet most DIYers and even seasoned makers skip critical setup steps, gambling with safety for the sake of speed. This guide cuts through the guesswork with actionable, step-by-step instructions to master how to use a drill press clamp effectively. You’ll learn exactly where to position clamps, how to apply optimal pressure, and the three costly errors that compromise every drilling operation—so your holes land perfectly, every single time.
Why Loose Workpieces Cause Catastrophic Drilling Failures
Unsecured materials on a drill press table create immediate hazards. As the bit engages, rotational force can spin or eject workpieces at high speed, damaging tools, ruining projects, and risking severe hand injuries. Even slight movement creates tapered or misaligned holes that scrap precision components. T-slot clamps solve this by anchoring workpieces directly into the table’s grooves, eliminating lateral shift during operation. Unlike handheld guides or makeshift solutions, they distribute pressure evenly across the material’s surface. This stability is non-negotiable for tasks like drilling engine blocks, cabinetry joinery, or metal brackets where fractions of a millimeter matter. Ignoring proper clamping turns your drill press from a precision instrument into a liability—especially with dense materials like hardwood or steel that amplify kickback forces.
Identifying Your Drill Press Table’s T-Slot Configuration
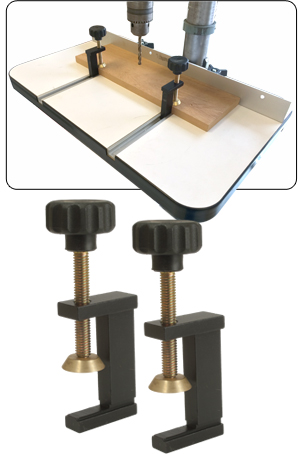
Before selecting clamps, examine your table’s T-slots—the key to compatibility. Most industrial and benchtop drill presses feature parallel T-shaped grooves running front-to-back or side-to-side. Measure the slot width (typically 10–15mm) and depth using calipers; mismatched clamps won’t seat properly. For example, a Porter-Cable 1140 table uses 12mm slots, while Jet models often require 15mm hardware. If your table lacks T-slots (common on older or budget models), skip C-clamps—they lack directional stability—and opt for hold-down clamps with base plates that bolt directly to the table surface. Never force undersized clamps into oversized slots; this creates dangerous play during drilling. Pro Tip: Dust and metal shavings clog slots over time. Clean them monthly with a stiff brush to ensure smooth clamp insertion.
Matching Clamp Size to Workpiece Dimensions and Material
:max_bytes(150000):strip_icc()/scrapewood-4f2160ae646a4897866ecb1d19bce696.jpg)
Using an oversized clamp on thin material cracks wood or dents metal, while undersized clamps slip on thick stock. For plywood or plastic under 1/2″ thick, choose low-profile T-slot clamps with 1″ wide jaws to prevent crushing. Dense hardwoods or steel over 1″ require heavy-duty clamps with 2″ jaws and 3/8″ diameter bolts for maximum grip. Always position clamps within 2″ of drilling zones—farther distances allow material flex. Crucially, match clamp material to your work: steel clamps for metalworking (to resist bit torque), and aluminum or nylon-jaw variants for delicate wood to avoid marring. Never substitute vise grips or pliers; their uneven pressure guarantees slippage.
Securing Workpieces Without Crushing or Shifting
Positioning Clamps for Maximum Stability and Access
Place workpieces flat against the table, then position clamps perpendicular to the expected drill rotation direction. For rectangular stock, anchor one clamp near each corner; for irregular shapes, cluster clamps around the drill point within a 3″ radius. Critical rule: The clamp body must sit entirely outside the drill bit’s swing path. A 1/2″ bit requires at least 1″ clearance—measure from the chuck centerline. If drilling near edges, use L-shaped clamps to grip the workpiece underside through table slots. Always leave space for chip evacuation; blocked shavings increase heat and bit binding. Example: When drilling a metal bracket flange, position clamps on the solid base section, not the thin edge being drilled.
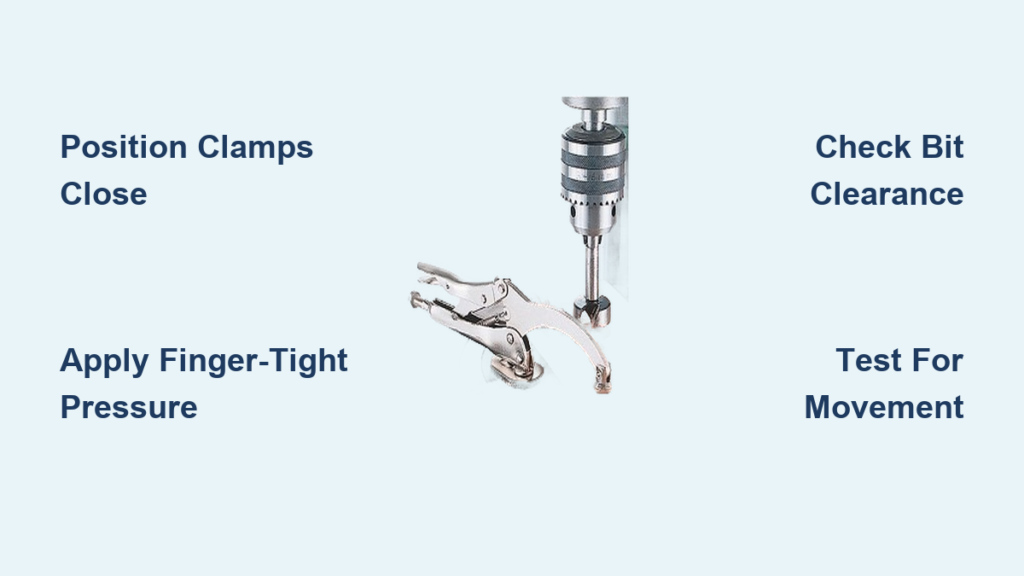
Applying Perfect Clamp Pressure: The Finger-Tight Rule
Overtightening distorts materials and warps drill tables; undertightening invites slippage. Follow this sequence:
1. Hand-tighten the clamp bolt until the jaw contacts the workpiece
2. Apply firm pressure with a wrench—just until resistance increases significantly
3. Test by attempting to slide the workpiece sideways with your palm (never fingers near the drill area)
If the piece moves, increase tension by 1/8 turn max. For aluminum or acrylic, stop when the jaw indents the surface slightly (0.5mm). Wood tolerates more pressure but check for cracking at clamp edges. Never use cheater bars—excessive torque strains table threads. Remember: Drill vibration naturally loosens clamps during operation. Pause after 30 seconds of drilling to recheck tightness, especially with high-RPM tasks.
Verifying Safety Before Powering On
Clearing the Drill Bit Path in 30 Seconds
A single obstructed clamp ruins accuracy and shatters bits. Conduct this visual sweep:
– Lower the quill to the workpiece surface without power
– Rotate the chuck manually through a full revolution
– Confirm no clamp hardware, bolts, or jaws intersect the bit’s path
If interference occurs, relocate clamps immediately—never “drill around” obstructions. For deep holes, extend the bit 1/4″ beyond final depth during this test to account for full travel. Metalworkers: Magnetic base indicators help spot millimeter-scale clashes invisible to the eye.
The Critical Hand-Slide Test for Zero Movement
This non-negotiable check prevents 90% of clamp failures: With the drill press off, press firmly against the workpiece in the direction opposite drill rotation (counterclockwise for standard bits). Attempt to slide it sideways and lift edges. Any movement means repositioning clamps closer to the drill point. For vertical stability, push down on the workpiece corners—if it rocks, add shims or a secondary clamp. If using hold-down clamps on curved surfaces, wrap the piece with a leather strap under the clamp jaw for even pressure distribution.
Three Costly Drill Press Clamping Errors That Ruin Projects
Why Incorrect Clamp Placement Guarantees Misaligned Holes
Placing clamps too far from the drill point creates leverage that twists materials during bit engagement. This manifests as oval-shaped holes or “walking” bits that wander off-center. In metal drilling, it also causes chatter marks that accelerate bit wear. Solution: Position clamps within 1.5x the bit diameter from the hole center. For a 3/8″ bit, keep clamps within 5/8″ of the target. Never clamp only one side of asymmetrical workpieces—always balance pressure across the centerline. If drilling near a workpiece edge, use a backer board clamped underneath to prevent tear-out.
How Over-Tightening Warps Your Drill Press Table Permanently
Excessive clamp force strains table castings, creating subtle dips that throw off all future work. Steel tables may recover, but cast iron often cracks microscopically. Signs include inconsistent hole depths across the table or wobbling workpieces despite “tight” clamps. To avoid this:
– Use a torque wrench set to 15–20 ft-lbs for standard 3/8″ bolts
– Place flat washers under bolt heads to distribute pressure
– Never clamp directly over table mounting holes (weak points)
If your table develops a persistent “low spot,” lap it flat with abrasive paste—a costly fix preventable by proper clamping.
Why Wrong Clamp Types Cause Catastrophic Slippage
Using C-clamps on T-slot tables is a critical error—they pivot under drill torque, shifting workpieces mid-operation. Similarly, spring-loaded clamps lack holding power for metal drilling. Always use T-slot specific hardware: The bolt threads into the table slot, creating downward + sideways force that resists rotation. For irregular shapes, combine T-slot clamps with toggle clamps that lock instantly. When in doubt, test clamps at low RPM first. If you hear squeaking or see bit deflection, stop immediately—slippage has begun.
Mastering how to use a drill press clamp transforms your machine from a hazard into a precision powerhouse. Remember: Position clamps within 1.5x the bit diameter of your hole, apply finger-tight pressure plus 1/8 turn max, and always verify clearance with a manual quill rotation test. These steps eliminate 95% of drilling inaccuracies while protecting your hands from kickback injuries. For ongoing safety, inspect clamp threads monthly for stripped sections and replace worn hardware before projects. Never skip the hand-slide test—even “obviously tight” setups fail under rotational forces. Finally, keep a dedicated set of nylon-jaw clamps for woodworking to prevent marring. Implement these protocols, and you’ll drill cleaner holes, waste less material, and work with confidence knowing your setup won’t betray you mid-operation. Ready to level up? Study your table’s T-slot pattern tonight—your next project’s accuracy depends on it.


