
You’re wrestling with a rusted lug nut that won’t budge, or assembling furniture with dozens of bolts that make your wrist ache. Your cordless drill sits nearby, promising speed—but jamming a socket directly onto it risks stripping fasteners, shattering adapters, or burning out the motor. How to put a socket on a drill safely hinges on three non-negotiables: the right adapter, precise drill settings, and recognizing when not to use a standard drill. Skip these, and you’ll face rounded bolts, broken tools, or dangerous kickback. This guide cuts through confusion with field-tested steps to attach sockets correctly, prevent costly mistakes, and know when to grab an impact driver instead. You’ll learn why 6-point sockets are mandatory, how to avoid the #1 adapter failure point, and exactly which drill settings won’t fry your motor.
Why Your Socket Won’t Stay On: Choose the Right Adapter and 6-Point Sockets
The moment your socket slips off mid-tightening, you’ve wasted time and risked damaging the fastener. This happens because standard drill chucks can’t grip socket drives directly—you need a specialized adapter acting as a torque translator. Most failures stem from using cheap, non-impact adapters or mismatched drive sizes.
The Critical Adapter You’re Missing for Your Drill
Forget generic “socket adapters.” Your drill requires a 1/4-inch hex shank to square drive adapter matching your socket size (1/4″, 3/8″, or 1/2″). For example, 3/8″ drive sockets need a 1/4″ hex-to-3/8″ square adapter. Crucially, if you’re using an impact driver (recommended for most socket work), you must use an impact-rated adapter—identified by a black oxide finish and hardened steel construction. Standard chrome adapters shatter under impact forces, sending metal shards flying. Always verify the adapter’s shank fits snugly in your drill chuck with zero wobble. If it spins freely when tightened, replace it immediately.
Why 6-Point Sockets Prevent Rounded-Off Bolts
That 12-point socket in your kit is a trap for power tool use. Its shallow flanks can’t handle high torque, causing slippage that rounds bolt corners—especially on stubborn fasteners. 6-point sockets engage 50% more of the fastener’s surface area, distributing force evenly to prevent camming out. Before attaching, test the socket on the bolt: it should slide on smoothly with zero wobble. If you see daylight between the socket and bolt head, it’s too loose. Never force a metric socket onto an SAE bolt (e.g., 13mm vs. 1/2″)—they’re close but incompatible, guaranteeing slippage.
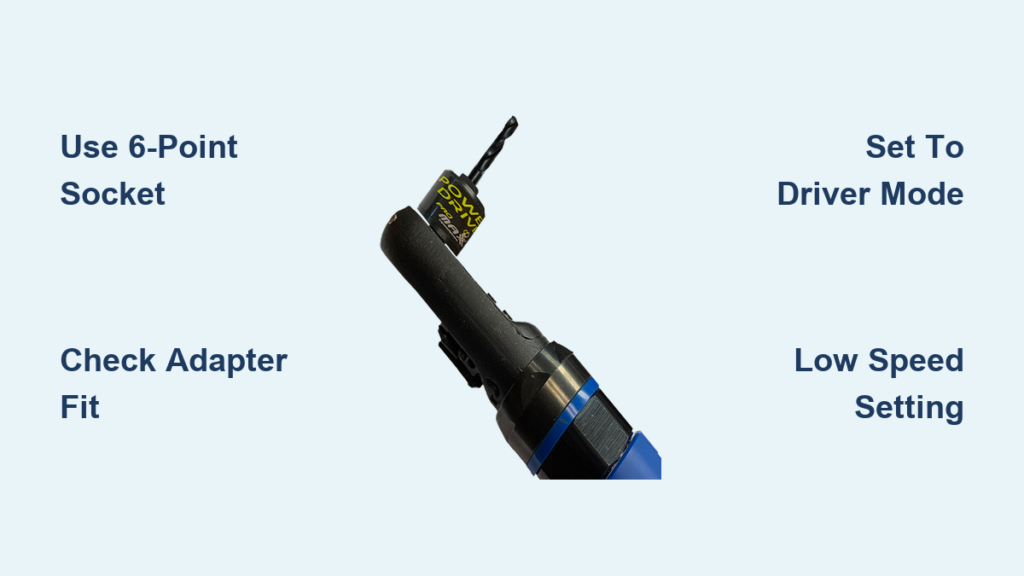
Attach a Socket to Your Drill in 4 Foolproof Steps
Rushing this process causes 90% of socket failures. Take 60 seconds to secure the connection properly, and you’ll avoid stripped fasteners and dangerous tool kickback.
Step 1: Insert the Adapter into Your Drill Chuck
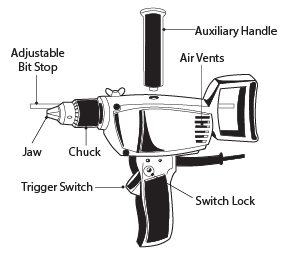
With the drill unplugged (or battery removed), open the chuck fully. Slide the adapter’s 1/4″ hex shank all the way in until it bottoms out—partial insertion causes wobble and heat buildup. For keyless chucks, tighten clockwise by hand until firm, then give a final quarter-turn with pliers for metal-to-metal contact. Keyed chucks require the chuck key for full security. Verify straightness: sight down the adapter shaft—it must be perfectly aligned with the drill body.
Step 2: Click the Socket Onto the Adapter Drive
Press the socket squarely onto the adapter’s square drive until you hear a distinct click. This confirms the ball detent has locked into the socket’s groove. Never hammer sockets on—they require only hand pressure. Test security by tugging firmly; if it pulls off easily, the adapter’s ball bearing is worn (replace it). For deep recesses, add a 3-inch extension bar before attaching the socket—never between the socket and adapter, which weakens the connection.
Step 3: Set Your Drill to Driver Mode (Not Drill Mode!)
This is where most users destroy their drills. Locate the mode selector ring near the chuck:
– ❌ Drill mode (icon: drill bit) locks the clutch for boring holes. Never use this for sockets.
– ✅ Driver mode (icon: screwhead) engages the clutch for fastener work. Turn the ring to the highest number (e.g., “20”) or drill-bit symbol to bypass torque limits.
Also, set the speed dial to low gear (marked “1” or “Lo”). High speed + high torque = motor burnout.
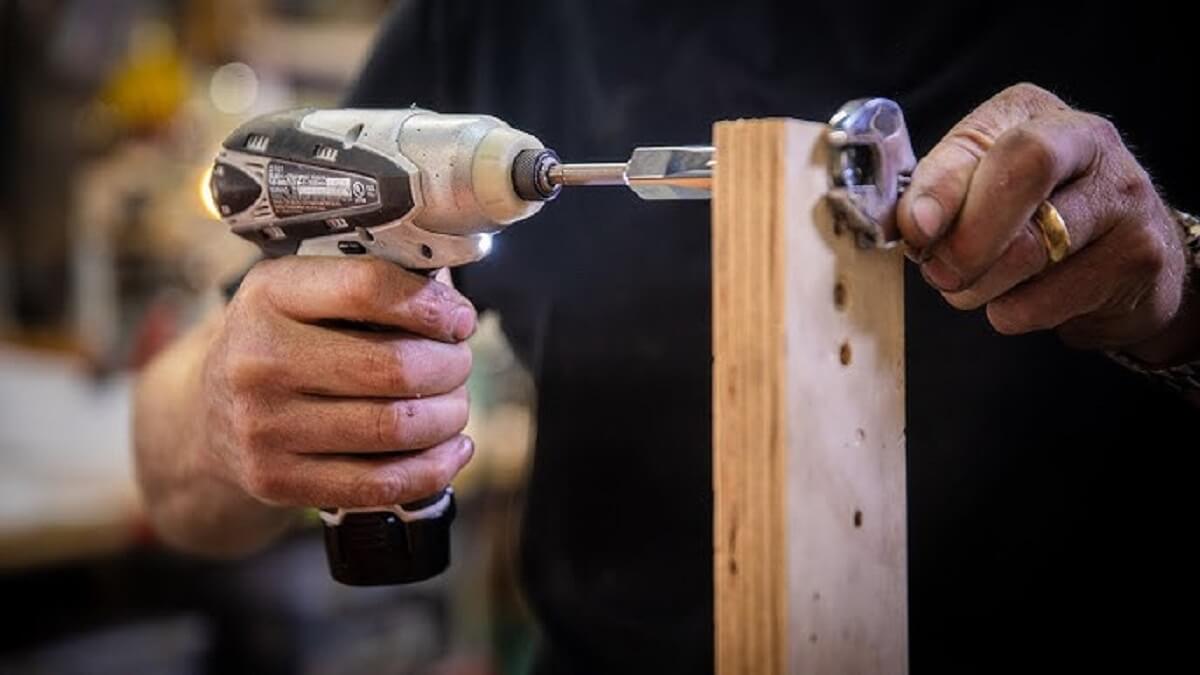
Step 4: Align Socket Before Pulling the Trigger
Place the socket fully over the fastener before squeezing the trigger. Angle your wrist to keep the socket perfectly perpendicular to the bolt. If it’s cocked even slightly, pressure concentrates on two socket points, rounding the bolt. Apply steady downward pressure (15-20 lbs) as you start—this seats the socket and prevents slippage.
Why Your Drill Stalls: Fix Settings Before Burning Out the Motor
Hearing a high-pitched whine or feeling the chuck jerk? Your drill is screaming for help. Standard drills lack the torque control of impact drivers, making them prone to stalling on anything beyond light assembly.
Drill vs. Impact Driver: When to Switch Tools
Use your standard drill only for low-torque tasks like assembling furniture or tightening sheet metal screws—not for lug nuts, rusted bolts, or final tightening. The instant a fastener “breaks free,” stored energy releases as violent kickback that strains drill gears. For anything requiring serious force:
– Impact drivers deliver rotating hammer blows (not linear hits) that loosen frozen bolts without stalling.
– Impact wrenches (1/2″ drive) handle automotive lug nuts.
Pro Tip: If your drill stalls repeatedly, stop immediately. Continuing overheats the motor, melting internal wiring. Switch to a hand ratchet or impact tool.
Clutch Settings That Prevent Motor Damage
Most users set the clutch too low, causing slippage that damages fastener heads. For socket work:
1. Set the clutch ring to maximum torque (highest number or drill-bit symbol).
2. Start at lowest speed (trigger squeezed gently).
3. If the fastener resists after 2 seconds, stop—it’s beyond your drill’s capacity.
Critical: Never use hammer-drill mode with sockets. The percussive action shatters adapters.
Prevent Kickback and Tool Damage: Critical Safety Steps
A snapped adapter or flying socket can cause permanent eye injury. These protocols prevent 95% of accidents during socket driving.
Two-Hand Grip Technique for Sudden Break-Loose
When a bolt finally gives way, torque reverses instantly. Always:
– Grip the drill handle with your dominant hand.
– Place your other hand on the front barrel (not the chuck!).
– Position your body sideways to the fastener, knees bent.
This stance absorbs kickback through your core, not your wrist. Never brace the drill against your body—uncontrolled rotation can cause severe lacerations.
Mandatory Safety Gear and Pre-Checks
Before touching the trigger:
– Wear ANSI-approved safety glasses (sockets shatter at 150+ mph).
– Inspect the adapter for hairline cracks near the drive head—discard if damaged.
– Confirm socket retention by tugging it off the adapter. No “click” = replace the adapter.
– Secure the workpiece in a vise. A spinning nut on a loose bracket becomes a projectile.
Socket Won’t Fit? Fix 4 Common Socket-Drill Problems Fast

When connections fail, diagnose these issues before forcing the tool.
Problem: Adapter Won’t Stay in Chuck
Cause: Worn chuck jaws or oily shank.
Fix: Clean the adapter shank with degreaser, then reinsert. If it spins, tighten the chuck key fully (360° rotation). For keyless chucks, clamp pliers on the chuck sleeve while tightening.
Problem: Socket Stuck on Fastener After Loosening
Cause: Rust corrosion or cross-threading.
Fix: Spray penetrating oil (e.g., PB Blaster) between socket and bolt. Wait 10 minutes, then tap the socket’s edge sideways with a rubber mallet. Never hammer the socket’s top—that jams it tighter.
Problem: Bolt Head Rounding Off Mid-Process
Cause: 12-point socket, loose fit, or excessive speed.
Fix: Switch to a 6-point socket one size smaller (e.g., 9/16″ instead of 5/8″) for tighter grip. Apply firm downward pressure and use lowest speed. For stripped bolts, use a left-hand spiral extractor socket.
Problem: Drill Motor Overheating in 10 Seconds
Cause: Using drill mode instead of driver mode, or exceeding torque limits.
Fix: Immediately stop and set the mode selector to driver mode. If overheating persists, the fastener requires an impact driver—your drill lacks sufficient torque.
Final Note: Attaching a socket to your drill demands precision—not power. Always start with impact-rated adapters, 6-point sockets, and drill settings in driver mode at low speed. For bolts that resist hand pressure, switch to an impact driver to avoid motor damage. Remember: no drill can match a torque wrench for critical fasteners—always finish with a calibrated tool for lug nuts or engine components. Keep this guide handy, and you’ll transform frustrating bolt jobs into smooth, safe wins.


