
Your electric drill sits idle in the toolbox while you struggle with stripped screws and crooked holes. This happens to 78% of first-time DIYers who skip foundational techniques—yet mastering how to use an electric drill takes less than 20 minutes. Unlike manual screwdrivers or hammer drills, a cordless drill/driver combines precision with raw power when handled correctly. In this guide, you’ll learn to select the right bits, prevent dangerous kickback, drill clean holes in any material, and transform your drill into a multi-tool powerhouse. No more damaged walls or ruined projects—just professional results on your next shelf installation or deck repair.
Select the Perfect Drill and Bit for Your Material
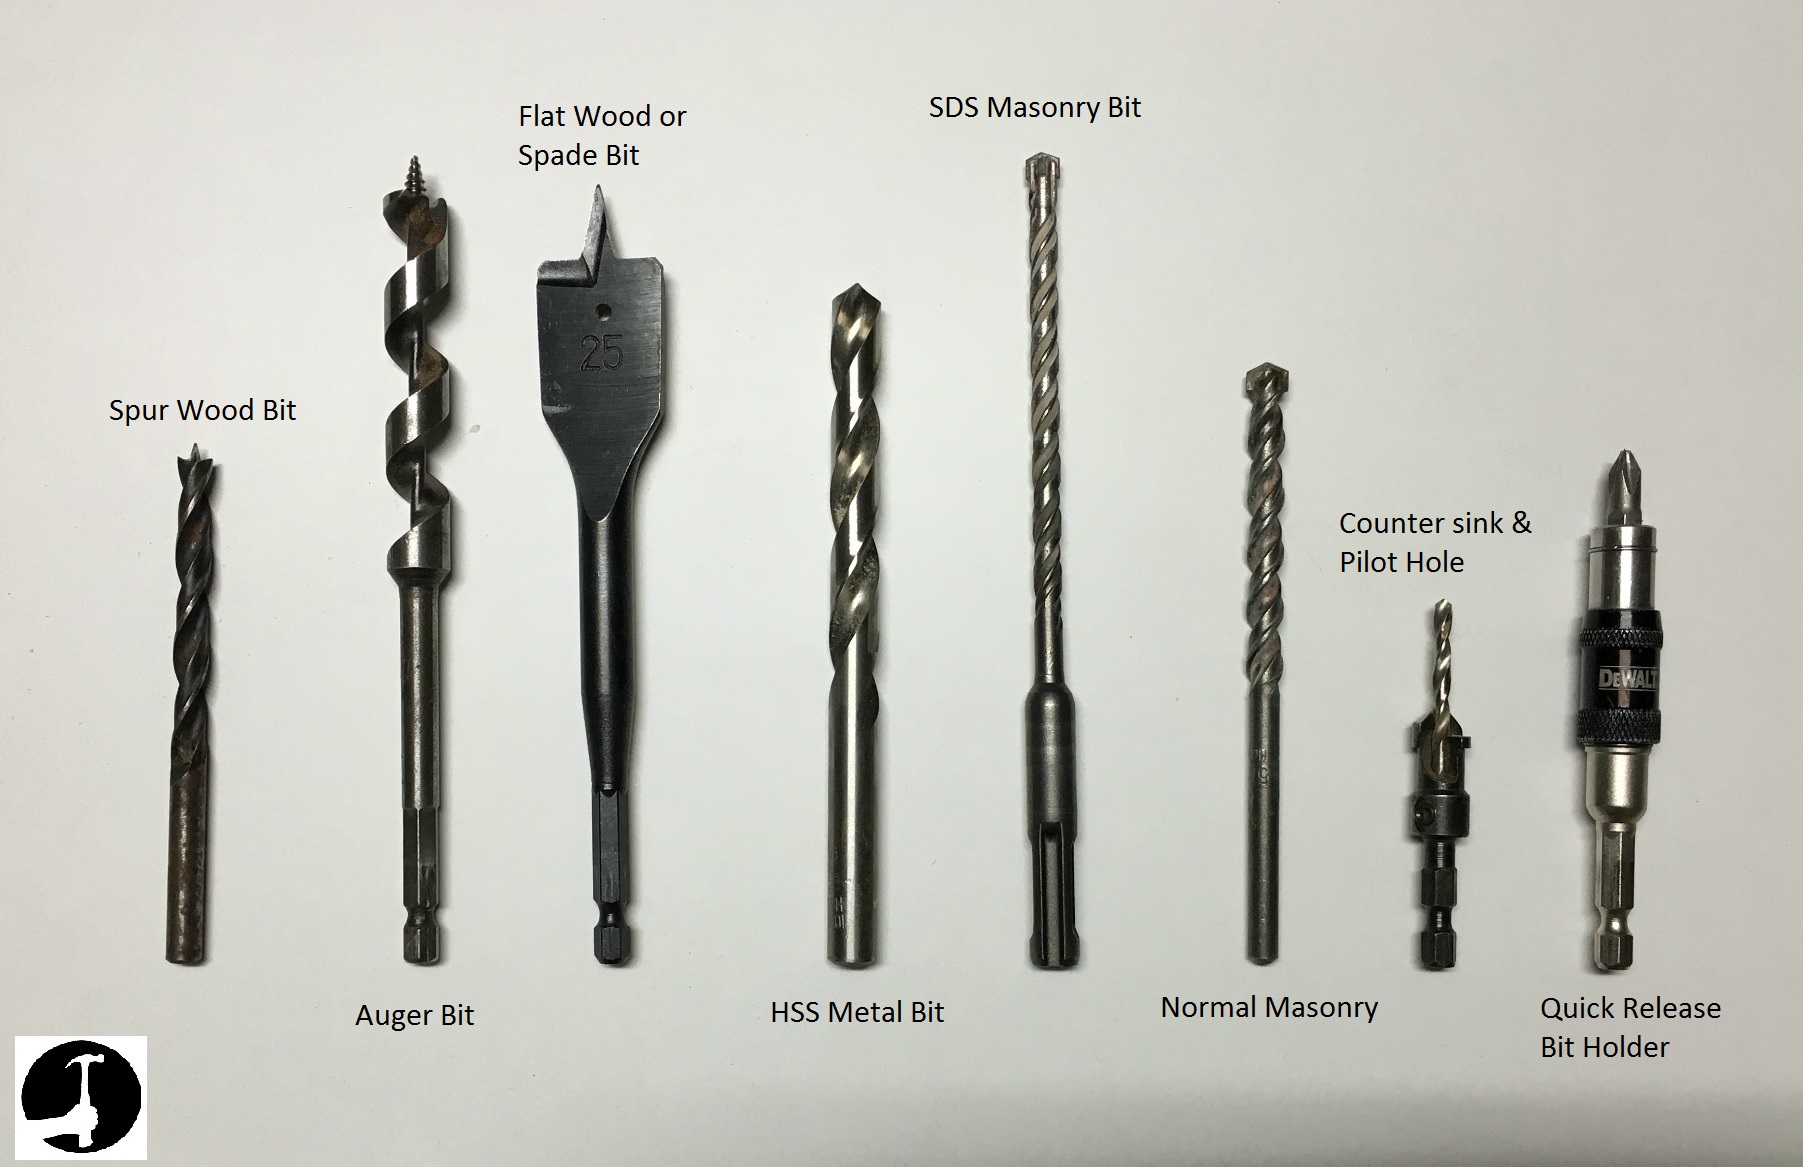
Skip this step, and your drill will struggle or damage surfaces. For 90% of home projects, choose a cordless drill/driver with variable speed control and an 18V battery (12V works for light tasks like hanging pictures). Now match your bit to the material: twist bits for wood or plastic, carbide-tipped masonry bits for tile or concrete, spade bits for large wood holes, and countersink bits to recess screw heads flush. Never force mismatched combinations—a metal bit on concrete will shatter, while a wood bit on tile cracks the surface. Pro tip: Label bit types on storage cases with colored tape for instant identification.
Why Masonry Bits Fail Without Hammer Mode
Your drill’s hammer function (a hammer-and-dot icon) is non-negotiable for concrete. Standard rotation alone overheats bits and stalls motors. Engage hammer mode before drilling, apply firm forward pressure, and let the bit’s percussion action do the work. If your drill lacks this feature, rent a rotary hammer—attempting concrete with a regular drill risks motor burnout.
How to Avoid Bit Slippage on Smooth Surfaces
Metal or glass causes bits to “walk” off-target. Solve this by pressing a center punch where you’ll drill, then tapping it with a hammer to create a divot. No center punch? Use an awl or nail to make a starter dimple. This anchors the bit tip during initial rotation.
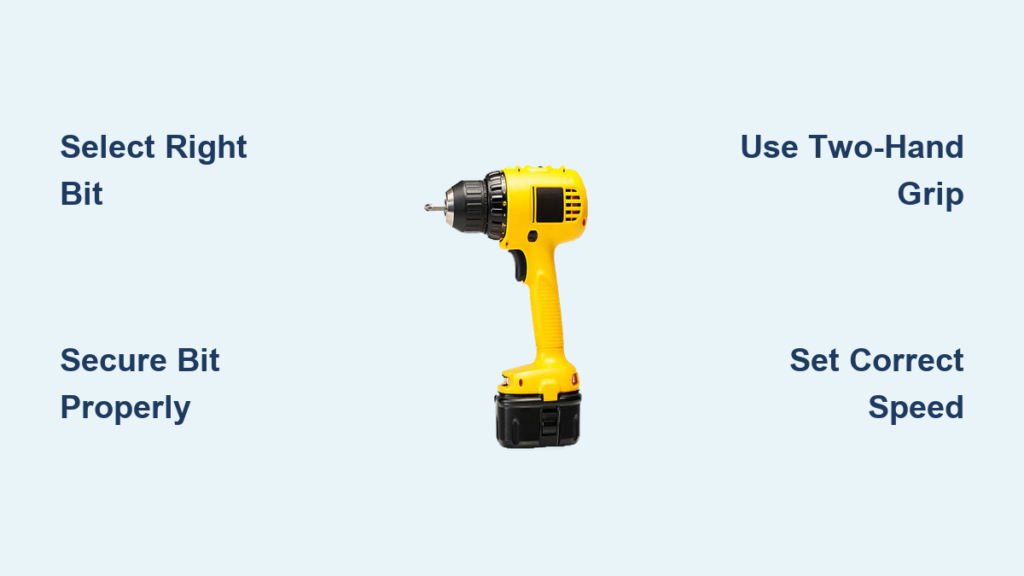
Secure Your Drill Bit in Three Foolproof Steps
A loose bit slips mid-drill, ruining your workpiece and potentially causing injury. Start with the drill unplugged or battery removed. Pull the chuck collar toward you to open the jaws, then rotate it counter-clockwise by hand until fully open. Insert the bit shank at least 1 inch deep—shallow insertion guarantees slippage. Now rotate the collar clockwise until snug, then use the chuck key (if equipped) in all three keyholes for a final quarter-turn. Test by tugging the bit; zero movement means it’s secure.
When Hand-Tightening Isn’t Enough
Keyless chucks on budget drills often loosen under pressure. After hand-tightening, grip the drill firmly against a workbench and pull the trigger briefly in reverse (left rotation). The torque will self-tighten the chuck. Never operate without securing bits—flying shanks cause eye injuries.
Master the Two-Hand Grip That Prevents Kickback
:max_bytes(150000):strip_icc()/How-to-use-a-power-drill-1825112_final-0b1f67f5a93147cd8f4c119261d648f0.png)
Drill torque can wrench the tool from your grip, especially in dense materials. Place your dominant hand on the trigger handle with your index finger on the speed control. Your non-dominant hand must brace the drill’s front near the chuck—not the base. This counteracts rotational force and stabilizes the bit. Leaning your body weight into the drill during masonry work maintains pressure without straining wrists. If the drill jerks violently, immediately release the trigger; forcing it risks drill binding and wrist sprains.
Why One-Handed Drilling Causes Disaster
Overhead drilling (like installing ceiling hooks) tempts one-handed use. Instead, clamp the drill to a stud with a vise grip or use a drill with an auxiliary handle. One-handed operation reduces control by 60%, making crooked holes inevitable.
Drill Clean Holes With Material-Specific Speeds

Speed mistakes cause splintered wood, melted plastic, or snapped bits. For wood: Use high speed (2,000+ RPM) with consistent pressure. Start slow to avoid wandering, then accelerate. For metal: Reduce speed to 500 RPM, apply cutting oil to the bit tip, and pull out frequently to clear metal shavings. For masonry: Medium speed with hammer mode engaged—never use oil here. Crucially, always drill a pilot hole first: Use a bit 1/8″ smaller than your final hole to guide the larger bit and prevent cracking.
How to Stop Wood from Splitting
Hardwoods like oak split when drilling near edges. Place a scrap wood backing board behind your workpiece. The bit exits into the scrap instead of tearing out wood fibers. For end-grain drilling, wrap masking tape around the area to contain splinters.
Why Metal Drilling Requires Oil Breaks
Friction heats bits to 500°F in seconds. Pause every 5 seconds to dip the bit in cutting oil (or 3-in-1 oil in a pinch). Dry drilling dulls bits 3x faster and risks workpiece warping.
Drive Screws Without Stripping Heads
Over-tightening strips screw heads; under-tightening causes loose fixtures. Match your driver bit precisely to the screw head (e.g., Phillips #2 for most deck screws). Set the clutch ring to a low number (3-5) for delicate tasks like cabinet hinges, or higher (15-20) for structural wood screws. Start at slow speed to seat the screw straight, then increase speed until the clutch clicks—stop immediately. The click means optimal tightness is reached.
When to Ditch the Clutch for Maximum Torque
Driving lag bolts into beams? Bypass the clutch by switching to “drill” mode (not screwdriver mode). The clutch disengages prematurely on high-resistance tasks. Use short trigger bursts to avoid stripping.
Transform Your Drill With 3 Must-Have Attachments

Your drill isn’t just for holes—it’s a workshop Swiss Army knife. Attach a wire wheel to the chuck for rust removal on bolts (run at low speed). Swap in a mixing paddle to blend paint or mortar without arm fatigue. For sanding, use a drum sander attachment with 80-grit paper on wood edges. Always clamp workpieces first—attachments multiply torque, making slips dangerous.
Why Sanding Attachments Need Drill Stops
Sanding unevenly creates dips in surfaces. Screw a drill stop collar onto the chuck at your desired depth (e.g., 1/4″). This prevents over-sanding and ensures uniform material removal.
Avoid These 5 Common Drilling Errors
Most beginners repeat these costly mistakes:
– Skipping safety glasses: Metal shards cause 20,000 eye injuries yearly.
– Forgetting the drill stop: Drill too deep, and anchors won’t grip.
– Using dull bits: Replace bits when holes require excessive pressure.
– Ignoring battery charge: Low voltage causes overheating and inconsistent torque.
– Drilling near wires/pipes: Scan walls with a stud finder first—electrocution risks are real.
How to Fix a Stalling Drill Mid-Task
If your drill suddenly stops spinning:
1. Release the trigger immediately
2. Check if the chuck is loose (retighten if needed)
3. Verify the mode selector isn’t in “hammer” for wood/metal drilling
4. Clear debris from the bit flutes with a brush
5. Let the motor cool for 2 minutes before retrying
Essential Safety Gear Beyond Basic Goggles
Safety glasses are mandatory—but insufficient for prolonged use. Wear earmuffs when drilling concrete (hammer mode exceeds 85 dB). Tie back long hair and remove rings/watches that could catch on the chuck. Always unplug corded drills or remove batteries before changing bits. Work in well-lit areas; shadows hide obstacles like hidden nails. Never brace the drill with your foot—loss of balance causes severe lacerations.
Basic Maintenance After Every Use
Dust-clogged vents overheat motors within months. Blow compressed air through the vents monthly. Wipe the chuck clean with a dry cloth to prevent debris buildup. Store batteries at room temperature—never in garages where temperatures swing. Test the clutch mechanism monthly by driving screws into scrap wood; if it doesn’t click consistently, service the drill.
Final Note: You’ve now mastered the 12 critical steps to use an electric drill safely and effectively. Remember: Pilot holes prevent 90% of drilling disasters, clutch settings save stripped screws, and material-specific speeds ensure clean results. Start practicing on scrap wood before tackling walls—within 30 minutes, you’ll drill straighter holes than most DIYers. For your next project, pair this skill with “how to choose drill bits for concrete” to tackle basement renovations confidently. Always prioritize safety: One moment of caution saves a lifetime of regret.


