
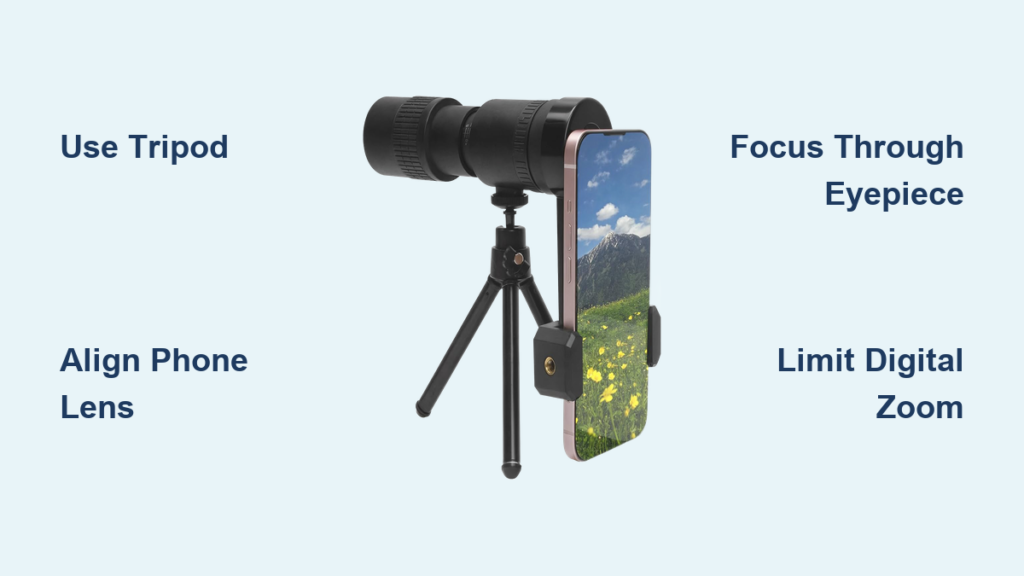
Imagine capturing the delicate feathers of a distant heron, filming a mountain peak at sunrise, or getting a close-up of your favorite band on stage—all through your iPhone. With a monocular telescope, that’s not just possible—it’s surprisingly effective. This compact optical tool pairs with your smartphone to deliver real magnification far beyond what digital zoom can offer. But unlike clip-on lenses or apps, a monocular isn’t plug-and-play. To get sharp, stable results, you need the right setup, technique, and expectations. In this guide, you’ll learn exactly how to use a monocular telescope with iPhone for clear photos and smooth videos. Whether you’re into birdwatching, hiking, or concert photography, these steps will help you unlock your iPhone’s full long-range potential.
Mount the Monocular on a Sturdy Tripod

Secure It Using the 1/4-Inch Thread
Every quality monocular comes with a 1/4-inch threaded mount on the base—this is your key to stability. Screw it into any standard tripod to create a rock-solid platform. Handheld use may seem convenient, but even slight hand tremors become major shakes at 8x or 12x magnification. A tripod eliminates camera shake and lets you focus on framing and clarity.
Make sure the connection is tight. Loose fittings lead to wobbling, which ruins both photos and videos. This step isn’t optional—it’s essential for usable results.
Choose a Stable, Level Surface
Place your tripod on solid, flat ground. Avoid soft soil, gravel, or sloped terrain that can shift under pressure. Extend the legs gradually and lock each section firmly. In windy conditions, hang a small weight—like a backpack or water bottle—from the tripod’s center hook to increase stability and dampen vibrations.
Pro Tip: The flimsy tripod included in most kits is underpowered. Upgrade to a carbon fiber or aluminum model for better balance and durability, especially with heavier iPhone setups.
Attach Your iPhone with Precision Alignment

Center the Main (1x) Camera Lens
Slide your iPhone into the smartphone adapter and carefully align the main rear camera (the 1x wide lens) with the monocular’s eyepiece. This alignment is critical—misalignment causes vignetting, where dark corners appear in your image due to blocked light.
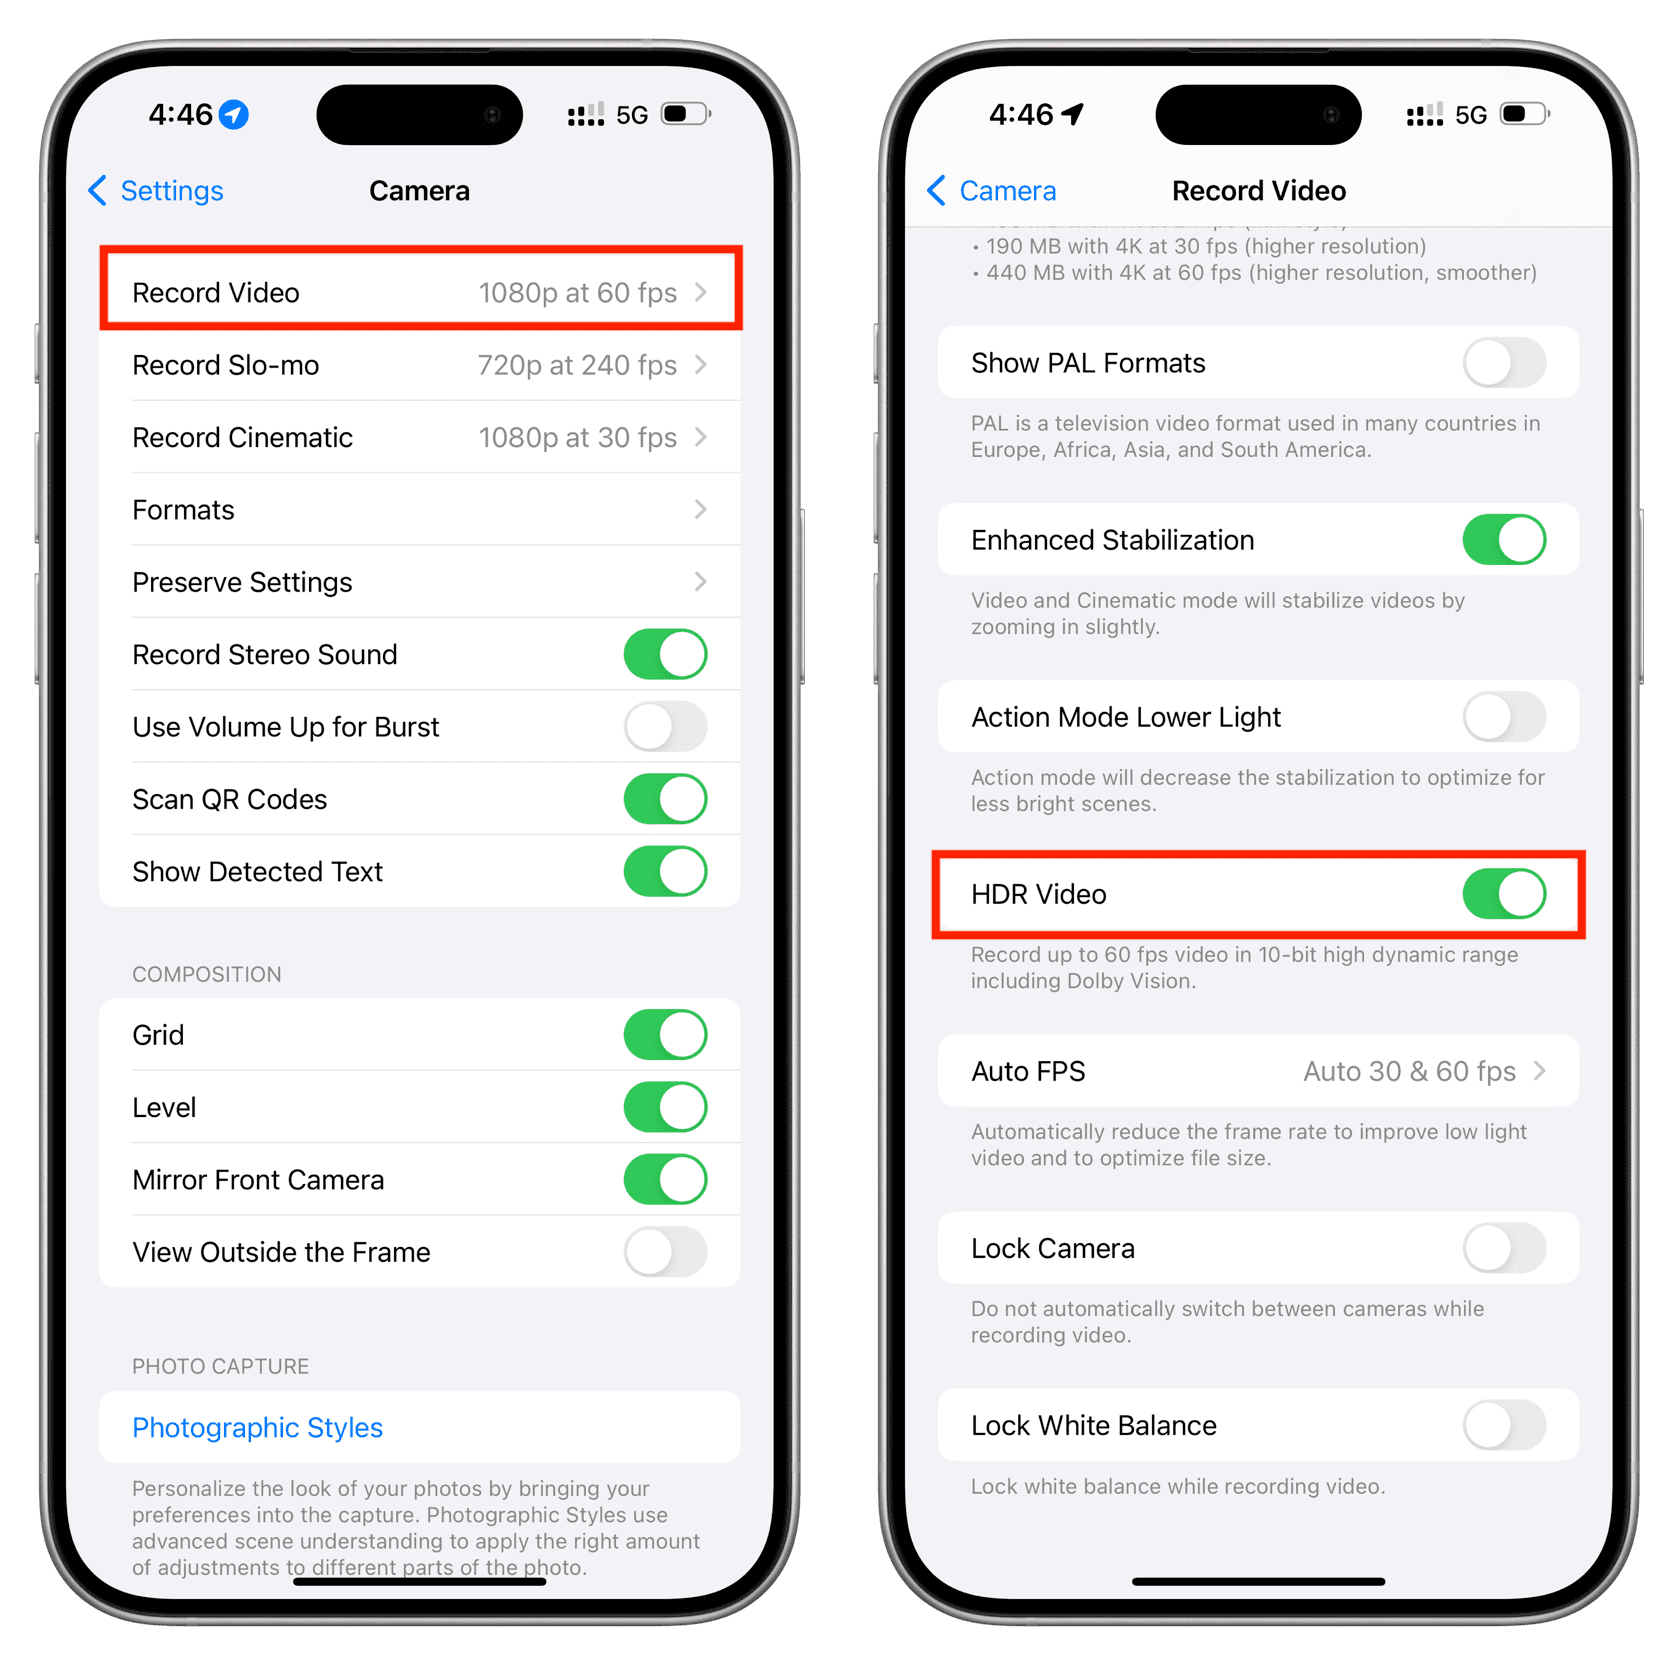
Use the grid lines in your iPhone’s Camera app (enable in Settings > Camera) to center the view. If your iPhone has multiple lenses—like ultra-wide or telephoto—avoid using the ultra-wide (0.5x) lens. It distorts the image and rarely aligns properly.
Fix Loose Mounts with a Rubber Band
Many adapters struggle with thick phone cases. If your iPhone wobbles or slips:
– Remove the case or switch to a slim, low-profile version
– Wrap a rubber band around the adapter and phone to lock it in place
This simple trick prevents movement and blocks light leaks—gaps that let ambient light into the lens path and wash out your image.
Warning: Even tiny light leaks can degrade photo quality. Cover any visible gaps with a dark cloth or electrical tape if needed.
Focus the Monocular Before Opening the Camera
Adjust Through the Eyepiece First
Look through the monocular and turn the focus wheel until the distant subject appears sharp. This step happens before you open your iPhone’s Camera app. The phone can’t fix a blurry input—if the image is soft through the eyepiece, it will be soft in your photo.
- Extend or retract the eyecup depending on whether you wear glasses
- Fine-tune focus as lighting or distance changes
Recheck Focus for Every New Subject
Don’t assume last time’s settings still apply. Objects at different distances require refocusing. Always verify sharpness through the eyepiece, especially when switching from nearby trees to distant mountains.
Expert Note: A perfectly focused 8x image beats a shaky, blurry 12x shot every time. Focus accuracy trumps maximum magnification.
Optimize iPhone Camera Settings for Clarity
Use Native Camera App in 1x Mode
Open the native iPhone Camera app and set zoom to 1x. This ensures the main lens captures the full field of view without digital cropping. Avoid third-party apps—they often introduce lag or compression.
- Use Photo mode for stills, Video mode for recording
- Enable HDR (High Dynamic Range) in Settings > Camera for better contrast in bright or mixed lighting
Tap to Focus and Adjust Exposure
Tap the screen to set focus on your subject. If the image looks too dark or washed out, drag the sun icon up or down to fine-tune brightness. This gives you control over exposure without over-relying on automatic settings.
Use Volume Buttons as Shutter Release
Press the volume up button to take a photo without touching the screen. This minimizes shake. You can also use wired headphones or AirPods as a remote shutter.
Pro Tip: Pair a Bluetooth remote or use the “Camera Remote” app for completely touch-free control—ideal for wildlife photography.
Capture Sharp Photos and Stable Videos
Limit Digital Zoom to 3x Maximum
While some kits claim “80x magnification,” that number includes aggressive digital zoom. Stick to 3x or less on the iPhone to maintain image quality.
- Optical zoom (from monocular): 8x–12x — delivers sharp, detailed images
- Digital zoom beyond 3x: causes pixelation, blur, and loss of detail
Realistic effective range: 10x–25x (optical + minimal digital), depending on lighting and stability
Shoot in Daylight for Best Results
Natural light produces the clearest images. The monocular works well at dawn, dusk, or on overcast days but struggles in low light. Avoid nighttime use—this isn’t a night-vision or thermal device.
Record Smooth Video with Full Stability
For stable footage:
– Keep the tripod locked down
– Avoid touching the phone during recording
– Use a jacket or shield to block wind
Note: Even a 6 mph breeze can cause visible shake at high magnification without counterweighting.
Avoid These Common Setup Mistakes
Don’t Use Ultra-Wide or Secondary Telephoto Lenses
- ❌ Ultra-wide (0.5x): causes distortion and framing issues
- ❌ Telephoto (2x–5x): often results in vignetting or misalignment
✅ Best choice: Main (1x) wide lens — offers the cleanest, most compatible image
Don’t Skip Lens Cleaning
Dust, fingerprints, or smudges on the monocular eyepiece or iPhone lens degrade image quality. Use the included microfiber cloth before every use.
Quick check: Shine a flashlight across the lens surface to spot invisible smears.
Don’t Expect Plug-and-Play Performance
This isn’t a simple clip-on lens. Success requires:
– Precise alignment
– Manual focusing
– Stable support
Users who skip steps often blame the device—when the real issue is improper setup.
Upgrade Your Setup for Better Results

Invest in a Heavy-Duty Tripod
Replace the included flimsy model with a carbon fiber or aluminum tripod featuring:
– 1/4-inch screw mount
– Adjustable legs
– Center hook for counterweights
Use a Flexible Ball Head Mount
Swap the rigid adapter for a Yulonzi-style ball head. This allows micro-adjustments for perfect alignment and balance, especially with larger iPhones like the 15 Pro Max.
Add a Remote Shutter
Eliminate all touch-induced shake with:
– Wired remote (via Lightning or USB-C)
– Bluetooth shutter button
– Headphone volume control
Switch to a Slim Phone Case
Thick cases (like OtterBox) prevent secure mounting. Use a low-profile case for a snug, stable fit.
Ideal Use Cases for iPhone + Monocular
Birdwatching and Wildlife Observation
Observe animals from a distance without disturbing them. The 12x magnification lets you identify plumage, behavior, or movement patterns clearly.
Tip: Use silent shutter mode to avoid scaring wildlife.
Hiking and Outdoor Exploration
Spot trail markers, landmarks, or terrain features ahead. Great for scouting routes or identifying distant peaks.
Sports and Concerts
Watch games or performances from the back rows. Capture stage details or player actions with surprising clarity.
Educational and Nature Photography
Teachers and students can use it for field biology, geography, or STEM learning. Photograph insects, flowers, or rock formations with macro-like detail.
Moon Viewing (Limited Astronomy)
With a stable setup, you can capture detailed images of the moon. Stars and planets are generally too dim for consumer-grade monoculars.
Troubleshoot Common Issues
| Issue | Cause | Solution |
|---|---|---|
| Vignetting (dark corners) | Misalignment | Reposition phone; use grid lines; avoid digital zoom |
| Shaky footage | Weak tripod or wind | Upgrade tripod; add weight; shield setup |
| Blurry images | Poor focus or shake | Focus through eyepiece; use remote shutter; limit digital zoom |
| Light leaks | Gaps in adapter | Cover with cloth or tape; use in shade |
Maximize Performance: Pro Tips
✅ Always use a tripod—it’s the foundation of success
✅ Start with 1x zoom and increase only if needed
✅ Enable HDR mode for richer detail
✅ Clean lenses before every use
✅ Test alignment with a test shot
❌ Avoid handheld use—especially above 8x
❌ Don’t overuse digital zoom—quality drops fast
❌ Don’t expect night vision—this is daylight optics only
Pro Hack: Use wired earbuds as a remote shutter. Press the volume button to snap photos without touching the phone.
Choose the Right Monocular for iPhone
Look for these features:
| Feature | Why It Matters |
|---|---|
| 12×42 or 8–32×50 Specs | Balanced magnification and light gathering |
| Universal Phone Adapter | Fits all iPhone sizes (11–15 series) |
| Tripod Compatibility | 1/4-inch mount for stability |
| Rubber Grip & Eyecup | Improves comfort and alignment |
Top Models:
– K&F Concept 12×50: Solid build, good clamp
– 8–32×50 Zoom Monocular: Adjustable magnification
– Generic 12×42 Kit: Budget-friendly, includes basics
Warning: “80x” claims are misleading—this refers to digital zoom, not optical power.
Final Verdict: Powerful Tool, Demanding Setup
The monocular telescope for iPhone is not a casual accessory—it’s a specialized tool for outdoor enthusiasts who value detail and distance. When used correctly, it delivers impressive optical reach at a fraction of the cost of professional scopes.
Who wins?
– Birdwatchers ✅
– Hikers and hunters ✅
– Nature photographers ✅
– Educators and travelers ✅
Who should skip it?
– Casual users expecting instant results ❌
– Anyone unwilling to use a tripod ❌
– Those seeking night vision or thermal imaging ❌
With the right technique—precise alignment, stable support, and smart camera settings—your iPhone becomes a window to distant worlds. Just remember: stability is everything.
“It’s not just cool—it’s useful. Just don’t try to hold it all by yourself.”


