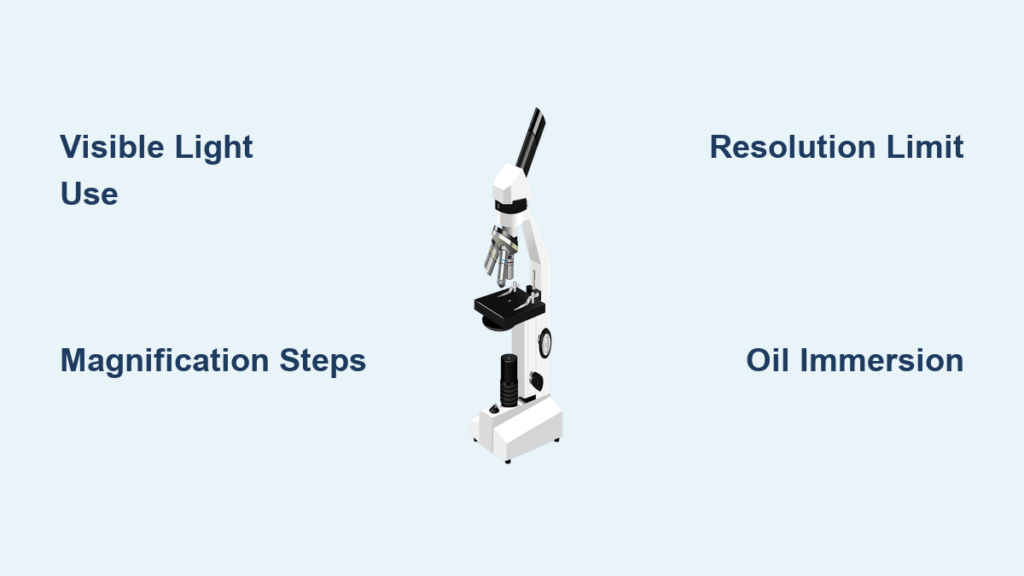
A light microscope is a scientific instrument that uses visible light and a system of lenses to magnify tiny structures invisible to the naked eye. Also known as an optical microscope, it allows researchers, students, and medical professionals to examine cells, microorganisms, tissues, and other microscopic specimens in detail. By detecting how light interacts with samples—through absorption, scattering, phase shifts, or fluorescence—it produces enlarged, high-contrast images that reveal essential biological and material features. This makes the light microscope a foundational tool in biology, medicine, education, forensics, and materials science.
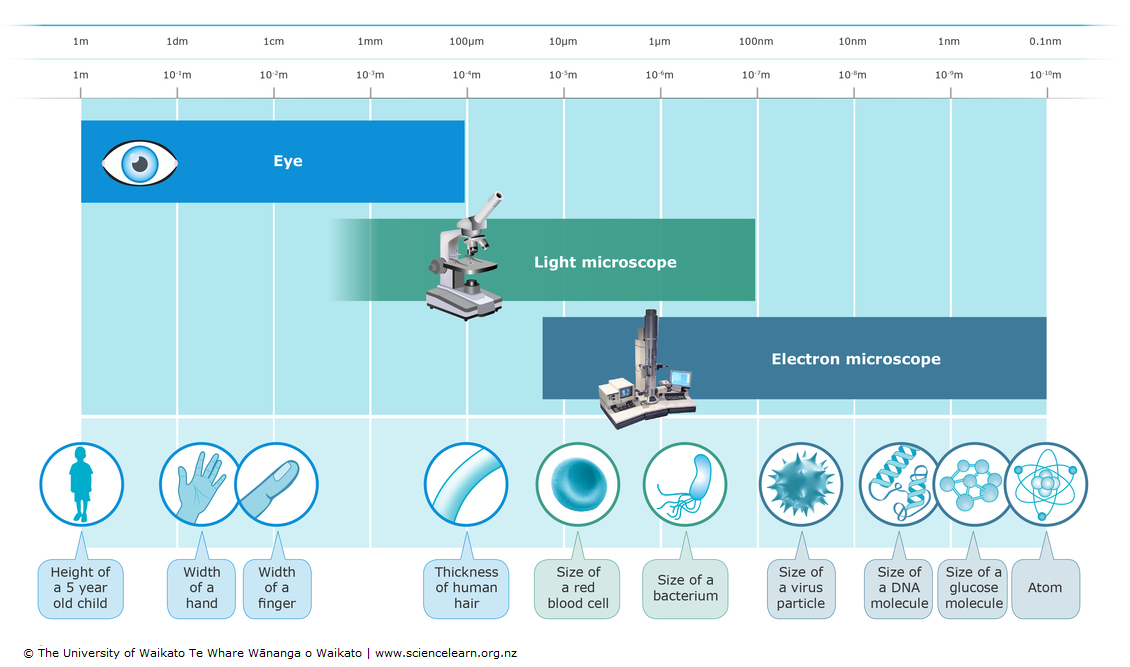
Unlike electron microscopes, light microscopes can image live specimens without requiring vacuum conditions or extensive preparation. This enables real-time observation of dynamic processes such as cell division, bacterial motility, and membrane trafficking. While limited by the diffraction of visible light—with a practical resolution limit of about 200 nanometers—modern advancements like super-resolution, confocal, and expansion microscopy have significantly extended its capabilities. Whether you’re viewing stained bacteria under brightfield illumination or tracking fluorescent proteins in living cells, understanding the light microscope definition, its components, and operational principles is crucial for accurate and insightful microscopic analysis.
How a Light Microscope Magnifies and Resolves Detail
The Role of Lenses in Image Formation
A light microscope works by directing visible light through or onto a specimen and using a series of lenses to magnify the resulting image. The process begins with a light source, typically LED or halogen, which illuminates the sample from below. This light passes through the condenser lens, which focuses it into a concentrated beam across the specimen. As light interacts with the sample, differences in thickness, density, or staining alter how it is transmitted, absorbed, or scattered.
The objective lens, positioned close to the slide, captures this modified light and forms a magnified real image inside the microscope. This image is then further enlarged by the eyepiece (ocular lens), usually 10×, creating a virtual image visible to the eye. Total magnification is calculated by multiplying the objective and ocular magnifications—for example, a 40× objective with a 10× eyepiece yields 400× total magnification. Standard compound microscopes typically offer magnifications from 40× to 1000×, with some reaching up to 1300×.
Why Resolution Matters More Than Magnification
While magnification makes objects appear larger, resolution determines how much fine detail you can actually distinguish. The resolving power of a light microscope depends on the wavelength of light and the numerical aperture (NA) of the lens system. According to the Rayleigh criterion:
$$
r = 0.61 \times \frac{\lambda}{\text{NA}}
$$
Where $ \lambda $ is the wavelength (e.g., 550 nm for green light) and NA reflects the lens’s ability to gather light. In air, the maximum NA is ~1.0; with oil immersion, it increases to 1.4–1.6, significantly improving resolution. This is why the 100× objective requires immersion oil—to reduce light refraction and maximize detail.
Without sufficient resolution, highly magnified images appear blurry—a phenomenon known as empty magnification. Therefore, achieving clear visualization depends not only on magnification but also on optimizing optical alignment, contrast techniques, and illumination.
Essential Components of a Light Microscope
Core Hardware and Their Functions
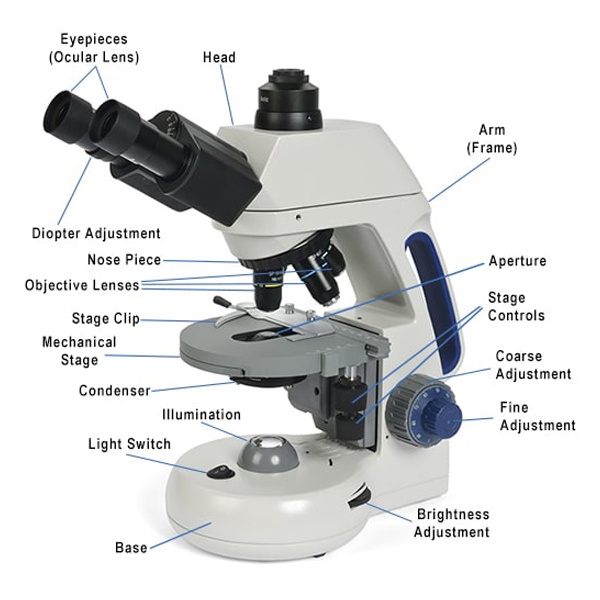
Each part of a light microscope plays a critical role in image formation and clarity:
- Light Source: Provides illumination; modern models use energy-efficient LEDs.
- Condenser Lens: Concentrates light onto the specimen; often includes an iris diaphragm to control contrast and depth of field.
- Stage: Holds the slide; mechanical stages allow precise X-Y movement for scanning.
- Objective Lenses: Mounted on a rotating nosepiece, common magnifications are 4× (scanning), 10× (low power), 40× (high power), and 100× (oil immersion).
- Eyepiece (Ocular): Usually 10×; some include reticles for measurement.
- Focus Knobs: Coarse knob for initial focusing, fine knob for sharp detail at high magnification.
- Arm and Base: Structural support; base houses electrical components and light source.
Proper use of these components ensures optimal performance and prevents damage—especially when switching objectives or adjusting focus.
The Importance of the Body Tube and Optical Path
The body tube maintains the correct distance between the objective and eyepiece, ensuring the optical path remains aligned. In standard microscopes, this distance is fixed at 160 mm (finite optics) or infinity-corrected for advanced models. Any misalignment or extension can distort the image or reduce resolution.
Additionally, some microscopes feature trinocular heads that allow attachment of digital cameras, enabling image capture, documentation, and analysis—critical in research, diagnostics, and education.
Major Types of Light Microscopes and Their Uses
Brightfield Microscopy: The Standard for Stained Samples
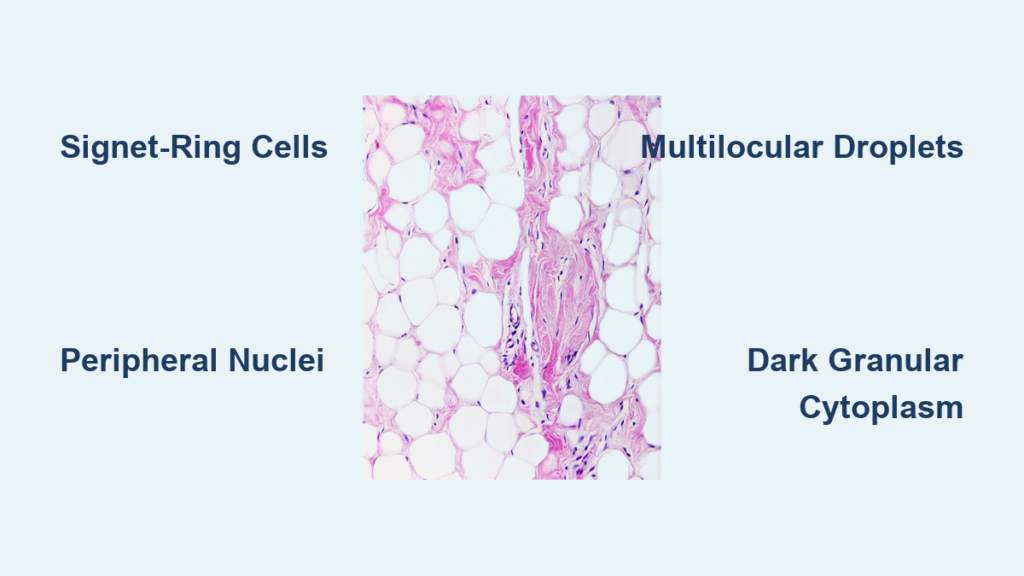
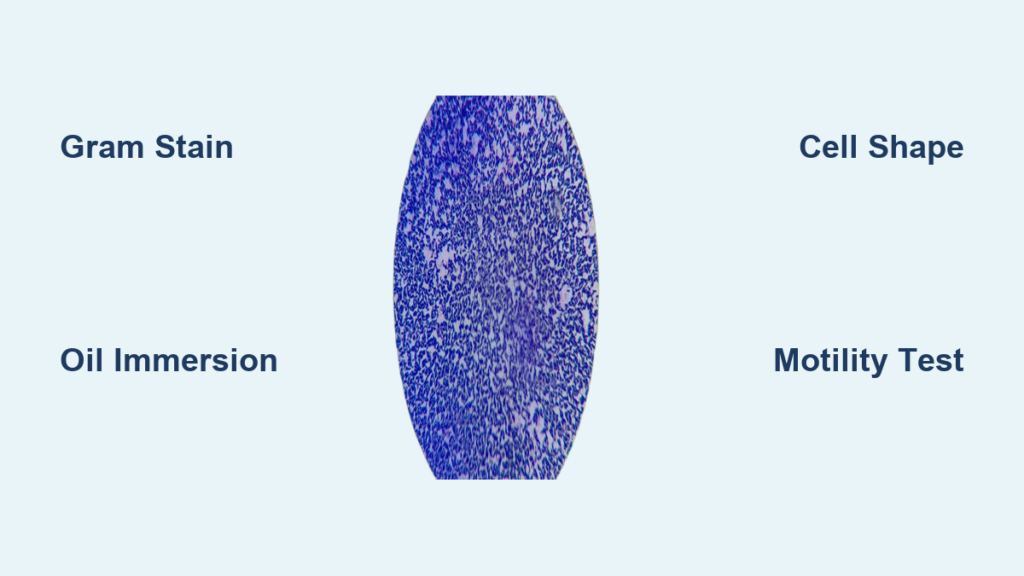
Brightfield microscopy is the most basic and widely used type. It uses transmitted light to illuminate the specimen from below, producing a dark image on a bright background. It’s ideal for stained samples such as histological sections or Gram-stained bacteria.
- Best For: Viewing fixed, colored structures (e.g., nuclei, cell walls)
- Limitation: Poor contrast in transparent, unstained specimens
- Typical Use: Classroom labs, medical diagnostics
Always start with brightfield when learning microscopy—it’s simple, accessible, and foundational for understanding contrast techniques.
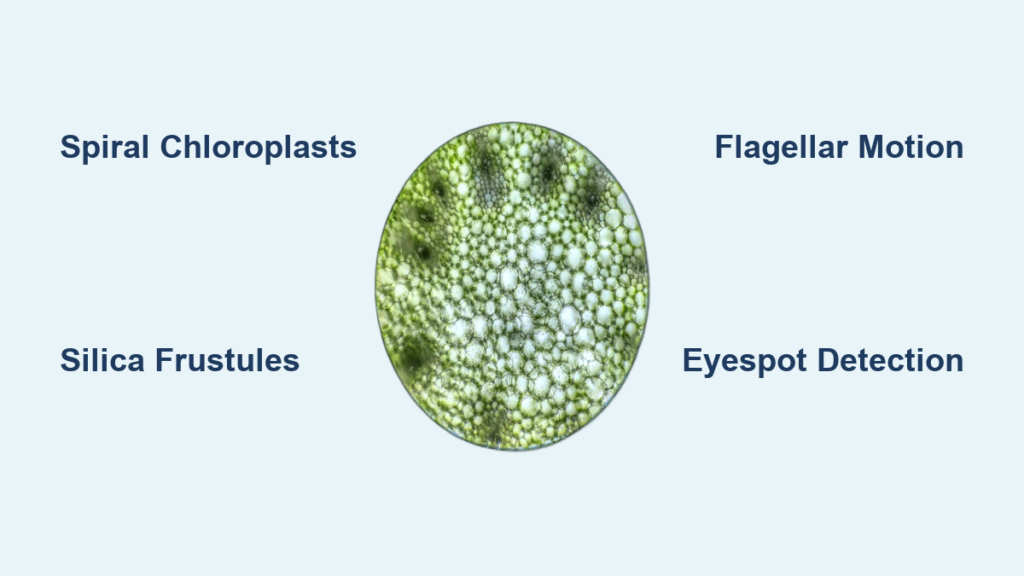
Darkfield Microscopy: Visualizing Live, Transparent Specimens
In darkfield microscopy, a special condenser directs light at an angle so only scattered rays enter the objective. This results in a bright specimen against a dark background, making it ideal for visualizing live, transparent organisms like Treponema pallidum or motile protists.
- Advantage: No staining required; reveals edges and surface details
- Drawback: Requires intense illumination; overall image may be dim
- Tip: Use with thin, lightly scattering samples for best results
Darkfield excels where brightfield fails—imaging living cells without killing or altering them.
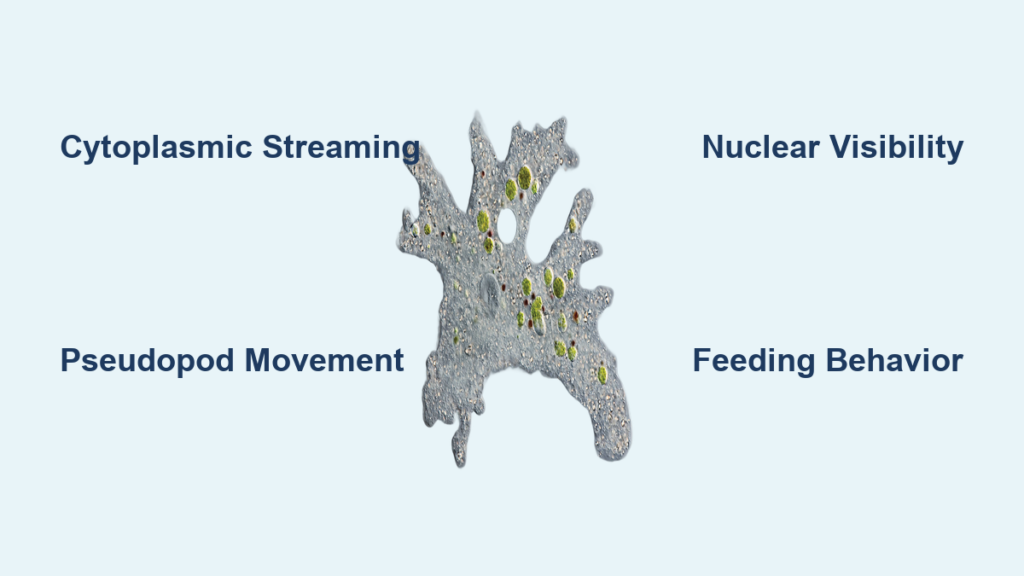
Phase Contrast and DIC: High-Contrast Imaging Without Staining
Phase contrast microscopy converts tiny phase shifts in light—caused by differences in refractive index—into visible brightness changes. This allows clear imaging of unstained, transparent cells, such as those undergoing mitosis.
- Key Components: Annular condenser and phase plate
- Image Quality: High contrast with halo artifacts
- Applications: Cell culture monitoring, microbiology
Differential Interference Contrast (DIC), or Nomarski microscopy, splits polarized light into two beams that pass through adjacent areas. When recombined, they create interference patterns that highlight refractive index gradients, giving a 3D-like appearance.
- Strengths: Excellent resolution; minimal halos
- Ideal For: Observing granules, nuclei, and cell membranes in live specimens
DIC offers superior clarity compared to phase contrast but requires more complex optics.
Fluorescence and Advanced Imaging Techniques
Fluorescence and Confocal Microscopy

Fluorescence microscopy uses fluorochromes—dyes or proteins like GFP—that absorb short-wavelength light and emit longer-wavelength light. Filters isolate the emitted glow, producing sharp, colorful images of targeted biomolecules.
- Core Parts: Excitation filter, dichroic mirror, emission filter
- Examples: DAPI (nuclei), FITC (antibodies), GFP (gene expression)
- Use Cases: Protein localization, pathogen detection, viability assays
Confocal microscopy uses a laser and pinhole aperture to eliminate out-of-focus light, enabling optical sectioning and 3D reconstruction of thick specimens.
- Benefits: Sharp images; reduced background
- Applications: Brain tissue, biofilms, z-stack analysis
Super-Resolution and Specialized Methods
Techniques like STED and SIM break the diffraction limit, achieving 20–50 nm resolution. Two-photon microscopy enables deep-tissue imaging (>200 μm), while light sheet (SPIM) allows fast, gentle 3D imaging of embryos.
TIRF microscopy excites fluorophores within ~100 nm of the coverslip, ideal for studying membrane dynamics. Expansion microscopy physically enlarges samples to achieve super-resolution with standard optics.
Practical Use: Step-by-Step Microscope Operation
Proper Setup and Focusing
- Turn on the light source.
- Rotate to the 4× objective.
- Place and secure the slide.
- Raise the stage (or lower the objective) until near the slide.
- Use coarse focus to bring the image into view.
- Switch to fine focus for sharp detail.
- Adjust condenser and diaphragm for contrast.
- Move to higher objectives (10× → 40× → 100×), using fine focus only.
- For 100×, apply immersion oil.
Always start low to avoid damaging the slide or lens.
Avoiding Common Mistakes
- Never use coarse focus at high magnification.
- Clean lenses with lens paper only.
- Wipe off immersion oil after use.
- Store with 4× objective engaged, stage lowered, and covered.
Final Note
The light microscope definition extends beyond a simple magnifier—it’s a powerful gateway to the microscopic world. From basic brightfield to advanced super-resolution systems, its evolution continues to drive scientific discovery. Whether you’re a student, researcher, or clinician, mastering its principles empowers you to explore life at the cellular level with clarity and precision.