You’re setting up your microscope, slide in hand, but the view through the eyepiece is nothing but a blur. Finding your specimen seems like searching for a needle in a haystack—until you turn the coarse adjustment knob. Within seconds, shapes begin to emerge. This is no accident: the coarse adjustment microscope function is engineered precisely for this moment. It delivers rapid vertical movement of the stage or objective lens, bringing your sample into rough focus fast—so you can move from confusion to clarity in seconds.
On most microscopes, a single turn of the coarse knob shifts the stage by centimeters, covering distances that would take dozens of turns on the fine adjustment. This makes it indispensable during initial observation, especially at low magnifications like 4x or 10x. But this power comes with responsibility. Misuse—particularly at high magnification—can result in costly damage to both slides and objectives. Used correctly, the coarse adjustment saves time and frustration; used incorrectly, it can destroy equipment.
In this guide, you’ll learn how the coarse adjustment works, when and how to use it properly, how to avoid common mistakes, and how to maintain it for long-term reliability—all based on standard microscopy protocols and mechanical design principles.
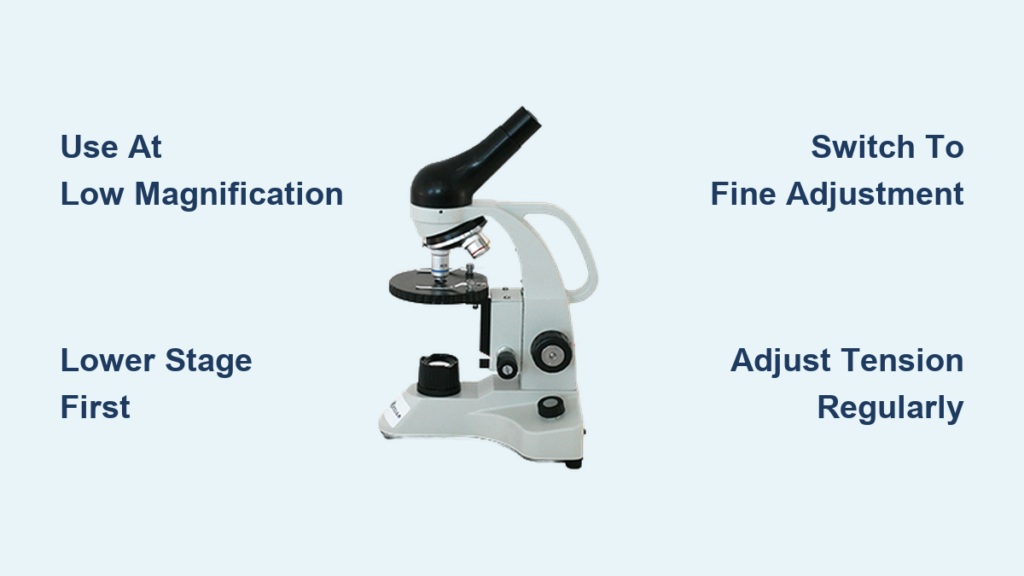
Start with Coarse Focus Every Time
When placing a new slide on the stage, your first action should always be to engage the coarse adjustment knob. More than just a starting point, it’s a critical safety step. Before inserting the slide, rotate the coarse knob to lower the stage to its lowest position. This creates essential clearance between the objective lens and the slide, preventing accidental contact during placement.
Once the slide is secured with stage clips, slowly turn the coarse knob to raise the stage while looking through the eyepiece. Your goal isn’t perfect clarity yet—just to bring the specimen into general visibility. As shapes, lines, or textures appear out of the blur, you’ve reached approximate focus. That’s your signal to stop and switch to the fine adjustment knob.
Pro Tip: Keep both eyes open when focusing. It reduces eye strain and improves depth perception, especially helpful during initial coarse adjustments on binocular microscopes.
Why Coarse Adjustment Must Come First
Imagine trying to find a tiny letter on a page using only a magnifying glass that moves in millimeter increments. That’s what relying solely on the fine adjustment would feel like. The fine knob moves the stage in 0.1–0.2 mm increments per full rotation—far too slow for initial focusing when the specimen may be millimeters out of alignment.
The coarse knob, in contrast, covers that same distance in less than a single turn. This speed is crucial for:
– Locating unknown or unstained specimens
– Scanning large tissue sections
– Switching between multiple slides efficiently
Without coarse adjustment, microscopy would be impractical for routine use in labs, classrooms, or clinical settings.
Preventing Slide and Lens Damage

One of the most frequent beginner errors is continuing to use the coarse knob after switching to high-power objectives. At 40x or 100x magnification, the working distance—the gap between the lens tip and the cover slip—can be less than 0.1 mm. A single aggressive twist of the coarse knob can slam the objective into the slide, causing irreversible damage.
Always follow this golden rule:
Use coarse adjustment only at low magnification (4x or 10x).
Switch exclusively to fine adjustment once you rotate to 40x or higher.
Ignoring this rule risks cracked slides, scratched lenses, contaminated oil immersion objectives, and misaligned optics—costly mistakes that disrupt workflows and may require professional repair.
Use Only at Low Magnification
The coarse adjustment knob is specifically designed for low-power objectives—typically 4x and 10x—where the depth of field is wide and precise focus is less critical.
At these magnifications, a greater portion of the specimen remains in focus across different planes. This tolerance allows large vertical movements without losing the image entirely, making the coarse knob ideal for quick, broad adjustments.
Fact: The coarse knob can move the stage by several centimeters per turn, while the fine knob adjusts in fractions of a millimeter—a difference of over 100x in movement scale.
Why High Magnification Changes the Game
When you rotate to a 40x or 100x objective, two things happen:
1. Depth of field shrinks dramatically—only a thin slice of the specimen stays in focus.
2. Working distance drops to near-zero—sometimes less than the thickness of a human hair.
At this point, even a slight turn of the coarse knob can move the stage too far, throwing the image out of focus or causing a collision. Most manufacturers explicitly warn against using the coarse adjustment at high power.
Critical Rule: Never use the coarse focus knob once you’ve selected a 40x or 100x objective. Always rely on the fine adjustment for final focusing.
Consequences of Misuse
- Objective lens crash: The lens hits the slide, potentially bending internal components.
- Slide breakage: Especially with glass coverslips, impact can crack or shatter the slide.
- Oil contamination: In 100x oil immersion, oil smears onto the lens, degrading future images.
- Optical misalignment: Repeated impacts can throw the microscope’s alignment off, requiring recalibration.
Some advanced models include parfocal design or mechanical safety stops to reduce risk, but these are not foolproof. Always follow standard operating procedures.
Identify the Coarse Knob by Size and Position
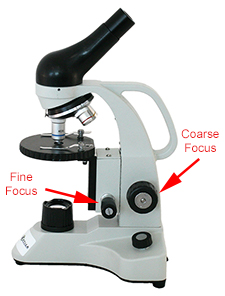
You should be able to locate the coarse adjustment knob without looking. It’s typically larger in diameter (25–40 mm) than the fine knob (15–25 mm), providing better grip for fast, full-hand turns.
Common Configurations
Most microscopes use one of two setups:
Side-Mounted Dual Knobs
- Both knobs are on the same side of the arm.
- The coarse knob is usually positioned higher or centrally.
- Easy to operate with one hand.
Coaxial Knobs (Same Shaft)
- Inner and outer knobs share a single axis.
- Outer ring is often the fine knob, inner is coarse—but not always.
- Requires checking the manual or labeling.
Warning: On some models (e.g., older Olympus or Nikon), the coarse knob is the outer one. Always verify before use.
How to Test Which Knob Is Which
If unsure:
1. Turn one knob slowly while watching the stage.
2. If the stage moves rapidly → coarse adjustment
3. If movement is barely visible → fine adjustment
Some microscopes label knobs with “C” for coarse and “F” for fine, but many educational models lack clear markings. Develop the habit of testing movement before focusing.
Prevent Stage Drift with Tension Adjustment
Over time, especially in high-use environments like student labs, the coarse adjustment mechanism can loosen. This leads to stage drift—the stage slowly sinks under its own weight, causing the image to blur even when untouched.
This issue compromises observation stability and frustrates users during long sessions.
Fix Drift Using the Tension Adjuster
Many microscopes include a tension ring or screw built into the coarse knob assembly. It increases friction in the focusing gears to stabilize the stage.
How to Adjust Tension
- Locate the knurled ring or set screw (often inside the coarse knob).
- Turn clockwise to increase tension.
- Stop when the stage stays in place but the knob turns smoothly.
- Avoid over-tightening—it can damage gears.
Note: Some models require a special tension wrench or hook tool, especially in shared educational microscopes.
Alternative: Opposing Knob Twist
On certain stereomicroscopes without a dedicated tension ring, rotate both coarse knobs in opposite directions simultaneously to tighten the mechanism temporarily.
Work With Fine Adjustment, Not Against It
The coarse and fine adjustment knobs are not alternatives—they’re partners in a two-stage focusing system.
Step-by-Step Focusing Workflow
- Start with the 4x objective.
- Lower the stage fully using the coarse knob.
- Insert and secure the slide.
- Slowly raise the stage with the coarse knob until the specimen appears.
- Switch to the fine knob to sharpen the image.
- Center your area of interest.
- Rotate to a higher objective (10x → 40x).
- Use only the fine knob to refocus.
Direct Guidance: “Start with coarse focus to bring the specimen into general view. Once visible, switch to fine focus for clarity.” — Standard Lab Protocol
What Happens If You Skip Steps?
- Fine-only focusing: Impractically slow for beginners.
- Coarse at high power: High risk of lens crash.
- Not lowering the stage first: Increases chance of contact during slide insertion.
Following the correct order protects equipment and speeds up analysis.
Maintain Smooth Operation Long-Term
Like any precision instrument, the microscope’s coarse adjustment mechanism requires care.
Lubrication
Internal rack-and-pinion gears should be lubricated every 6–12 months with microscope-grade grease. Never use household oils like WD-40—they attract dust and degrade over time.
Cleaning
Wipe knobs with a lint-free cloth dampened with 70% ethanol. Avoid spraying liquids directly onto the microscope.
Avoid Over-Tightening
Excessive tension adjustment stresses gears. If the knob feels stuck or gritty, stop and consult a technician.
Warranty Protection
Many manufacturers void warranties if damage results from improper coarse knob use at high magnification. Proper training protects both equipment and budget.
Designed for Speed, Not Precision
The coarse adjustment knob’s purpose is clear: rapid initial focusing. It’s not meant to deliver sharp images—that’s the fine knob’s job.
| Feature | Purpose |
|---|---|
| Large knob size | Easy grip for fast turns |
| Rapid movement | Cover large distances quickly |
| Low magnification use | Matches wide depth of field |
| First-step function | Establish baseline focus |
Reality Check: Some basic or budget microscopes include only a coarse adjustment knob. These are unsuitable for high-magnification work (>80x), as they lack the precision needed for cellular detail.
For serious biological, medical, or industrial applications, a dual-knob system is essential.
Apply Best Practices in Every Setting
In Education: Build Confidence Safely
Students rely on the coarse knob to find specimens quickly. Instructors must emphasize:
– Lowering the stage before slide insertion
– Stopping coarse use at 40x+
– Recognizing knob differences by touch
In Research: Speed Through Screening
Biologists use coarse adjustment to rapidly scan tissue sections. Once a region of interest is found, they switch to fine focus for detailed analysis.
In Industry: Navigate Thick Samples
Material scientists inspecting metals or polymers use the coarse knob to jump between focal planes in thick, uneven samples—before refining with fine control.
Summary: Master the Basics, Avoid Costly Mistakes
The coarse adjustment microscope function is foundational. It enables fast, effective starting focus—but only when used correctly.
✅ Do This:
- Always start with coarse adjustment at 4x or 10x
- Lower stage before inserting/removing slides
- Switch to fine knob once image appears
- Adjust tension if stage drifts
- Keep knobs clean and well-maintained
❌ Never Do This:
- Use coarse knob with 40x or 100x objectives
- Force the knob if movement feels stuck
- Over-tighten tension adjusters
- Assume all microscopes have the same knob layout
Final Tip: Look Before You Turn
Always check the lens-to-slide distance before rotating the coarse knob. If the objective is close to the slide, don’t raise the stage—switch to fine focus or rotate back to low power.
By respecting the coarse adjustment’s role—rapid initial focus at low power—you’ll work faster, see more clearly, and protect your microscope for years to come.