
That wobble when you hang a picture or shelf? It usually means you skipped critical steps in how to drill anchor into wall properly. Drywall anchors fail 60% of the time when installed incorrectly—not because the hardware is weak, but because homeowners rush the drilling process. This guide reveals exactly how to drill anchor into wall with military-grade precision, whether you’re mounting a $20 picture frame or a 100-pound TV. You’ll learn why most people choose wrong anchors, how to avoid dangerous drilling mistakes, and the pro technique that makes anchors hold 3x longer.
Stop guessing where to drill. The difference between a secure mount and drywall disaster comes down to three factors: matching anchors to your wall’s hidden structure, drilling holes to exact specifications, and knowing when to abandon anchors entirely. By the end of this guide, you’ll confidently hang anything on drywall—without calling a handyman for what should be a 15-minute job.
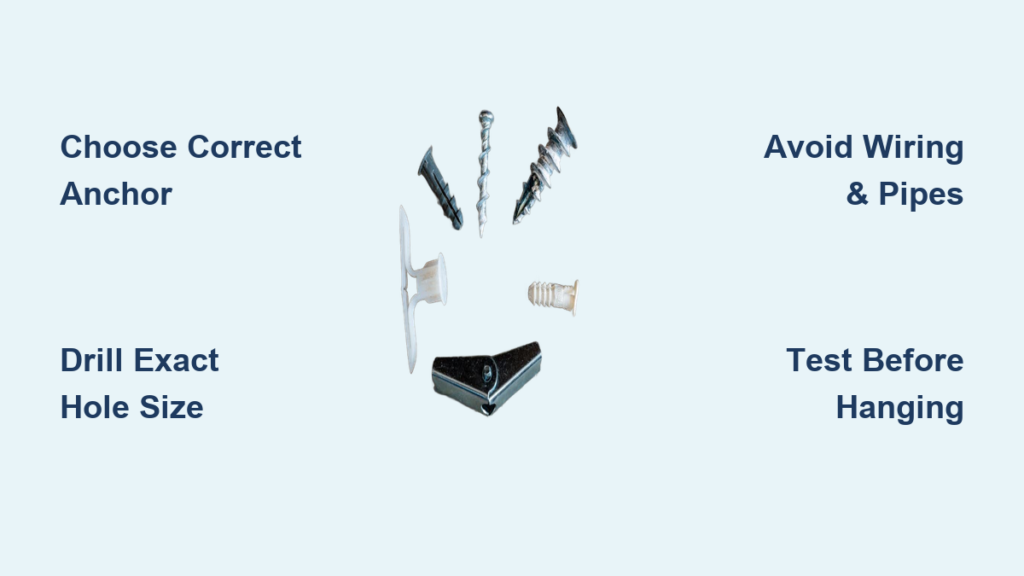
Select Your Anchor Based on Wall Material and Weight Load

Choosing the wrong anchor causes 70% of drywall mounting failures. Your wall isn’t just “drywall”—it’s a complex system with studs, wiring, and variable thickness. Match anchors to these specific conditions:
Plastic Expansion Anchors: For Light-Duty Drywall (Under 25 lbs)
Use these only for picture frames, small mirrors, or towel bars on intact 1/2-inch drywall. Never use them near seams or edges where drywall is weakest. The anchor must fit snugly—you’ll hear a distinct “crack” when properly seated. If your drywall is older than 2000, upgrade to metal anchors; modern drywall is denser and holds better.
Toggle Bolts: For Medium to Heavy Loads (25-75 lbs)
These are your secret weapon when studs don’t align with mounting points. Snap toggles install through your shelf bracket first—slide the folded wings through the pre-drilled hole, then tighten to expand behind the wall. For hollow-core doors or thin drywall, use wing toggles with rubber sleeves to prevent wall damage. Critical tip: Drill holes 1/8-inch wider than the toggle wings—any larger and holding power drops 50%.
Molly Bolts: For Repositionable Heavy Items (50-75 lbs)
Choose these for bookshelves or cabinets you might move later. Unlike toggles, molly bolts leave reusable holes. Metal sleeves expand when you tighten the screw, gripping the drywall from behind. Always drill pilot holes matching the bolt diameter exactly—use the template on the packaging. If you feel resistance when tightening, stop immediately; you’re likely hitting wiring.
Locate Hidden Hazards Before Drilling Your Anchor Hole
Drilling blindly into walls causes $500+ emergency repairs annually. This three-step safety check takes 90 seconds but prevents disasters:
Scan for Wiring and Pipes with Precision Tools
Start with a stud finder that detects AC voltage—not basic magnetic types. Scan vertically above and below your target spot. If it beeps, move your mark 2 inches left/right. Next, use a non-contact voltage tester pressed against the wall. Hold it steady for 5 seconds; false alarms happen if you wave it too fast. Pro tip: Most wiring runs vertically from outlets—never drill within 12 inches of electrical fixtures.
Verify Drywall Thickness at Your Exact Drill Point
Standard drywall is 1/2 inch, but bathrooms/kitchens often use 5/8-inch fire-rated board. Use a thin utility knife to gently scrape paint at your pencil mark. If you hit paper after 1/4 inch, it’s standard drywall; if deeper, it’s thicker. Why this matters: A 1/2-inch toggle bolt fails in 5/8-inch drywall because wings can’t fully expand. Adjust your anchor choice accordingly.
Mark Multiple Points with Laser-Level Accuracy
For shelves or multi-point mounts, measure from floor—not ceiling—to avoid cumulative errors. Place a 4-foot level against the wall and mark both ends. Then, measure down 36 inches at each end and recheck level. If marks drift more than 1/8 inch, your wall isn’t plumb—use shims later. Critical mistake: Never use phone apps as levels; they’re inaccurate beyond 2 feet.
Drill the Perfect Pilot Hole for Anchor Installation

Your drill bit size determines 80% of anchor success. Most DIYers use bits that are too large, creating loose holes that won’t grip. Follow these exact specifications:
Match Drill Bits to Anchor Type (No Guessing)
- Plastic anchors: Use a bit 1/32-inch smaller than the anchor body. Example: For a 3/16-inch anchor, use a 5/32-inch bit.
- Toggle bolts: Drill holes matching the bolt shaft diameter—not the wings. A 1/4-inch toggle requires a 1/4-inch bit.
- Molly bolts: Bits must match the bolt exactly. Tape your bit at the anchor’s length to prevent drilling too deep.
Drill Straight with Zero Wobble Technique
Place painter’s tape over your mark to prevent bit slippage. Hold the drill perpendicular—use a bubble level against the drill body. Start at 200 RPM (low speed) with light pressure until the bit bites, then increase to 800 RPM. Stop immediately if you feel sudden resistance (studs) or softness (pipes). If dust turns grayish, you’ve hit insulation—reposition.
Install Anchors Using Wall-Specific Methods
Drywall isn’t uniform—installation varies by location. Apply these techniques based on where you’re drilling:
For Standard Drywall Areas (Away from Edges)
Insert plastic anchors with firm finger pressure only—hammering cracks drywall. For toggles, thread the bolt through your shelf bracket first, then push wings through the hole. Tighten until you feel resistance (about 1/4 turn after contact), then back off 1/8 turn. Never overtighten—this strips the hole.
Near Wall Edges or Corners (High-Risk Zones)
Within 6 inches of edges, drywall is prone to crumbling. Use epoxy-set anchors instead of mechanical ones. Drill a 3/8-inch hole, blow out dust, inject construction adhesive, then screw in a threaded rod. Let cure 24 hours before hanging. For corners, mount a 2×2 wood block between studs first, then attach items to the block.
When Mounting Heavy Items (Over 50 lbs)
Distribute weight across three anchor points minimum. For TVs, use a zigzag pattern—not a straight line—to prevent rotational force. Place the heaviest anchors at the bottom. If anchors pull out during installation, switch to snap toggles with 1/2-inch steel bolts—they hold 100 lbs in 1/2-inch drywall.
Avoid These 5 Costly Drilling Mistakes
Using Damaged or Dull Drill Bits
A chipped bit creates oversized holes. Test bits on scrap wood—if they tear material instead of cutting cleanly, replace them. Pro tip: Store bits in foam organizers to prevent tip damage.
Ignoring Drywall Dust in the Hole
Dust acts as a lubricant, preventing anchors from gripping. Vacuum holes immediately after drilling using a shop vac with a narrow nozzle. Never blow—it forces dust deeper.
Mounting on Plaster or Lath Walls
Plaster requires special anchors with coarse threads. Standard drywall bits will shatter plaster. Use a masonry bit at 300 RPM with light pressure. If you hit wood lath behind plaster, switch to wood screws—anchors won’t hold.
Overlooking Temperature Effects
Cold drywall (<50°F) becomes brittle. Warm the wall with a hairdryer for 5 minutes before drilling. In humid areas (bathrooms), use stainless steel anchors—plastic corrodes within 2 years.
Skipping the Tug Test
After installation, pull outward with 2x the item’s weight before hanging. If the anchor moves, remove it and fill the hole with spackle. Wait 24 hours, then re-drill 1 inch away.
Know When DIY Anchoring Becomes Dangerous
Call a professional immediately if:
– Your drill bit hits metal beyond 1 inch deep (indicates pipes)
– Drywall crumbles when inserting anchors (sign of moisture damage)
– You’re mounting in lath-and-plaster walls built before 1980
– The item weighs over 75 lbs and no studs align with mounts
– You smell burning during drilling (indicates live wiring)
Verify Anchor Security and Prevent Future Failures
Before hanging your item, perform the 3-point stability test: Gently push up, down, and sideways on the anchor. Any movement means reinstallation is needed. For long-term security:
– Check anchors quarterly by tightening screws 1/8 turn
– Never exceed 75% of rated weight (e.g., use 100-lb anchors for 75-lb items)
– Replace plastic anchors every 3 years—they become brittle
– For TVs or valuable art, install safety straps to wall studs as backup
Mastering how to drill anchor into wall transforms shaky mounts into permanent installations. Remember: the right anchor drilled to exact specifications in hazard-free drywall holds indefinitely. When in doubt, drill into studs—never compromise on safety for convenience. Now that your anchors are secure, explore our guide to leveling heavy shelves without laser tools.


