
Learning how to prepare a microscope slide is essential for anyone exploring biology, medicine, or science education. Whether you’re observing cheek cells under a classroom microscope or examining pond life at home, the clarity of your view depends entirely on how well the slide is made. A poorly prepared slide can lead to blurry images, trapped air bubbles, dried specimens, or even contamination—derailing your entire observation. But with the right materials, technique, and attention to detail, you can create high-quality slides that reveal stunning cellular detail. This guide covers every method—dry, wet, section, and smear—including staining, sealing, and safe observation practices so you get reliable results every time.
Choose the Right Slide: Flat vs. Concave
The first step in preparing a microscope slide is selecting the proper type of glass. Most labs use flat slides, measuring 25 × 75 mm and about 1 mm thick. These are ideal for thin specimens like cell smears or tissue sections and must always be paired with a cover slip to flatten the sample and protect the objective lens from damage.
For observing live, motile organisms such as Paramecium or samples in liquid media, concave (well) slides are better. These have a small depression in the center that holds 3–4 drops of fluid, reducing evaporation and preventing spillage. They’re often used without a cover slip at low magnifications, though one can be added when higher resolution is needed.
Gather Essential Tools Before You Begin
Before handling any specimen, ensure you have the right tools:
- Clean glass slides — free of fingerprints, dust, and scratches
- Cover slips (#1.5 thickness, 22 mm × 22 mm) — optimal for high-magnification clarity
- Pipette or dropper — for precise liquid placement
- Forceps or toothpick — to transfer delicate specimens
- Mounting medium — water, saline, glycerin, or immersion oil
- Stains — methylene blue, iodine, crystal violet, or eosin
- Sealing agents — petroleum jelly or clear nail polish for longer storage
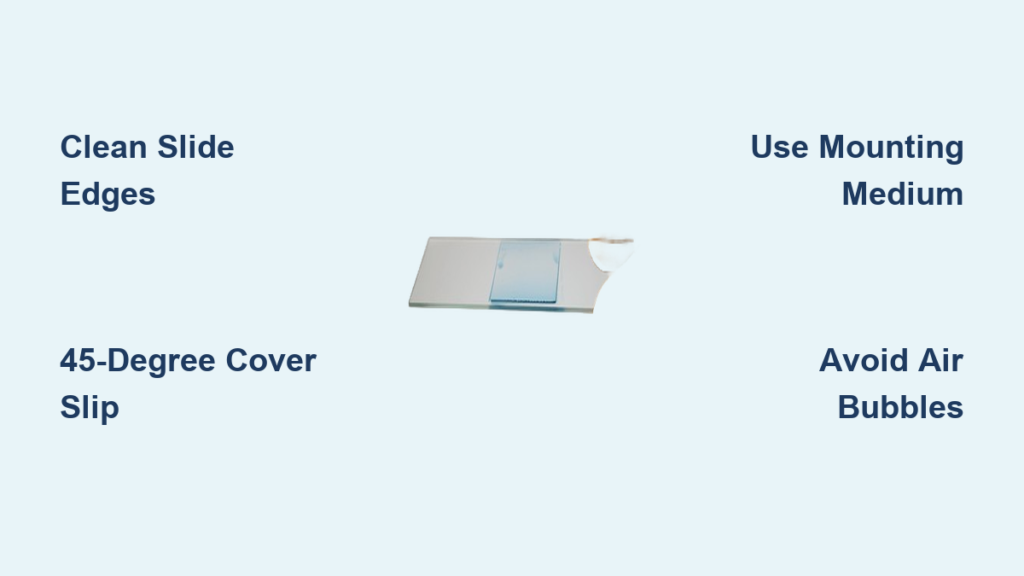
Pro Tip: Always handle slides and cover slips by the edges. Skin oils cause smudges and reduce image quality.
Master the Four Main Slide Preparation Methods
Dry Mount: For Solid, Non-Liquid Specimens
Use a dry mount for items like pollen grains, insect wings, hair strands, or fabric fibers. Since no liquid is involved, this method is simple but limited to low magnification due to potential thickness issues.
Steps:
1. Place the specimen in the center of a clean slide.
2. Gently lower a cover slip at a 45° angle to minimize air bubbles.
3. For semi-permanent storage, seal the edges with clear nail polish.
Warning: Thick specimens won’t focus under high power. Use only 4x or 10x objectives.
If the object is too bulky—like a beetle leg—use a concave slide instead, placing it directly into the well without a cover slip.
Wet Mount: Observe Living Organisms in Motion
A wet mount is the go-to method for viewing live, hydrated samples such as pond water microbes, cheek cells, or yogurt bacteria.
Steps:
1. Place one drop of water, saline (0.9%), or glycerin in the slide’s center.
2. Add your specimen using a pipette or toothpick.
3. Hold the cover slip at a 45° angle, touch one edge to the liquid, then slowly lower it.
4. Press lightly to spread the liquid evenly—avoid puddling.
Critical Tip: Air bubbles ruin visibility. If they form, gently lift and reseat the cover slip.
To extend the life of your wet mount (from minutes to days), seal the edges with petroleum jelly. Use glycerin instead of water for slower drying and improved clarity.
Section Mount: View Internal Plant and Animal Structures
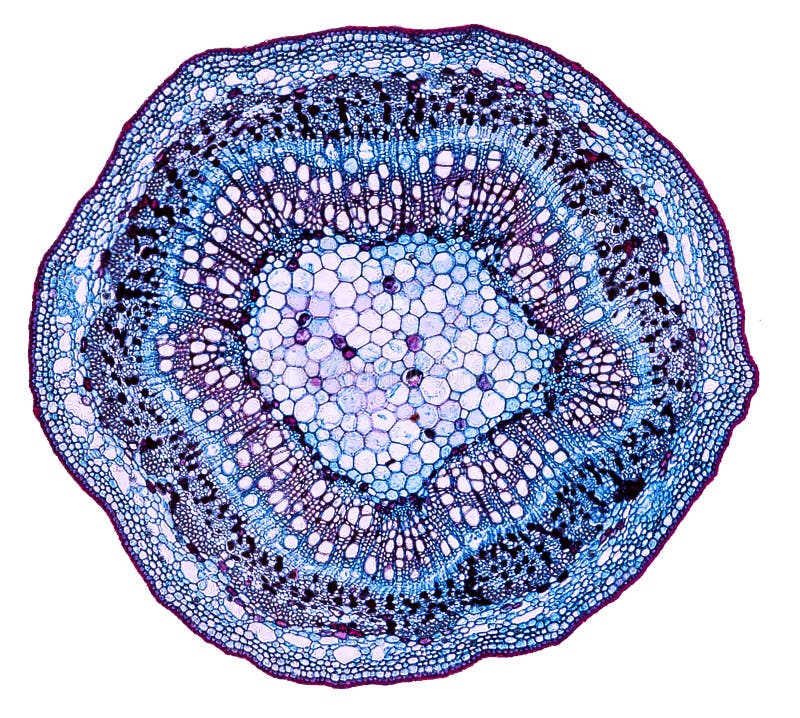
When studying internal anatomy—like onion root tips, apple slices, or plant stems—a section mount allows you to examine thin cross-sections.
Steps:
1. Cut a thin slice (5–20 µm) using a microtome or sharp blade.
2. Float the section in water to prevent curling.
3. Transfer it to a clean slide with forceps.
4. Add a drop of water or glycerin.
5. Apply the cover slip at a 45° angle.
Hand-cut sections are acceptable for classroom use, though unevenness may affect focus. For permanent slides, use commercial mounting media like Prolong Gold and cure according to instructions.
Smear Slide: Spread Thick Fluids Evenly
Use a smear for viscous biological fluids like blood, bacterial cultures, or semen. This technique spreads the sample into a thin, translucent layer for clear cellular observation.
Steps:
1. Place a tiny drop near one end of the slide.
2. Hold a second slide at a 30–45° angle against the first.
3. Let capillary action draw the liquid across the edge.
4. Smoothly pull the top slide forward to create a feathered taper.
Key Indicator: A good smear is translucent—you should see text through it when held up.
After air-drying completely, apply stain (e.g., methylene blue or Wright’s), rinse with distilled water, and blot dry with lens paper. Never rub—this damages cells.
Enhance Clarity with Proper Staining

Unstained cells are nearly invisible under a light microscope. Staining increases contrast and highlights key structures like nuclei, cell walls, or cytoplasm.
Match the Stain to Your Specimen
| Stain | Best For | Target | Color Result |
|---|---|---|---|
| Methylene blue | Cheek cells | Nucleus/DNA | Blue |
| Iodine (Lugol’s) | Onion cells | Starch, cell walls | Blue-black |
| Crystal violet | Bacteria | Gram-positive cells | Purple |
| Eosin Y | Blood films | Cytoplasm, RBCs | Pink/red |
| Safranin | Counterstain | Gram-negative bacteria | Red |
Staining Procedure:
- Prepare your slide (wet, dry, smear, or section).
- Place on a staining tray.
- Apply stain to cover the specimen.
- Wait:
– Methylene blue: 1–2 min
– Iodine: 30 sec – 1 min
– Crystal violet: 1 min - Rinse gently with distilled water.
- Blot dry with filter paper.
- Add cover slip if not already present.
Safety First: Wear gloves and eye protection—some stains are toxic or allergenic.
Observe Safely: Microscope Viewing Protocol
Once your slide is ready:
- Place it on the stage with the cover slip facing up.
- Secure with stage clips.
- Start with the lowest objective (4x or 10x).
- Lower the objective manually (watch from the side) until close to the slide.
- Look through the eyepiece and raise the stage slowly with the coarse focus knob.
- Fine-tune with the fine adjustment knob.
- Switch to higher magnifications carefully.
– For 100x (oil immersion), add a drop of oil on the cover slip.
Never force the focus—this can crack the slide or damage the lens.
Prevent Contamination and Ensure Sterility
For biological work:
– Soak slides and cover slips in 70% ethanol for 15 minutes.
– Or autoclave them before use.
– Use sterilized forceps and work in a clean area.
– Follow aseptic techniques when handling cultures.
Note: Commercially bought slides are not sterile unless labeled as such.
Seal and Preserve Your Slide
| Type | Lifespan | Sealing Method |
|---|---|---|
| Temporary | Minutes to hours | Surface tension only |
| Semi-permanent | Days to weeks | Petroleum jelly or nail polish |
| Permanent | Years | Prolong Gold or glycerol jelly; bake or cure |
To seal a wet mount:
1. Apply a thin bead of petroleum jelly around the cover slip edges.
2. Gently press down to form an airtight seal.
3. Store flat in a labeled slide box.
Avoid immersion oil for sealing—it’s only for 100x objectives.
Common Mistakes and How to Avoid Them
- Air bubbles: Lower cover slip at 45°, not flat.
- Blurry images: Clean slide, thin specimen, less stain.
- Cracked slides: Don’t force focus; use oil only on 100x.
- Dried specimens: Seal edges with petroleum jelly.
- Poor smear: Use less sample; maintain 30–45° pulling angle.
Try These Simple Experiments Today
Human Cheek Cells (Wet Mount + Stain)
- Scrape inside cheek with toothpick.
- Smear on slide.
- Add methylene blue, wait 1–2 min.
- Rinse lightly, add water, apply cover slip.
- Observe: Dark blue nuclei, lighter cytoplasm.
Onion Epidermal Cells (Plant Wet Mount)
- Peel thin layer from onion.
- Place on slide.
- Add iodine drop, wait 30–60 sec.
- Blot excess, add water, apply cover slip.
- Look for blue-black starch granules and cell walls.
Clean, Reuse, and Store Properly
Slides can be reused if uncontaminated:
1. Remove cover slip carefully.
2. Wash with mild soap or 70% ethanol.
3. Rinse with distilled water.
4. Dry with lint-free cloth or air-dry.
Dispose of biohazardous slides (blood, pathogens) in proper waste containers. Store clean slides in labeled boxes, and keep cover slips in dust-proof containers.
Safety First: Handle with Care
- Sharp edges: Cover slips and blades can cut—handle with forceps.
- Toxic stains: Use gloves and ventilate the area.
- Bright light: Adjust intensity to prevent eye strain.
- Live cultures: Decontaminate after use.
- Microscopes: Carry with two hands—arm and base.
Best Practices Summary
| Step | Pro Recommendation |
|---|---|
| Handling | Hold slides by edges only |
| Cover Slip | Use #1.5 (0.15–0.17 mm) for clarity |
| Mounting Medium | Match to specimen: water (live), glycerin (longer life) |
| Air Bubbles | Lower cover slip at 45° angle |
| Focusing | Start low, focus up, avoid lens crashes |
| Staining | Rinse well, blot gently, avoid overuse |
| Preservation | Seal edges for semi-permanent slides |
| Sterility | Sterilize slides and tools when needed |
Mastering how to prepare a microscope slide opens a window into the invisible world. With clean materials, correct technique, and proper staining, you’ll consistently achieve sharp, informative views. Whether you’re a student, teacher, or curious hobbyist, these methods provide a solid foundation for exploration—from the nucleus in your own cells to the swirling motion of pond life. Practice regularly, follow safety rules, and always aim for precision. The microscopic world is waiting.


