
You’re facing a flooded basement after a storm, an overflowing rain barrel, or a clogged pool—and your standard pump isn’t cutting it. This is where a drill-powered water pump becomes your secret weapon. Unlike bulky electric pumps, this compact attachment transforms your everyday cordless drill into an instant water-moving solution. But here’s the critical reality: 90% of drill pump failures stem from improper priming or dry running, turning a $30 tool into a melted plastic paperweight in under 30 seconds. When you learn how to use a drill pump correctly, you’ll drain 300 gallons per hour safely—yet one wrong move can destroy it instantly. This guide cuts through the confusion with field-tested steps, real-world flow rates, and the exact drill settings professionals use. Stop guessing and start moving water efficiently.
Choosing the Right Drill and Hose Setup for Maximum Flow
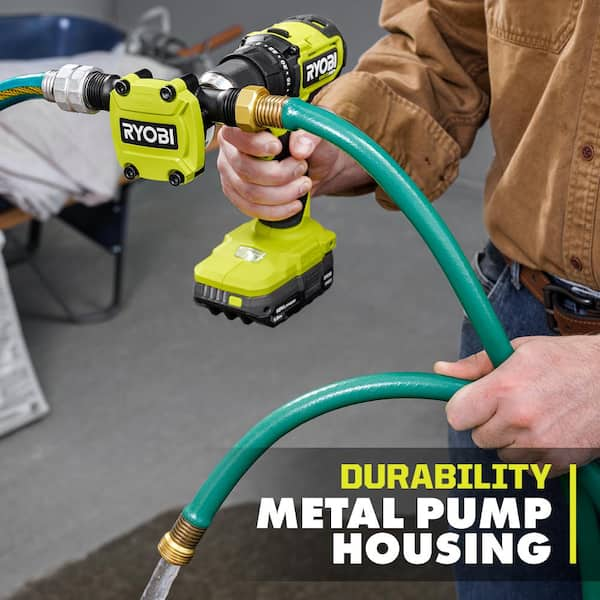
Your drill isn’t just a power source—it’s the engine determining whether you’ll move water or burn out your pump. Skip this setup phase, and you’ll waste time troubleshooting preventable failures. Most manufacturers like DrillPump300™ specify a minimum 600-watt drill (18V+ cordless or corded equivalent) with variable speed control. Crucially, avoid hammer drills unless you can disable the hammer function—those vibrations will crack the glass-filled nylon housing. For optimal results, use a brushless motor drill with at least 2.0Ah battery capacity; low-torque drills stall under load, causing immediate overheating.
Hose Selection and Connection Mistakes That Kill Flow Rate
Your hose choice directly impacts whether you achieve 300 gallons per hour or a pathetic trickle. Standard ½-inch inner diameter garden hoses work, but here’s what manuals don’t emphasize: corrugated hoses reduce flow by 40% due to internal friction. Always opt for smooth-bore hoses under 25 feet long—every extra 10 feet cuts output by 15%. When connecting, push the hose fully onto the barbed fitting until it seats against the pump housing, then secure it with two stainless steel worm gear clamps (not zip ties). One community user reported losing prime repeatedly until switching from flimsy vinyl tubing to reinforced ½-inch hose—his flow rate doubled instantly.
Mounting Your Pump: Why Hand-Holding Causes Catastrophic Failure
This isn’t a suggestion—it’s physics. Centrifugal forces during operation create violent torque that will wrench the pump from your grip if held. Always mount the unit: clamp it to a bucket rim, secure it with bungee cords to a stable surface, or place it directly in the water source if submersible. One critical detail from DrillPump300™ specs: the housing must remain below water level during operation. If the pump sits higher than your water source, you’ll exceed the 9-foot suction lift limit, breaking prime instantly. Position it in a low spot or use a shallow container as a “sump” for reliable flow.
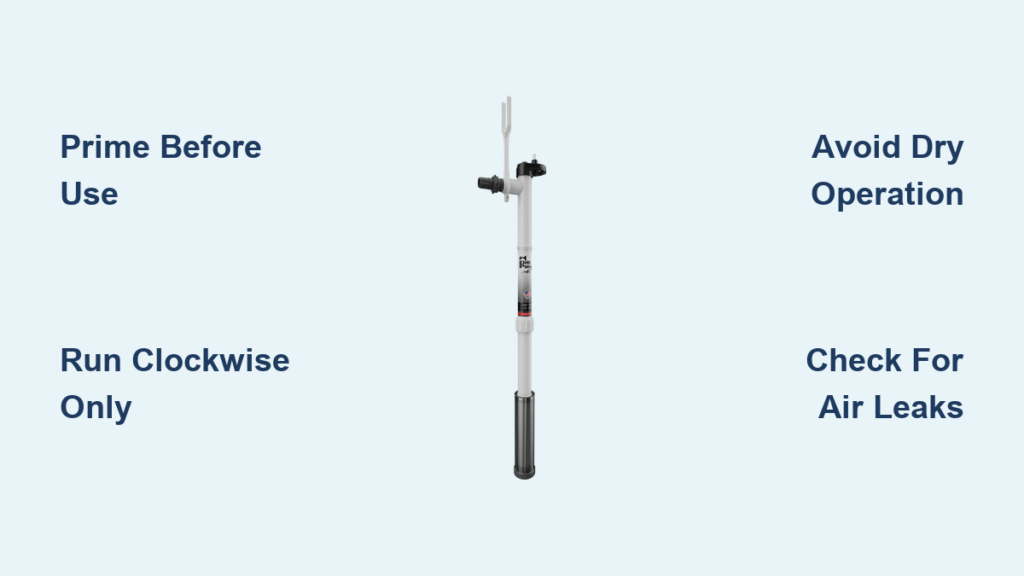
Priming Your Drill Pump: The 60-Second Step That Prevents 90% of Failures
Skipping priming is the #1 reason drill pumps fail. These aren’t self-priming units—they need a liquid seal to create suction. Without this step, you’re running the pump dry within seconds, melting internal components. The DrillPump300™ manual explicitly warns: dry operation beyond 30 seconds causes irreversible damage as water cools and lubricates the impeller.
Exact Priming Technique for Instant Water Flow
- Submerge the entire inlet hose in your water source
- Remove the hose from the pump inlet (highest point)
- Pour 2 cups of water directly into the pump housing until it overflows
- Reattach the hose while holding the pump upright to trap water inside
- Immediately start the drill at lowest speed
If you hear gurgling instead of smooth water flow, air remains trapped. Stop, re-prime, and ensure all connections are airtight. One user shared how adding a funnel to the inlet during priming eliminated air pockets—his flow stabilized in 10 seconds versus 2 minutes of troubleshooting.
Operating Your Drill Pump: Speed Control and Rotation Secrets

Clockwise rotation isn’t optional—it’s mechanical law. The impeller’s design only moves water when spinning clockwise (forward on most drills). Run it counter-clockwise even once, and you risk cracking the nylon housing from reverse stress. Start at 20% drill speed; you’ll feel a distinct vibration when water flows. Gradually increase speed while watching outlet flow—never exceed 2,800 RPM as specified by DrillPump300™. High-speed operation causes cavitation (air bubbles imploding), which erodes impellers silently.
Real-World Flow Rate Adjustments You Must Know
Advertised specs like “300 gallons per hour” assume perfect conditions: zero lift height and short hoses. In reality:
– Every foot of vertical lift reduces flow by 5%
– At 5 feet suction lift, expect ~225 GPH (25% drop)
– With a 25-foot outlet hose, flow diminishes by 30%
One homeowner measured actual output draining his pool: with 3 feet of lift and 20-foot hose, his drill pump delivered 180 GPH—not the advertised 300. Adjust your expectations accordingly. For deeper sources (like 8-foot wells), community experts confirm these pumps are “useless”—you’ll hit the 9-foot suction limit and get no flow.
Troubleshooting Common Drill Pump Failures in Under 2 Minutes

When water stops flowing, don’t panic—95% of issues are fixable onsite. Start with these field-tested diagnostics:
No Water Flow After Priming?
Check drill rotation first (70% of cases). If clockwise, disassemble and inspect the impeller for debris—leaves or sediment jam the vanes instantly. One gardener cleared clogs by backflushing with a garden hose through the outlet.
Pump Overheating or Melting?
You’ve exceeded the 30-second dry run limit. Stop immediately. Let the unit cool for 15 minutes, then verify your priming technique. If the housing is warped, replace the pump—it’s compromised.
Intermittent Flow with Gurgling Sounds?
Air leaks in the inlet line. Tighten all clamps and submerge hose connections. For deep lifts, lower the pump closer to the water source—exceeding 9 feet creates suction voids.
Safety Rules That Prevent Costly Accidents
Water and electricity demand respect. Always plug corded drills into GFCI outlets—this cuts power in 1/40th of a second if current leaks. For cordless drills near standing water:
– Keep battery packs elevated on dry surfaces
– Wear rubber-soled shoes and avoid wet ground
– Never operate in flooded areas deeper than 2 inches
Most critical: never leave a running drill pump unattended. A sudden prime loss could flood your workspace in minutes. One user returned to find his basement re-flooded after the inlet hose slipped out of the water.
When to Choose a Drill Pump (and When to Walk Away)
This tool shines for specific scenarios:
✅ Draining rain barrels, inflatable pools, or clogged sinks
✅ Transferring water between containers under 9 feet apart
✅ Emergency basement flooding (under 500 gallons)
It fails catastrophically for:
❌ Deep wells (beyond 9-foot suction limit)
❌ Continuous operation (max 15-minute runtime per session)
❌ Dirty water with sediment (clogs impellers in minutes)
For pond drainage or well access, invest in a $100 submersible pump—drill pumps can’t sustain the lift height or flow duration.
Post-Use Maintenance That Doubles Your Pump’s Lifespan
Rinse the pump housing with clean water after every use—especially with dirty sources. Remove the impeller (most models allow this with a quarter-turn) and scrub debris from vanes using an old toothbrush. Lubricate the shaft seal with silicone grease—not oil—to prevent corrosion. Store disassembled in a dry container; freezing temperatures crack nylon housings. One contractor reported 3+ years of service by following this routine versus 2 months for colleagues who skipped maintenance.
Final Note: Mastering how to use a drill pump transforms it from a frustrating gadget into your most reliable water-moving tool. Remember the non-negotiables: prime meticulously, run clockwise only, and never exceed 30 seconds dry operation. For jobs within its limits—shallow lifts, clean water, and short durations—it outperforms bulkier pumps in speed and portability. Keep a spare battery charged, store your unit disassembled after rinsing, and you’ll tackle floods and transfers with confidence. When the next storm hits, you won’t be waiting for help—you’ll already be draining that basement.


