
There’s nothing more frustrating than carefully setting up to drill a hole in glass, only to hear that dreaded crack as your expensive project shatters. Learning how to use a glass drill bit properly transforms this seemingly impossible task into a reliable process that yields clean, professional results. Unlike drilling wood or metal, glass requires specialized tools, precise technique, and strict safety protocols to prevent catastrophic failure. When done correctly, you can create flawless holes in glass for mounting hardware, installing fixtures, or crafting custom projects without risking injury or wasted materials.
The key to success lies in understanding that glass isn’t just another material—it’s a brittle substance that demands respect and precision. Standard drill bits will slip, shatter the glass, or simply fail to cut. Diamond-coated bits are essential, but even with the right tool, improper technique guarantees failure. This guide reveals exactly how to use a glass drill bit safely and effectively, whether you’re working with picture frames, glass tabletops, or custom art pieces. By following these proven steps, you’ll avoid the common pitfalls that ruin most DIY glass drilling attempts.
Essential Glass Drilling Safety Gear You Can’t Skip
Drilling glass creates invisible hazards that can cause serious injury if you’re not properly protected. The crystalline dust produced contains silica particles that become airborne and can permanently damage your lungs. Unlike wood or metal dust, glass dust is extremely fine and easily inhaled, making proper respiratory protection non-negotiable for anyone learning how to use a glass drill bit.
Why Standard Safety Gear Isn’t Enough for Glass Drilling
Regular safety glasses won’t protect against high-velocity glass shards that can fly during drilling. You need ANSI Z87.1+ rated safety glasses with side shields as your minimum eye protection. For added security, especially with larger projects, wear a full-face polycarbonate shield rated for impact protection. Hearing protection is equally critical—diamond bits create a high-pitched grinding noise that can damage hearing over time. Use earplugs with at least NRR 29 rating or quality earmuffs throughout the entire process.
The Complete PPE Checklist for Glass Drill Bit Operation
Your personal protective equipment must include:
– Respirator: A NIOSH-approved P100 filter respirator (not just a dust mask) to capture dangerous silica particles
– Cut-resistant gloves: ANSI Cut Level 4 rated gloves made from high-performance polyethylene fibers
– Long-sleeved work shirt: Heavy cotton or leather to prevent glass fragments from contacting skin
– Steel-toed shoes: ANSI/ISEA Z41 or ASTM F2413-11 rated footwear
– Fire extinguisher: ABC-rated, 5lb minimum within immediate reach
– First aid kit: ANSI/OSHA Class A compliant kit for emergency response
Must-Have Tools for Successful Glass Drilling Projects

Using the wrong drill or bit guarantees failure when attempting to drill glass. Standard twist bits designed for metal or wood simply won’t work—they’ll slip, overheat, or shatter your glass. Learning how to use a glass drill bit properly begins with selecting the right diamond-coated tool for your specific glass type and hole size.
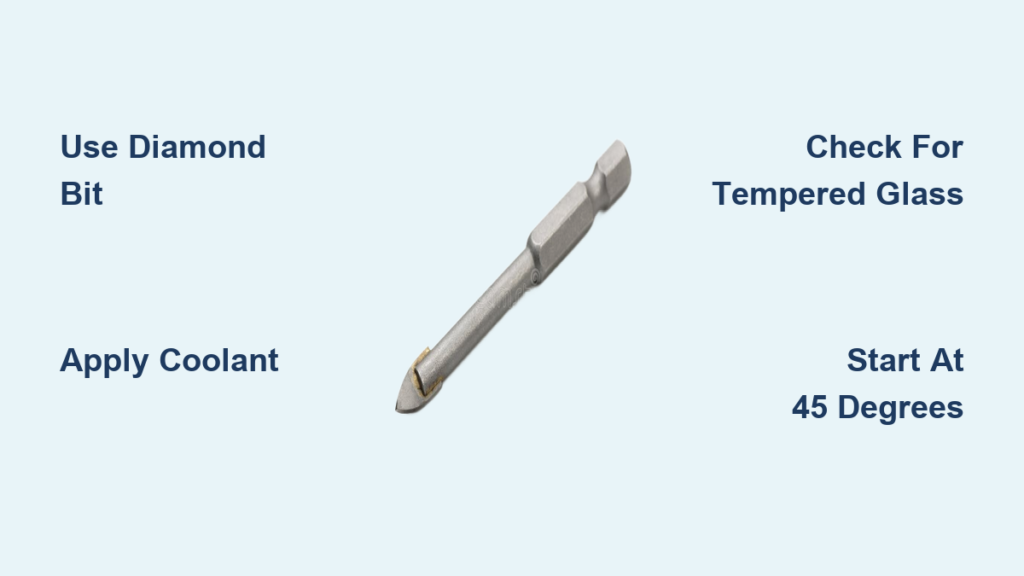
Choosing the Right Diamond Drill Bit for Your Glass Type
Diamond hole saws with 80-120 grit and 35-45 concentration are essential for glass drilling. For holes under ½”, solid diamond-tipped core bits work best, while larger holes require diamond hole saws with a mandrel. Crucially, you must match your bit specifications to your glass type:
– Annealed glass: 100-120 grit diamond bits at 300-800 RPM
– Borosilicate (Pyrex): 80-120 grit bits at 600-800 RPM
– Laminated glass (like windshields): 80-100 grit bits at 200-300 RPM
– Tempered glass: DO NOT ATTEMPT TO DRILL—IT WILL SHATTER
Setting Up Your Water Cooling System Properly
Water isn’t optional—it’s mandatory when learning how to use a glass drill bit. Without constant cooling, the friction generates enough heat to crack the glass or glaze over your expensive diamond bit. For small projects, a simple drip bottle or spray bottle works, but for professional results, set up a continuous water feed system delivering 0.5-1.0 gallons per minute. Add 3-5% water-soluble oil to your coolant for enhanced lubrication and bit longevity. Never begin drilling without starting your coolant flow 30 seconds in advance.
Critical Glass Identification: How to Avoid Catastrophic Breakage
The most common reason DIYers fail when trying to use a glass drill bit is attempting to drill tempered glass. Tempered glass contains internal stresses that cause it to explode when compromised—drilling a single hole releases all that stored energy at once. Proper identification separates successful projects from dangerous disasters.
The Tempered Glass Test Every DIYer Must Know
Before you even unpack your drill bit, verify your glass isn’t tempered. Look for the “temper” or “tempered” etching in the corner. If no marking exists, use polarized sunglasses to check for stress patterns—tempered glass shows distinctive wave patterns when viewed through polarized lenses. Another test: apply soapy water to the surface—tempered glass creates visible bubbles along stress lines. If you suspect tempering, stop immediately—drilling tempered glass is unsafe and will destroy your workpiece.
Marking and Taping Techniques That Prevent Bit Slippage
Place a cross-pattern of high-quality masking tape over your drilling location. This prevents the bit from “walking” across the smooth surface. Mark your exact drill point with a permanent marker through the tape intersection. For precision work, use a carbide scribe to create a shallow guide indentation before applying tape. Always clean the surface with 90%+ isopropyl alcohol first—any oil or residue compromises tape adhesion and drill accuracy.
Step-by-Step Glass Drilling Process for Flawless Results
The actual drilling process requires patience and precision. Rushing or applying excessive force guarantees failure when learning how to use a glass drill bit. Follow these exact steps to create clean, professional holes every time.
Starting Your Hole: The 45-Degree Angle Technique
Begin with your drill at a 45-degree angle to the glass surface at your marked point. Start drilling at the lowest possible speed (100-200 RPM) while maintaining constant coolant flow. Gently create a shallow groove for about 15-20 seconds—this establishes a guide path for the bit. Never start drilling perpendicular to the glass—this causes immediate slippage and surface damage.
Maintaining Perfect Pressure and Speed Through Breakthrough
After establishing your guide groove, slowly bring the drill to perpendicular while maintaining gentle, consistent pressure. For most glass types, maintain 300-800 RPM with just 0.5-2.0 pounds of pressure—let the diamond grit do the work. As you approach breakthrough (when the bit begins penetrating the back side), reduce both speed and pressure by 50%. This final stage is where most holes chip—slowing down ensures a clean exit.
Troubleshooting Common Glass Drilling Failures

Even with proper technique, issues can arise when using a glass drill bit. Knowing how to diagnose and fix problems immediately saves time, materials, and prevents dangerous situations.
Fixing Chipping at the Exit Point
Exit chipping happens when the bit breaks through the back side too aggressively. Place a sacrificial backing board (like scrap wood) beneath your glass to support the exit point. Reduce feed rate by 50% during breakthrough and maintain consistent coolant flow. If chipping occurs, stop immediately and smooth the edge with a diamond file before continuing.
Reviving an Overheated Drill Bit
If your bit stops cutting effectively, it’s likely “glazed over” from insufficient coolant. Stop drilling, clean the bit with a diamond dressing stone or rough ceramic tile, and verify your coolant flow rate. Never continue drilling with an overheated bit—this damages both the glass and your expensive tool.
Post-Drilling Cleanup: Protecting Yourself from Invisible Hazards
Glass dust remains dangerous long after drilling stops. Proper cleanup prevents long-term health risks from silica exposure that many DIYers overlook when learning how to use a glass drill bit.
Immediately inspect your hole for chips or micro-cracks that could lead to future breakage. Clean your diamond bit thoroughly with water to prevent grit hardening. Never use a standard vacuum—always employ a HEPA-filtered vacuum to capture microscopic glass particles. Wash all protective gear separately from other laundry, and shower immediately after working with glass to remove any residual dust from your skin and hair.
Mastering how to use a glass drill bit safely transforms a seemingly impossible task into a reliable skill that opens up countless project possibilities. Remember the golden rules: always verify your glass isn’t tempered, maintain constant coolant flow, and let the diamond bit do the work without excessive pressure. With proper safety gear, the right tools, and patience through each drilling stage, you’ll create clean, professional holes in glass consistently. Whether you’re mounting a shelf, installing a faucet, or creating custom art, these techniques ensure your glass drilling projects succeed where others fail. Start with small practice pieces to build confidence before tackling expensive projects—your precision and safety will improve with each successful hole.


