
Drilling through porcelain tile, granite countertops, or cement board with standard bits leads to chipped edges, overheated tools, and wasted materials. The Milwaukee Diamond Max drill bit solves this with its diamond-impregnated edge that grinds—not tears—through ultra-hard surfaces. Unlike bi-metal hole saws that shatter on porcelain, this specialized bit uses industrial diamonds bonded to a steel core to deliver clean, precise holes for plumbing fixtures, electrical boxes, and HVAC installations. If you’ve ever ruined a $50 tile because your bit “walked” or overheated, this guide will transform your approach. You’ll learn the exact techniques professionals use to drill perfect holes while maximizing your bit’s legendary 20X lifespan compared to standard hole saws.
Forgetting critical steps like continuous cooling or using hammer mode turns this premium tool into an expensive paperweight. I’ve seen contractors destroy $40 Diamond Max bits in minutes by forcing pressure or skipping water. But when you follow the right process—low RPM, steady pressure, and constant misting—you’ll breeze through marble sinks and fiber cement boards with surgical precision. This isn’t just another drill bit tutorial; it’s your blueprint for avoiding costly rework and getting professional results on your next tiling project.
Why Standard Drill Bits Fail on Porcelain Tile and Masonry
Porcelain tile’s density (up to 2,000 PSI) and smooth glaze defeat standard bi-metal hole saws that rely on toothed cutting action. Teeth skid across the surface, causing cracks, or clog with debris, generating heat that warps the bit. The Milwaukee Diamond Max drill bit’s continuous diamond-impregnated edge solves this by grinding material at a microscopic level. Industrial diamonds embedded in the matrix slowly wear down abrasive surfaces like granite, slate, or cement board without clogging. Crucially, this bit only works on hard, brittle materials—never use it on wood, metal, or plastic where it will overheat and fail.
The Diamond Grinding Science Behind Clean Cuts
Unlike toothed bits that chip material, diamond particles erode surfaces through friction. As the bit rotates, diamonds fracture microscopically, exposing fresh sharp edges that maintain cutting efficiency. Milwaukee’s premium braze technology bonds diamonds deeper into the matrix, preventing premature shedding. This is why it handles 100+ porcelain tiles per bit versus 5-10 for standard hole saws. If you hear a smooth grinding hum instead of a screech, the diamonds are working correctly—forcing pressure creates heat that melts the braze, destroying the bit.
Non-Negotiable Safety Gear for Diamond Max Hole Saw Operation

Diamond drilling generates crystalline silica dust—100x finer than flour—that embeds in lungs and causes irreversible damage. Skipping proper PPE risks silicosis, a fatal lung disease. I’ve watched contractors dismiss respirators “for a quick hole,” only to cough for weeks after. For your Milwaukee Diamond Max drill bit operation, these four protections are non-negotiable:
- Full-face shield over safety glasses: Flying tile shards can blind you instantly
- N95 respirator (minimum): Standard dust masks filter 0% of silica dust
- Impact-resistant gloves: Sharp tile edges and hot bits cause severe cuts
- Hearing protection: Diamond grinding hits 100+ decibels—equivalent to a chainsaw
Why Respirator Masks Beat Dust Masks for Tile Drilling
Dust masks create a false sense of security but filter nothing under 5 microns. Silica dust is 0.5 microns—small enough to bypass masks and scar lung tissue. An N95 respirator forms a seal that blocks 95% of particles down to 0.3 microns. For multi-hour jobs, upgrade to a P100 cartridge respirator. Pair this with a shop vacuum dust extractor for 99% airborne particle capture. Your lungs will thank you years later.
Preparing Your Tile Surface: Marking and Preventing Bit Walk
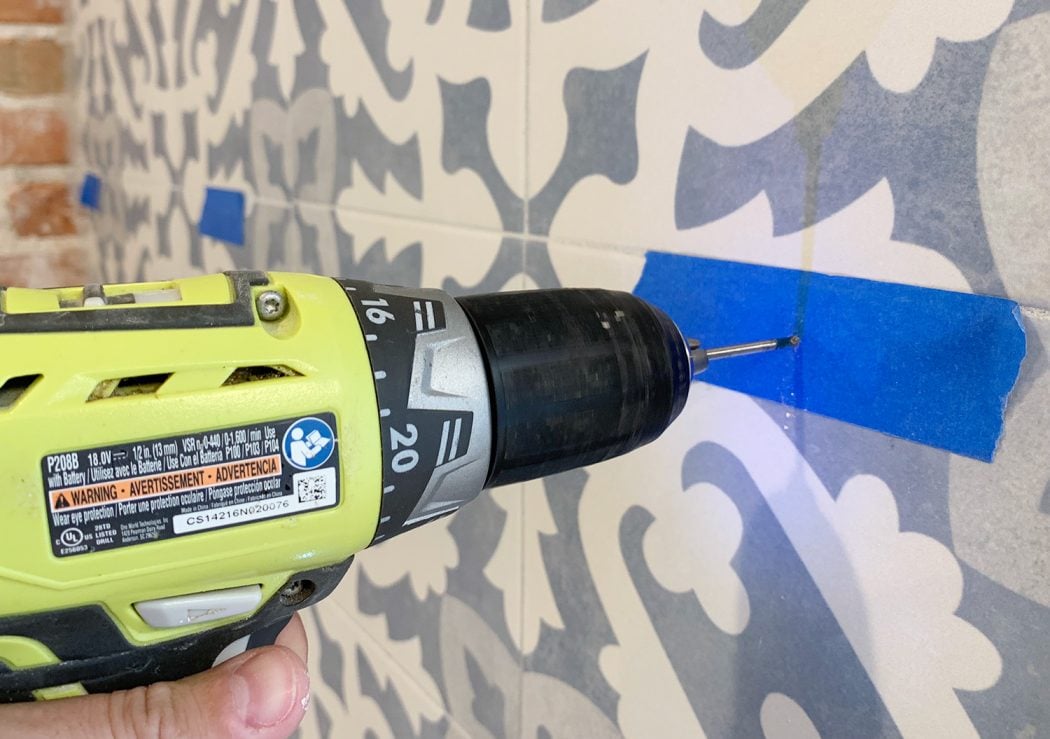
Glazed tile surfaces cause bits to skid off-center, ruining your layout. Milwaukee’s engineers confirm 80% of failed holes start with poor surface prep. The solution is simple but critical:
- Mark your center point with a fine-tip marker
- Apply 1″ square of painter’s tape over the mark—this grips the bit’s edge
- Create a pilot dimple by tapping a nail punch into the tape with a hammer
The Painter’s Tape Trick for Perfect Hole Placement
That tiny dimple anchors the Milwaukee Diamond Max drill bit during startup. Without it, even light pressure makes the bit skate across glossy porcelain, scratching your tile. For large holes (1″ diameter+), clamp a drill guide jig over the tape. This ensures perpendicular drilling—critical for faucet holes where angled penetrations leak. I’ve saved countless tiles by spending 30 seconds on this step versus 3 hours replacing a cracked backsplash.
Correct Drill Setup: Speed, Pressure, and the Hammer Mode Trap
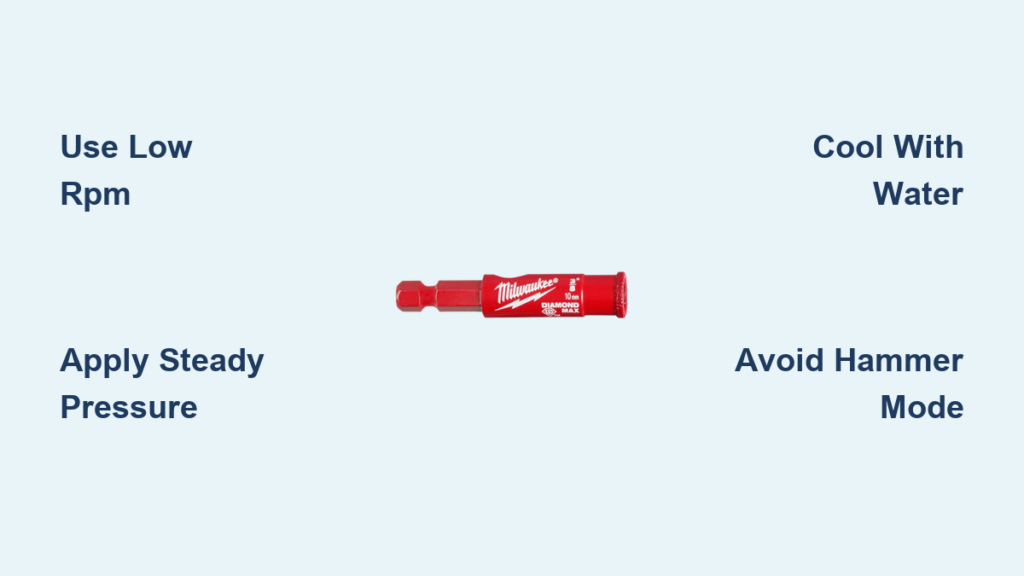
Using the wrong drill settings is the #1 reason Diamond Max bits fail prematurely. Never engage hammer mode—percussive action shatters the diamond matrix in seconds. Instead:
- Use a 1/2″ variable-speed corded drill (cordless lacks torque consistency)
- Set RPM to 500-800—start slow, increase only if bit glazes
- Apply light, steady pressure (like pushing a pencil through clay)
- Attach a side handle for control on holes over 3/4″
Why 500-800 RPM Is Your Sweet Spot
Higher RPM generates heat that melts the braze holding diamonds. At 500 RPM, diamonds grind efficiently without overheating. If you hear a high-pitched squeal, reduce speed immediately—that’s the sound of diamonds detaching. Test on scrap tile first: too slow causes glazing (bit slides without cutting); too fast creates smoke. Find the “grinding hum” and maintain it.
Step 1: Starting Your Hole Without Cracking the Tile
Begin drilling with zero pressure until the bit grinds a 1/16″ dimple. This establishes the cutting path:
- Position the bit centered on your pilot dimple
- Start drill at lowest RPM with the trigger barely pressed
- Hold the drill perpendicular—tilting causes uneven wear
- Once the dimple forms (5-10 seconds), apply light forward pressure
Creating the Pilot Dimple with a Nail Punch
For extra security on polished stone, deepen the pilot dimple with a center punch. Tap gently—excessive force creates micro-cracks that spread during drilling. On wall-mounted tile, support the drill with both hands while a partner sprays coolant. If the bit walks, stop immediately; restarting in a misaligned spot guarantees chipping.
Step 2: Maintaining Constant Cooling During Drilling

Dry drilling destroys Diamond Max bits in under 2 minutes. Water serves three critical functions: cools the diamond matrix, flushes abrasive slurry, and reduces silica dust. Milwaukee’s lab tests show bits last 20X longer with consistent cooling. Use one method:
- Spray bottle: Mist continuously (every 2-3 seconds) for floor work
- Drip system: Tape a water bottle with pinhole above the bit for walls/ceilings
- Never use oil—it clogs the diamond matrix with gunk
Spray Bottle vs. Drip System: Which Is Better?
Spray bottles offer precise control but require a partner for overhead work. Drip systems (a gravity-fed IV bag or punctured bottle) maintain steady flow but can flood the work area. For shower surrounds, I use a drip system with a towel-lined catch basin—this prevents water damage while keeping the bit cool. If the bit smokes, stop drilling immediately; cooling failures cause irreversible matrix damage.
Step 3: Breaking Through Without Backside Blowout
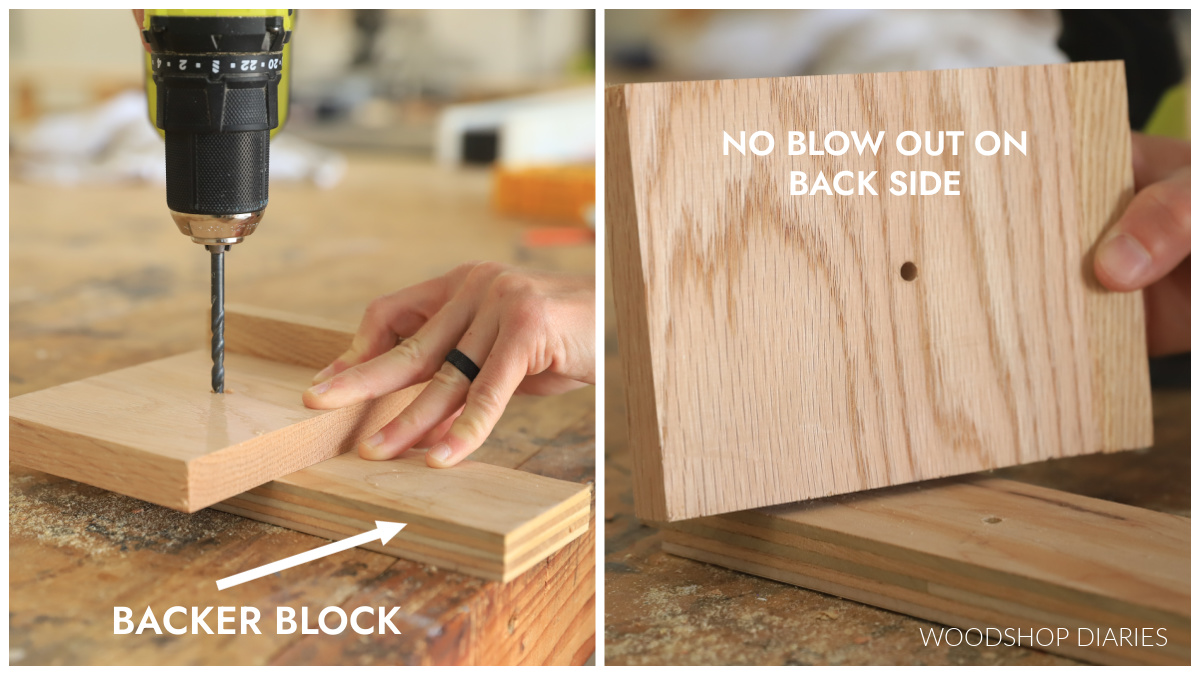
When the bit exits the material, unsupported tile often shatters. Prevent this by:
- Clamping a 1/2″ plywood backer board behind the tile
- Reducing pressure by 50% as you near the exit point
- Backing out slowly when the slug releases
How a Sacrificial Backer Board Saves Your Tile
That plywood backer absorbs the bit’s exit force, preventing “blowout” cracks. For wall installations, slide a 2×4 between the tile and wall studs. Without it, the last 1/8″ of drilling can splinter your expensive marble backsplash. When the slug drops (for cement board) or stays seated (for tile), let the drill spin freely for 5 seconds to clear debris before withdrawing.
Cleaning and Maintaining Your Diamond Max Bit After Use
Diamond bits fail when slurry clogs the matrix. Proper cleaning extends life dramatically:
- Rinse immediately under running water while spinning the bit
- Scrub with a brass brush—steel brushes damage diamonds
- Dry completely before storage to prevent rust
- Dress glazed bits by drilling 20 seconds into scrap brick
Dressing a Glazed Bit on Scrap Brick
If cutting slows despite cooling, the matrix has glazed over. Drill into a cinder block with light pressure and water—this exposes fresh diamonds. Milwaukee’s tests show this restores 90% of original cutting speed. Never store bits wet; moisture causes “diamond pull-out” as the matrix corrodes. Keep yours in the original case with silica gel packs.
5 Costly Mistakes That Destroy Diamond Hole Saws
Avoid these errors that turn premium bits into junk:
- Forcing excessive pressure: Creates heat that melts the braze—let diamonds do the work
- Using hammer drill mode: Shatters the diamond edge in seconds
- Drilling dry: Causes instant matrix failure (water is non-negotiable)
- Skipping the backer board: Guarantees blowout cracks on exit
- Storing wet bits: Leads to rust that loosens diamond particles
Why Forcing the Bit Cuts Your Tool’s Lifespan
New users think “more pressure = faster holes.” Reality: over-pressing generates 500°F+ heat that dissolves the braze bonding. You’ll see smoke and a burnt smell—by then, diamonds have detached permanently. Apply just enough pressure to maintain grinding resistance. If the drill stalls, reduce pressure; never force it.
Troubleshooting: When Your Bit Won’t Cut or Starts Smoking
Problem: Bit spins but won’t penetrate tile
Fix: Dress the bit on scrap brick—it’s glazed over. If still stuck, check RPM (too low) or pressure (too light).
Problem: Smoke or burning smell during drilling
Fix: STOP IMMEDIATELY. Coolant failed—dip the bit in water for 60 seconds, then resume with constant misting.
Problem: Excessive vibration or wobble
Fix: Re-chuck the bit squarely. Bent shanks or misaligned arbors cause dangerous vibration.
Problem: Chipping around the hole edge
Fix: Increase tape coverage or reduce RPM—high speed fractures brittle materials.
Mastering your Milwaukee Diamond Max drill bit means respecting its grinding physics: low RPM, light pressure, and relentless cooling. Treat it like a precision instrument, not a brute-force tool, and it’ll drill 100+ porcelain tiles without replacement. Always wear full PPE, clamp your work securely, and let water flow constantly—these habits prevent 95% of failures. When in doubt, slow down; diamond drilling rewards patience with flawless results. For plumbing installations, match bit sizes to fixture specs (e.g., 1-1/4″ for toilet flanges), and store bits dry after cleaning. You’ve now got the pro techniques to conquer tile, stone, and cement board without fear—go make that perfect hole.


