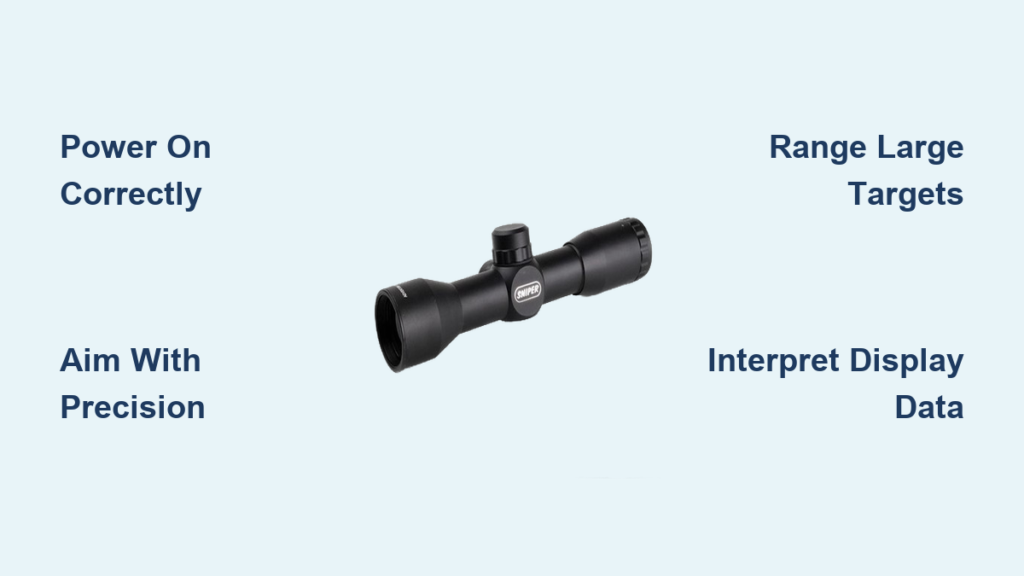
You’re set up for the perfect shot with a steady stance and clear view of your target. But guessing the distance can turn a clean hit into a missed opportunity. Knowing how to use a range finder scope properly transforms that guesswork into precise, real-time distance data. These advanced optics combine a traditional rifle scope with a built-in laser rangefinder, so you never need to switch devices in the field.
In this guide, you’ll learn how to power up, aim, range, and interpret data from your range finder scope. You’ll also get practical tips on avoiding common mistakes, maintaining your gear, and maximizing performance in real shooting conditions.
Activate the Device Correctly

Before you can range anything, your scope needs power and a proper boot sequence. Most range finder scopes use a simple button-activated system, often located near the eyepiece or on the side turret.
Insert and Test Batteries
Open the battery compartment, which is usually behind the display or on the scope body. Insert the required battery, typically a CR2 or AA lithium cell. Power on the device and watch for a display light or startup tone. If nothing appears, reseat the battery or swap in a fresh one. Low power is the most common reason a range finder scope fails to boot.
Enable Rangefinder Mode
Some scopes require you to toggle between standard optics and rangefinder mode. Press the dedicated “Range” or “LRF” button to engage the laser. You may see a prompt like “Ready” or notice a reticle shift. Wait a few seconds for the system to calibrate, especially in cold weather.
Aim with Precision

Accurate distance readings depend on accurate aiming. Even a slight misalignment can cause the laser to read the background instead of your intended target.
Stabilize Your Position
Use a bipod, shooting bag, or solid rest to minimize hand shake. Handheld ranging increases error risk, especially beyond 300 yards. Keep your breathing steady and gently press the range button when ready.
Focus the Reticle
Adjust the ocular lens at the eyepiece until the crosshairs appear sharp. Then, use the objective lens or side focus (if available) to eliminate parallax and bring the target into clear view. A blurry image leads to poor ranging and unreliable data.
Range the Target Quickly
Once you’re aimed, measuring distance is fast. But timing and target selection can make or break the result.
Press and Hold the Range Button
Depress the range button halfway or fully, depending on your model. Most scopes emit a laser beam and display results within 0.5 to 1 second. Keep the scope steady until the distance locks in, then look for a beep or a stabilized number in the display.
Target Large, Solid Objects
Aim at a high-contrast, reflective surface like an animal’s body, a tree trunk, or a rock. Avoid ranging through glass, foliage, or thin branches, which scatter the laser and return false distances.
Check Maximum Effective Range
Know your device’s limits before heading out. Entry-level scopes range up to 800 yards, while premium models reach 2,000+ yards under ideal conditions. Performance drops in fog, rain, or low-contrast scenarios.
Interpret the Data Display

Once you’ve locked in a range, your scope displays critical information. Learning to read it quickly improves shot placement under pressure.
Read Distance in Yards or Meters
The primary readout is target distance. Most scopes default to yards, but you can usually switch to meters through a settings menu. Confirm your preferred unit before heading into the field.
Note Angle and Holdover Data
Advanced scopes calculate angle compensation for uphill and downhill shots. They may also suggest bullet drop in MOA or MIL adjustments. For example, a 500-yard uphill shot at 30 degrees might display an equivalent horizontal range of 440 yards.
Recognize Lock Icons and Errors
A solid number with a checkmark means a confirmed range. A flashing number or dashed line indicates no lock. If you see “ERR” or “LOW,” check the battery, target clarity, and environmental interference.
Adjust Your Shot Accordingly
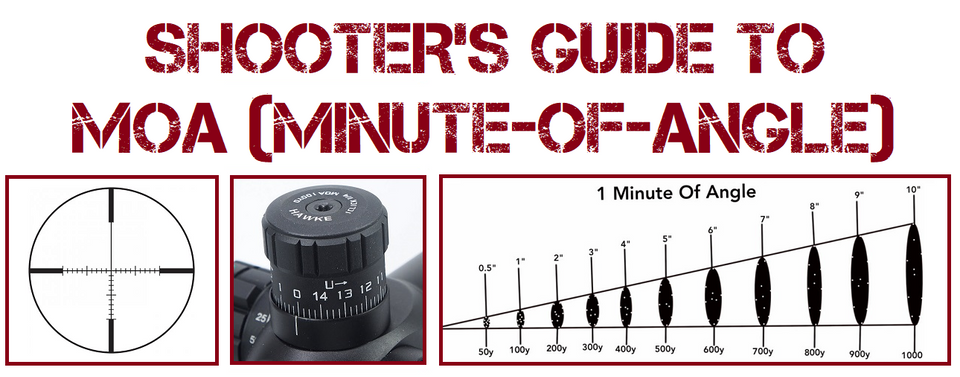
Ranging is only half the battle. Applying the data correctly is what seals the deal on accurate shooting.
Dial Turrets or Hold Using Reticle
Use the measured distance to adjust elevation turrets or use holdover marks built into the reticle. If your ballistic profile is programmed, some scopes auto-display the correct aiming point for your load.
Account for Environmental Factors
Even perfect ranging can be thrown off by wind, temperature, and humidity. Use the scope’s environmental sensors (if equipped) or a separate ballistic calculator for final tuning before pulling the trigger.
Fire and Confirm
Take the shot and observe the impact. If the bullet lands off-target, re-range and reassess. Modern scopes allow rapid re-measurement, so use that capability to dial in your hits.
Maintain and Calibrate Regularly
A well-maintained scope delivers consistent results year after year. Skipping this step leads to drift and unreliable data.
Clean Lenses Safely
Use a microfiber cloth and lens cleaner to wipe the objective and eyepiece. Avoid paper towels or clothing, which can scratch coatings. Keep lens caps on whenever the scope is not in use.
Zero the Scope Annually
Even with built-in ranging, your optical zero can drift over time. Mount the rifle on a stable rest and fire at a 100-yard target. Adjust the windage and elevation turrets until your point of aim matches your point of impact.
Update Firmware and Settings
Many digital range finder scopes support firmware updates via USB or Bluetooth. Check the manufacturer’s website periodically for new releases. Also, verify that your time, date, and ballistic profiles are current.
Troubleshoot Common Issues
Even the most reliable scopes can act up in the field. Knowing how to fix frequent problems saves time and frustration.
No Display or Power Failure
Check the battery charge and orientation first. If the scope previously worked, inspect the battery compartment for moisture or corrosion. In humid environments, store the scope with batteries removed.
Inconsistent Ranging Results
Ensure the target has enough surface area and reflectivity. Try ranging a larger object nearby as a test. If the issue persists, recalibrate the laser per the manual or contact manufacturer support.
Foggy Lenses or Internal Condensation
This usually indicates a broken seal. Avoid rapid temperature changes, such as bringing a cold scope into a warm room. Use silica gel packs in storage. Severe fogging requires professional servicing.
Reticle Misalignment
If the crosshairs don’t match the laser point of origin, the scope may be out of collimation. Test at a known distance and compare where the bullet hits versus where the scope reads. Realignment often requires factory repair.
Choose the Right Conditions

Your environment plays a major role in how well a range finder scope performs. Picking the right moment to shoot matters as much as skill.
Avoid Ranging in Poor Light
Low light reduces laser effectiveness and display visibility. Dawn and dusk work well, but full darkness does not. Use illuminated reticles when available to extend your shooting window.
Steer Clear of Heavy Weather
Rain, snow, and fog scatter laser beams, leading to weak or false returns. Wait for clearer conditions or move closer to the target for a reliable reading.
Use High-Contrast Backgrounds
A dark animal against a bright sky ranges better than one lost in shadowed woods. Position yourself for clean lines of sight whenever possible.
Practice for Real-World Success
Like any precision tool, mastery comes with repetition and intentional training.
Test at Known Distances
Visit a range with marked distances at 100, 200, and 300 yards. Verify that your scope reads correctly and record any discrepancies for future reference.
Simulate Field Scenarios
Set up targets at varying distances and angles in natural terrain. Practice ranging and shooting from prone, kneeling, and standing positions to build versatility.
Train with a Spotter
Have a partner confirm readings and shot impacts. Two sets of eyes catch errors faster and build confidence in your gear under pressure.
Frequently Asked Questions About Range Finder Scopes
What is the best way to use a range finder scope for beginners?
Start by stabilizing your position on a rest, focusing the reticle clearly, and aiming at a large, high-contrast target. Press the range button and hold steady until the distance locks in. Practice at known distances before taking it into the field.
How accurate are range finder scopes at long distances?
Entry-level models are accurate within 1 yard at distances up to 800 yards. Premium scopes maintain accuracy within 1 to 2 yards out to 2,000+ yards under ideal conditions. Fog, rain, and low-contrast targets reduce accuracy.
Can a range finder scope work in the rain or fog?
Performance drops significantly in heavy rain or fog because water particles scatter the laser beam. You may get weak or false returns. For best results, wait for clearer weather or move closer to the target.
Do range finder scopes need to be zeroed separately?
Yes. The rangefinder and the optical reticle are separate systems. You should zero the reticle at 100 yards annually or after any impact, even if the laser rangefinder continues to work properly.
How do I switch between yards and meters on my scope?
Most digital scopes allow you to toggle units through a settings menu accessed by holding a specific button. Check your owner’s manual for the exact sequence, as it varies by manufacturer.
Why does my range finder scope give different readings for the same target?
Inconsistent readings usually result from hand shake, poor target contrast, or ranging through obstacles like branches or glass. Stabilize your position and aim at a solid, reflective surface for the most consistent results.
Key Takeaways for Mastering Your Range Finder Scope
Learning how to use a range finder scope effectively combines technology with disciplined technique. Start with a fully charged battery, a stable shooting position, and a clear focus on the reticle. Range large, high-contrast targets and apply the distance data through turret adjustments or reticle holdovers. Maintain your scope with regular cleaning, annual zeroing, and firmware updates. Practice at known distances and in varied field conditions to build real-world confidence.
Your next step is simple: head to a local range with marked distances, test your scope against the marks, and log the results. Once your readings match the known distances, you’ll know your gear is dialed in and ready for the field.