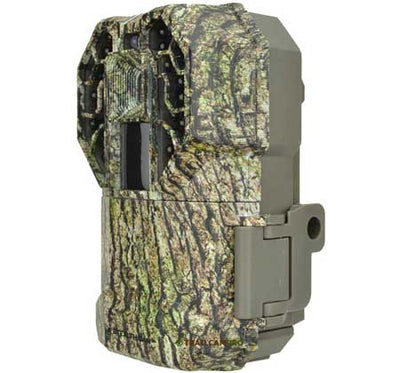
You power on your Stealth Cam night vision monocular at dusk, expecting the familiar green-hued image of the forest ahead—but the screen stays dark. No infrared glow. No image. Nothing. It worked fine during the day, but now, when you need it most, it’s dead. This is a common frustration among outdoor enthusiasts, hunters, and wildlife watchers relying on devices like the G45NGX and other Stealth Cam monocular models. The good news? In most cases, the problem isn’t permanent. Whether it’s a simple battery issue, corrupted firmware, or a failed voltage regulator, many failures can be fixed—either with basic troubleshooting or targeted repairs. This guide delivers a step-by-step roadmap to diagnose and resolve a Stealth Cam night vision monocular that won’t work, using real-world fixes from technical diagnostics and user reports.
Replace Batteries and Verify Power Source
Before assuming hardware failure, rule out the most common culprit: weak or faulty batteries. Many users report their monoculars “die” at night because the power source can’t support the high drain of the IR LEDs and sensor.
Use Fresh High-Capacity Alkaline or Lithium Batteries
Start by installing brand-new alkaline or lithium AA batteries. Avoid using old or partially charged rechargeables—especially NiMH types, which often drop below 1.3V under load. Lithium batteries (like Energizer L91) are ideal for cold weather and extended runtime.
Pro Tip: Always replace all batteries at once. Mixing old and new cells creates voltage imbalance, reducing performance and potentially damaging circuitry.
Test with multiple battery sets. If the device powers on with one set but not another, the issue is almost certainly power-related.
Check Battery Voltage Under Load
Even if batteries read 1.5V when tested outside the device, they may collapse under load. Use a multimeter to measure voltage:
– Insert batteries and power on the monocular
– Measure voltage at the battery terminals inside the compartment
If voltage drops below 1.3V, the batteries can’t sustain operation. Weak power prevents the IR system from activating—even if the display flickers briefly.
Clean Battery Terminals and Internal Contacts
Corrosion and grime on battery contacts are silent killers of electronic devices. They block current flow, mimicking total failure—even with good batteries.
Remove Corrosion With Pencil Eraser and Isopropyl Alcohol
- Remove all batteries and the battery tray.
- Gently rub metal contacts with a clean pencil eraser to remove oxidation.
- Dip a cotton swab in 90%+ isopropyl alcohol and wipe each terminal.
- Leave the compartment open for 5–10 minutes to air dry.
Warning: Never use water or household cleaners. They accelerate corrosion and can damage plastic components.
Inspect for green or white crust—signs of battery leakage. If found, clean thoroughly and check for pitted or damaged metal. Severely corroded contacts may require solder repair or replacement.
Inspect for Physical and Optical Damage
Drops, moisture, and environmental exposure can cause internal damage that disables night vision.
Examine Housing, Lens, and IR LEDs
Check for:
– Cracked casing or loose lens housing
– Fogging inside the lens (indicates moisture ingress)
– Bent screws or misaligned panels
If the lens is foggy, place the monocular in a sealed container with silica gel packets for 24–48 hours. Do not use heat—hair dryers or direct sunlight can warp plastic or degrade anti-reflective coatings.
Look for IR LED Failure
The infrared array is essential for night vision. In total darkness, look closely at the front of the device. Functional IR LEDs emit a faint red glow visible to the naked eye.
No glow? Possible causes:
– Dead LEDs
– Power not reaching the circuit
– Firmware disabling IR output
If LEDs appear dark brown, cracked, or unevenly lit, they may be damaged. Partial illumination suggests a wiring fault or driver issue.
Diagnose Night Vision Failure in Darkness
Daytime operation confirms basic electronics work—but night vision requires additional components. Isolate the failure.
Test in a Fully Dark Environment
- Turn off all lights and wait 10 minutes for your eyes to adjust.
- Power on the monocular.
- Observe:
– Any red glow from IR LEDs
– Green or grayscale image on screen
– Menu visibility and button response
If the screen lights up but shows no image, the display works—but the sensor or IR system does not. This often points to firmware corruption or sensor disconnection.
User Report: A G45NGX showed a frozen menu and no night vision. After a factory reset via prolonged power button press, both display and IR functionality returned.
Clean the IR Lens and Sensor Window
Dust, fingerprints, or smudges block infrared light. Use a microfiber cloth and lens cleaning solution to gently wipe the front lens in circular motions. Never use paper towels or abrasive cloths.
Avoid touching the lens with fingers—skin oils degrade coatings over time.
Reset and Update Firmware Correctly
Firmware glitches can disable night vision or freeze the device—especially after interrupted updates.
Perform a Factory Reset
If the device powers on but is unresponsive:
1. Navigate to Settings > Reset > Factory Reset
2. Confirm and wait 30 seconds
If the screen is frozen, try holding the power button for 15–20 seconds. Some models reset after prolonged press.
Note: The G45NGX has no physical reset button, making recovery harder. If unresponsive, firmware recovery via USB is the next step.
Safely Update Firmware
To prevent bricking:
– Use fully charged batteries or external power
– Download firmware from stealthcommand.com
– Connect via USB to a stable computer
– Do not disconnect during update
Follow instructions precisely. Interrupting the process can corrupt memory, rendering the device inoperable.
Verify Stealth Command Account Status
Smart-enabled models may depend on an active account—even for firmware access.
Reactivate Inactive Accounts
- Visit stealthcommand.com
- Sign in with your credentials
- Go to Account > Status
- Click Activate if inactive
An inactive account can prevent:
– Firmware downloads
– Remote diagnostics
– Feature unlocks
User Case: A non-working monocular began functioning after account reactivation—despite no hardware changes.
Diagnose Internal Power Circuit Failure
If the device shows no signs of life—no lights, no sound, no display—suspect internal power failure.
Test Voltage With a Multimeter
Set your multimeter to DC voltage and check:
– Battery input to PCB (should match battery voltage)
– Output of voltage regulator (typically 3.3V)
– Main power rail to processor and display
No output from the regulator? The LP2985-33DBVT 3.3V LDO regulator is likely dead.
Common Failure: The LP2985 is sensitive to overcurrent. Installing a 5-pin regulator (like LP2985-ADJ) instead of the correct 3-pin version destroys the board.
Inspect for Cold Solder Joints
Use a magnifier to examine the PCB. Look for:
– Cracked solder around the power switch
– Lifted traces
– Burnt components near the regulator
Resolder loose joints with a fine-tip iron and flux. Ensure solid connections before powering.
Replace the Failed Voltage Regulator

A dead LP2985 regulator is a known fixable cause of “no power” in Stealth Cam monoculars.
Identify the Correct Regulator
The LP2985-33DBVT is a 3-pin regulator (IN, GND, OUT). Do not install 5-pin variants—they won’t function and can damage the circuit.
Steps to Replace the Regulator
- Remove the faulty chip using a hot air gun or desoldering station.
- Clean pads with solder wick and isopropyl alcohol.
- Verify footprint—ensure it matches a 3-pin layout.
- Install the correct regulator—or mount on a small protoboard if direct fit fails.
- Solder connections:
– IN → from input capacitor
– GND → shared ground
– OUT → to main power rail - Add a heatsink with thermal adhesive to prevent overheating.
- Test for continuity and shorts before applying power.
Success Story: A non-responsive G45NGX powered on after regulator replacement, displaying full menu and functional night vision.
Verify Function After Repair
After any fix, conduct full testing.
Power-On and Menu Test
Confirm the device:
– Boots with LCD activity
– Displays startup screen
– Allows navigation through settings
– Responds to all buttons
If the menu appears, the core electronics are functional.
Night Vision Field Test
In total darkness:
– IR LEDs should glow faint red
– Image should appear in green or grayscale
– Detection range should reach 30+ meters
Users report spotting rabbits at 25m, moths up close, and kiwi birds in dense bush. Resolution is typically 640×480—grainy but usable for detection.
File a Warranty Claim If Under One Year
If your Stealth Cam monocular failed shortly after purchase, it may be covered.
Confirm Warranty Eligibility
Stealth Cam offers a one-year limited warranty covering:
– Manufacturing defects
– Firmware update failures
– No physical or water damage
A G45NGX that froze during an update and won’t power on is likely covered.
How to Submit a Claim
- Contact GSM Outdoors (manufacturer)
- Provide:
– Serial number
– Proof of purchase
– Description of issue
– Troubleshooting steps tried - Follow return instructions
Warning: Opening the device may void warranty. Only disassemble if out of warranty or you accept the risk.
Final Note: Most Stealth Cam night vision monocular issues stem from power problems, firmware glitches, or dirt—not dead hardware. Start with battery replacement, terminal cleaning, and firmware checks. For advanced users, replacing the LP2985 regulator can revive a bricked unit. If your device failed within a year—especially during a firmware update—pursue warranty service through GSM Outdoors. With systematic troubleshooting, you can restore night vision—or get a replacement without unnecessary cost.