
That stubborn screw refusing to budge can turn a simple repair into a headache in seconds. Whether you’re dealing with a stripped Phillips head, a rusted deck screw, or a fastener frozen in place, your power drill is actually the most powerful tool for extraction—not just installation. The secret lies in reversing its function. Knowing how to use a drill to remove screws properly transforms frustration into triumph, saving you time and preventing costly damage to your project. This guide reveals the exact techniques professionals use to extract even the most resistant screws using nothing but your standard drill, a few household items, and the right approach. You’ll learn critical setup steps, grip-enhancing tricks, and troubleshooting moves that work when conventional methods fail.
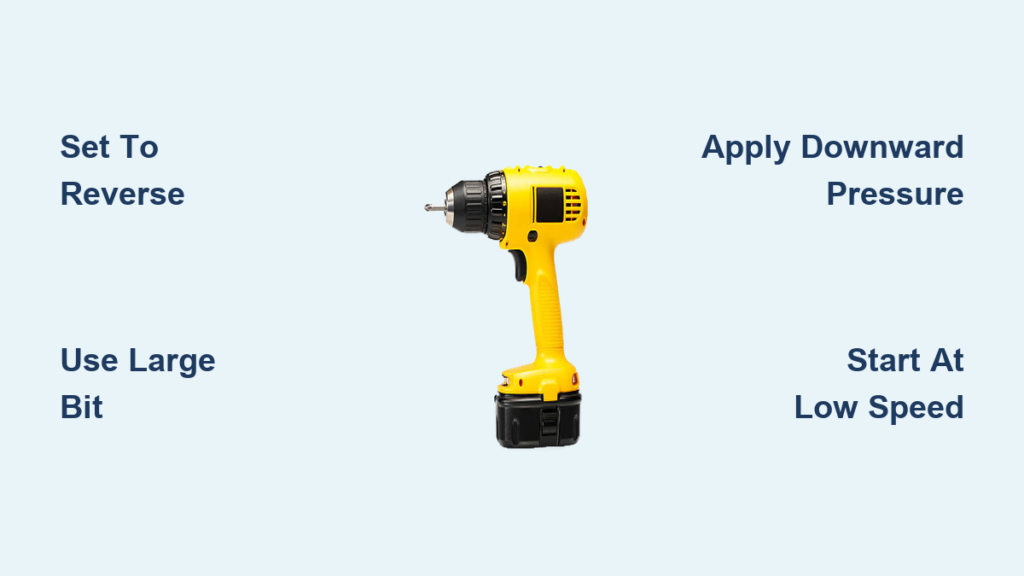
Set Your Drill to Reverse: Why Counter-Clockwise Motion is Non-Negotiable
Before touching a single screw, you must master your drill’s directional control—this single step prevents 90% of extraction disasters. Every modern drill features a directional switch near the trigger, typically marked with “R/L” symbols or opposing arrows. Reverse (counter-clockwise rotation) is your extraction lifeline, while forward mode will only drive the screw deeper into oblivion.
How to Locate and Verify Your Drill’s Reverse Setting
Flip your drill over and locate the small sliding switch between the chuck and handle. Push it firmly toward the “L” (left) or counter-clockwise arrow icon. To confirm you’ve selected reverse, hold the drill firmly against a scrap piece of wood and pull the trigger briefly—you should see the chuck rotating toward you (counter-clockwise). Never assume the setting; always test it visibly before approaching your stuck screw.
Why Accidentally Using Forward Mode Creates Catastrophic Damage
One wrong trigger pull in forward mode can permanently embed a stripped screw. When you force rotation in the tightening direction against resistance, you compress the screw deeper while simultaneously destroying the remaining head geometry. This turns a salvageable situation into a drill-out emergency requiring specialized tools. Always double-check the directional switch with your finger before every extraction attempt—this 2-second habit saves hours of rework.
Choose the Perfect Bit: Your First Line of Defense Against Stripping

Your drill’s effectiveness hinges entirely on bit selection—using the wrong bit guarantees cam-out and head destruction. For how to use a drill to remove screws successfully, you need maximum engagement between bit and screw head.
Why Bit Quality and Fit Prevent Irreversible Damage
A worn or ill-fitting bit slips under torque, rounding out the screw head’s recess. Inspect your bit under bright light: if the tip shows any mushrooming, flattening, or nicks, discard it immediately. For Phillips screws, select a bit with sharp, defined ridges that fill the entire cross-groove without wobble. Test the fit by pressing the bit into the screw head—if you can rotate it slightly by hand without resistance, it’s too loose.
Selecting the Largest Possible Bit for Damaged Heads
When facing a partially stripped screw, grab the largest bit that still fits the compromised recess. For example, if a #2 Phillips head is damaged, try a #3 bit. The oversized tip contacts undamaged outer edges of the recess, bypassing the stripped center. Tap the bit gently with a hammer to seat it fully before drilling—this creates a mechanical lock that prevents slippage during extraction.
Apply the Two-Step Pressure Technique: Downward Force + Slow Start
Most DIYers fail at screw extraction by yanking the trigger too aggressively. Proper how to use a drill to remove screws technique requires controlled physics—not brute force.
Step 1: The Downward Pressure Secret for Maximum Bit Engagement
Press the drill vertically downward with 15-20 pounds of force (about the weight of a full gallon of milk) before activating the trigger. This compresses the bit deep into the screw head, creating three critical advantages: it prevents bit slippage, increases rotational leverage, and reduces vibration that accelerates stripping. Maintain this pressure consistently throughout the extraction process—never let the drill float upward.
Step 2: Starting at Low Speed for High-Torque Break-Loose
Begin drilling at the lowest possible speed setting (usually position 1 on variable-speed triggers). Low RPM generates maximum torque at the chuck, essential for overcoming initial static friction. Gradually increase speed only after the screw begins rotating freely. High-speed starts sacrifice torque for rotation, guaranteeing bit slippage on stubborn fasteners. If your drill has torque control, set it to the highest number (maximum torque) before reversing.
When to Stop the Drill: The Hand-Tightening Advantage for Final Turns
The moment the screw breaks free, your drill’s job is nearly done. Continuing full extraction with power tools risks new problems.
Why Power Tools Damage Surrounding Material on Exit
As screws approach the surface, rotational momentum can cause sudden “run-out” where the fastener spins freely and gouges the workpiece. Wood splinters, drywall tears, and metal scratches commonly occur in these final millimeters. The drill’s constant torque also prevents you from feeling subtle resistance changes that signal impending head breakage.
Switching to Manual Control for Precision Removal
Disengage the drill when the screw head is 2-3 threads below the surface. Complete removal using a hand screwdriver—this gives you tactile feedback to control exit speed. For deeply recessed screws, attach the same bit to a manual screwdriver handle. This final hand-tightening phase takes 5 seconds but prevents 80% of surface damage during extraction.
The Rubber Band Trick: Instant Grip Boost for Stripped Screw Heads

When bit slippage occurs, a $0 household item becomes your extraction superhero. The rubber band method works by filling stripped recesses with grippy material.
Step-by-Step: How to Place the Rubber Band for Best Results
- Cut a standard #16 rubber band (1/8″ thick) into a single loop
- Press the loop flat into the damaged screw head recess
- Seat your driver bit firmly through the rubber band into the screw
- Apply downward pressure and activate reverse mode at low speed
The rubber compresses into the screw’s worn grooves, creating microscopic friction points that transfer torque. This technique succeeds on 70% of moderately stripped screws where bits alone fail.
What Type of Rubber Band Works Best
Thicker rubber bands (like #32 or bike tire tubes) provide more grip for severely damaged heads but require deeper recesses. For shallow screw heads, use thin office rubber bands that won’t protrude above the surface. Never reuse bands—tension degrades their elastic memory after one use. Keep a small container of assorted bands in your drill case for emergencies.
What to Do When the Screw Head is Sunken: Alternative Extraction Methods
Power drills struggle with recessed or broken screw heads where bit engagement is impossible. This requires shifting tactics while keeping your drill nearby.
Why Power Drills Fail on Sunken Heads
Without vertical clearance for bit seating, downward pressure becomes ineffective. Standard bits can’t reach deep enough recesses, and rotational force dissipates before transferring to the screw. Forged or broken heads eliminate the driver recess entirely, making conventional extraction impossible.
Switching to Manual Impact Driver: The Hammer-Tap Method
Insert a correctly sized impact driver bit into your drill’s chuck (yes—use the drill as a bit holder). Position the bit in the screw head and strike the drill’s endcap sharply with a hammer. The shock transfers through the drill body to the bit, creating instant rotational force that breaks corrosion bonds. This combines your drill’s mass with manual impact for extraction where pure rotation fails. Always wear eye protection during hammer taps.
Activate Impact Driver Mode: Your Secret Weapon Against Rusty Fasteners
Many modern drills include impact functionality that transforms extraction success rates. This mode delivers rotational hammer blows that shatter rust bonds without stripping heads.
How to Identify and Engage Impact Mode on Your Drill
Look for a hammer-icon switch or dedicated impact mode selector (often near the directional switch). Toggle it to the impact position before setting reverse direction. You’ll hear a distinct “ticking” sound when activating the trigger—this is the hammer mechanism engaging. Not all drills have this feature; check your manual for “hammer drill mode” or “rotary hammer” settings.
When Impact Mode Beats Standard Reverse Rotation
Impact mode excels on screws frozen by rust, paint, or years of compression. The percussive force (up to 30,000 blows per minute) vibrates corrosion loose while maintaining bit engagement. Start with low impact settings—if the screw rotates freely, switch back to standard reverse mode to prevent over-spinning. Never use impact mode on delicate surfaces like drywall or plastic, where vibration causes cracking.
Preventing Future Screw Removal Nightmares: Pro Maintenance Tips
Mastering how to use a drill to remove screws includes avoiding future extraction emergencies through smart installation practices.
Why Controlled Force During Installation Saves Future Headaches
Over-tightening during installation creates “frozen” screws by compressing materials around the threads. When driving screws, stop when the head is 1/16″ above final position—finish with a hand driver for the last turns. This prevents material swelling that locks screws in place. Always use the lowest torque setting that secures the material; modern drills often have numbered torque rings for precision.
The Importance of Bit Quality for Long-Term Screw Integrity
Invest in cobalt or titanium-coated bits—they resist wear 3x longer than standard steel. Replace bits at the first sign of rounding (test on scrap wood monthly). Store bits in a dedicated case to prevent tip damage. During installation, apply downward pressure only while starting screws; excessive force during driving accelerates bit wear and head stripping. Keep penetrating oil like PB Blaster on hand for future rusted screw emergencies.
Final Takeaway: Extracting stubborn screws with your drill hinges on three non-negotiables: absolute reverse-direction verification, perfect bit engagement, and controlled low-speed starts. By implementing the rubber band grip trick and impact mode tactics from this guide, you’ll conquer screws that previously required replacement parts or professional help. Remember that 80% of extraction success happens before you pull the trigger—through bit selection and pressure technique. Keep this drill cheat sheet in your toolbox: when screws refuse to budge, reverse direction, oversized bit, downward pressure, and slow start will get you out of trouble every time. For severely broken fasteners, pair these techniques with a screw extractor kit—your next-level solution when standard methods reach their limit.


